
Everything seems to go so slow; you can’t open most apps, and this all happens to start after a recent update to Windows 10. Many people had had much to deal with after they went through an update to Windows 10. And as it seems, an error with the Built-in Administrator account is another one of those many issues.
One would expect an update to clear most bugs, and while some had commented on how it truly did, others only had more errors to deal with. This particular error response —”Get Started Can’t Be Opened Using The Built-in Administrator Account”- often has to do with an Account error. The error largely comes from the new update, and you might not be able to access most of your apps except if the bug is fixed.
Frankly, in some cases, you won’t get to access most of your apps on the Built-in Administrator account, save you log into a new primary account, or alter some admin settings. Technically, if you use a Microsoft-made system, you could open a new Microsoft account (making sure you allow it has access to administrative privileges). And if you discover your system to be in a safe mode, you will have to revert it to the Normal mode to get the error fixed.
The most common reasons for the error often involve the Wins 10 update, an issue with the boot menu, some settings issues or maybe you have a corrupted system file. Really, the main causes aren’t anything so serious. You only need a bit of clicking around to get around your built-in admin account, which seems to cause the bulk of most issues. Still and all, this guide further discusses this and presents some quick fixes to get you going.
4 Fixes To Get Rid Of The “Get Started Can’t Be Opened Using The Built-in Administrator Account” Error
Below, we’ll look through the most basic solutions that have worked for many. Hence, do tag along and try them out until you find the very one that works for you best.
Solution #1 — Try Opening Another Primary Account
If you do not have another account opened apart from the built-in administrator account, it will help to open another account that has access to administrative privileges.
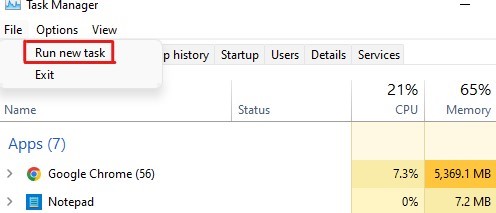
Step 1: Hold down on the Ctrl and Shift, and ESC buttons to access the Task Manager
Step 2: Select File and proceed to choose “Run New Task“
Step 3: Be certain to mark the box that allows you to create the new task with admin privileges.
Step 4: Press in cmd and click “OK.”
Step 5: Paste in the “net user test /add” command to create a new user account named “test.”
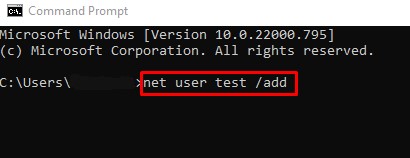
Step 6: Type in this other command, “net localgroup administrators test /add“, to make your created “test” account an admin.

You should note that “test” is the name of your new Account, and until you change it to a new name that seems more fitting, it will remain like that.
Step 7: Log Out of your former user profile now.
Step 8: Log into your new Account and try converting to a Microsoft account by following these commands.
- Click on Start
- Select Settings and scroll over to Accounts
- Select Accounts and choose Your Accounts
- Proceed to Sign in to Microsoft Account
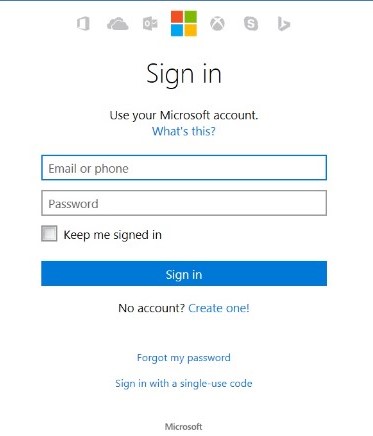
If you already have a Microsoft account, you can go ahead to enter the details of your existing one instead of creating a new Microsoft account. But if you don’t have an existing one, you should sign up for a new one and switch to it.
Solution #2— Allow The Admin Approval Mode For The Built-in Account
One thing you need to be sure of is that your computer is indeed installed to the most recent update. The issue might be due to some important pending updates, so it helps to clear this out. To get your system to the most recent update, follow these steps.
- Press down on the Start Key
- Navigate to Settings
- Scroll down and select “Update and Security“
- Choose Windows Update and see if there is any available new update. If there are any, make sure to install the updates.

However, if your PC is rightly updated and you are still finding it hard to sign in with a Microsoft account. You can follow the steps below:
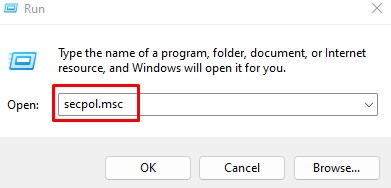
Step 1: Press down on the Windows button and the R key to open the Run command box
Step 2: Press “secpol.msc” into the bar and Press Enter
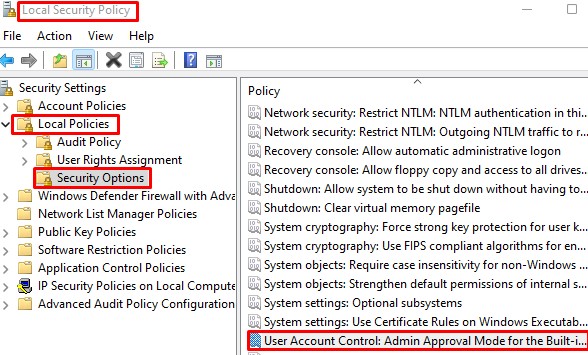
Step 3: Access The Local Security Policy
Step 4: Navigate to “Local Policies“
Step 5: Find and Select “Security Options“
Step 6: On the right side, find and choose “User Account Control: Admin Approval Mode for the Built-in Administrator account” and click on Properties.
Step 7: Tick “Enabled” on the next page that comes up, then select “OK“
Step 8: Load the Run Command Again
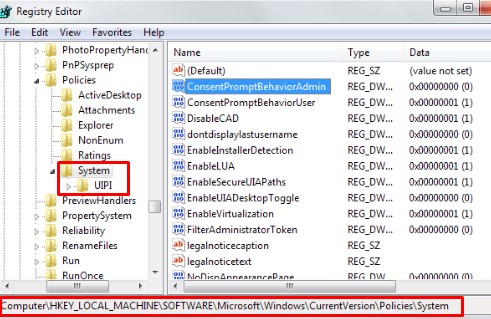
Step 9: Press “regedit” into the text bar and press down on your Enter key.
Step 10: Under the Registry Editor, find HKEY_LOCAL_MACHINE\SOFTWARE\Microsoft\Windows\CurrentVersion\Policies\System\UIPI, and navigate to your right-hand side to right-click on Default and choose the Step 5: option
Step 11: In the Edit String Context box, scroll down to “Value data” and alter the value to 0x00000001(1). Press down on “Enter” on your keyboard
Go ahead now and check if the error issue has been rectified. And if not, try out the other solution options below.
Select #3 — Try Changing Your User Account Settings
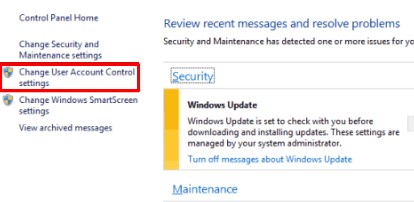
Step 1: Access the Control Panel tab
Step 2: Choose View by “Large icons” and select “User Accounts“
Step 3: Scroll under and select “Change User Account Control Settings“
Step 4: Place the Slider in the third position from below, and if it’s there already, you should leave this step.
Select “OK”
Solution #4 —Utilize The System File Checker To Manage Affected System files
You could be dealing with a situation that involves infected or faulty system files. To solve the issue in this case, you can run the system file checker to help you look for and fix infected files. Here are the steps to follow:
Step 1: To access the Run command dialog box, press down on your Windows and “R” buttons
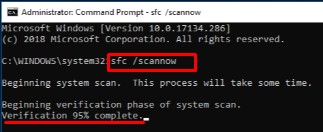
Step 2: Press “cmd” into the text bar and press “Enter” on the keyboard
Step 3: On the new black-screen page, press in sfc/scannow and click down on the Enter button.
Step 4: Allow the program to run until the operation ends.
Step 5: Make sure to go through the operation as an admin. Nonetheless, if you get a response saying, “you must be an administrator running a console session in order to use the SFC utility”, try to follow the steps below if you are using a Wins 10
- Hold down on the Windows key and the “X” button to open the “power user menu/ start menu.”
- Find and select the Command Prompt (Admin)
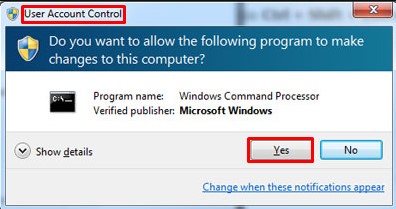
- Once the “User Account Control” page appears, scroll down and select “Yes” to run the operation.
Step 6: Now, run it again, and then go ahead to find out if the error is now fixed.
What Causes The “Get Started Can’t Be Opened Using The Built-in Administrator Account” Error?
The common causes of the error often involve the Wins 10 update, an issue with the boot menu, some settings issues or maybe you have a corrupted system file. The issue generally affects the built-in admin account; hence, you might have to open a new primary account in some situations. In other situations, though, a few changes in the settings can get you going.
Final Thoughts
This article has covered some of the most effective fixes you can try, and we do hope you take a look through them all. At least till you find the one that fixes your error response, hence, feel free to check through the step-by-step guide again in case of any doubt or issues.
Frequently Asked Questions (FAQs)
It stops most apps from functioning well and, in this case, the get started function.
You can try opening another primary account, enabling the admin approval mode for the built-in Account, using the system file checker to manage the affected system file, etc. You should note that the guide above gives more insight into this through an easy step-by-step approach.