The Windows OS occasionally fails to boot due to an issue with the master boot record. If this occurs, the boot record must be repaired to enable your computer to restart and run. This issue can impact your computer’s functionality because you will be unable to boot your system properly.
This error is usually due to a corrupt, outdated, or removed boot file. Fortunately, there are quick solutions to this issue. Continue reading to find out the causes of this error and six of the most effective solutions to this issue. Let’s begin.
Causes of the “Bootx64 EFI” Error
This error is typically referred to as a “runtime error.” The term “runtime” means that EFI errors occur when bootx64.efi is being loaded, either when your PC is starting up or while it is already running.
Runtime errors are a common type of EFI error encountered when using your PC. Most bootx64 EFI runtime errors that occur while a program is running will cause the program to terminate unexpectedly. Moreover, this error indicates that:
- The system was unable to locate the file during startup.
- The file is corrupt or outdated.
Your PC will not be able to start until these errors are resolved. Read on to learn six solutions to fix this issue.
Solution #1. Run Startup Repair
Windows Startup Repair is a tool that users can use to fix some common errors on their Windows PC. You can also use this tool to repair the Bootx64 EFI error in Windows:
Step 1: Connect your PC to the internet and insert a Windows installation disk or USB.
Step 2: Restart the computer and boot Windows from the installation disk or USB device.
Step 3: On the “Install now” screen, select “Repair your computer.”

Step 4: Then, select “Troubleshoot” from the choosing an option screen and select “Automatic repair.”
Step 5: Select an account from the list to the Automatic Repair screen. Wait a couple of minutes for the process to complete. Once the process is finished, restart your computer and check if the problem persists.
Solution #2: Manually Add Disk Driver
You may experience startup issues if you use an incompatible hard drive with unsuitable drivers. For instance, when you replace the original IDE or SATA system hard drive with a newer SSD. Input the following Windows command line to manually add the driver:
Dism /Image:X: /Add-Driver /Driver:”y:\z.inf”
Solution #3: Run Diskpart in Command Prompt
Step 1: Boot up your PC and insert the Windows install disk.
Step 2: Restart and click any key to boot from the Windows installation dis.
Step 3: Wait for the Installer to finish loading the files.
Step 4: Select “Next” and choose to repair your PC.
Step 5: Then, select Command Prompt from the Advanced menu. You should see a cmd window pop up on your screen.
Step 6: Type “diskpart” into the cmd window.
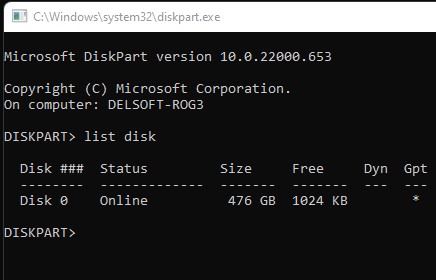
Step 7: Enter “list disk” to identify the disks installed on Windows.
Step 8: The Windows system is usually installed on “disk 0.” If not, alter this command to match your disk number.
Step 9: In the Command Prompt, input “sel disk 0.”
Step 10: After you’ve chosen your disk, input “list vol” to see all the partitions.
Step 11: Select your partition with the “sel vol 3” command. Then, assign a new letter by entering: assign letter=b. Note that you can use any letter of your choice.
Step 12: Type “exit” and then click Enter.
Step 13: To repair the boot record, input “cd /d b:EFIMicrosoftBoot,” then “bootrec /fixboot” and press Enter.
Step 14: Afterward, input “ren BCD BCD.old,” then “bcdboot c:Windows /l en-us /s b: /f ALL” to recreate the Boot Configuration Data. Once you’re done, reboot your computer to verify if you can use it properly.
Solution #4: Restore PC To The Latest Restore Point
Restoring your computer to the last restore point before the error occurred can also help fix this issue. To run a system restore:
Step 1: Launch Windows by pressing the Start button.
Step 2: When the search box appears, input “System Restore” and click “Enter.”
Step 3: Find and select “System Restore” from the search results.
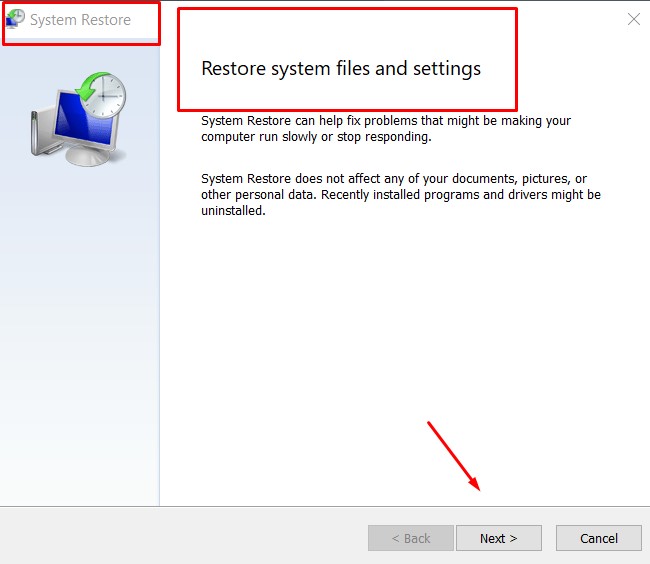
Step 4: If a prompt pops up, enter your password to grant administrative access.
Step 5: Use the System Restore Wizard to select a suitable restore point.
Solution #5: Update Windows
If the issue isn’t resolved yet, consider running a Windows Update. The bootx64.efi error can be attributed to an out-of-date Windows OS. Follow these simple steps to quickly update your Windows version.
Step 1: Click on the Windows Start button.
Step 2: Type “Update” into the search box and click “Enter.”
Step 3: Then select “Check for Updates” in the Windows Update dialog box.
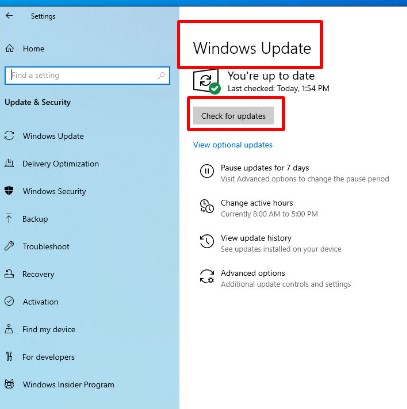
Step 4: If updates are available, select “Install Updates.”
Lastly, restart your computer once the update is complete. Once your computer comes on, check if you still notice the error.
Solution #6: Reinstall Windows
If none of the above-mentioned methods work, reinstalling Windows may be the last solution you can try. Here are the steps involved:
Step 1: Press the Windows key + I. The Settings dialog box will appear. Scroll to the bottom and look for “Update and Security.”
Step 2: Navigate to the menu and choose “Recovery.”
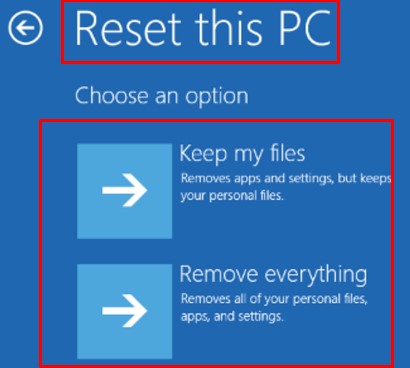
Step 3: In the “Reset This PC” section, locate and select the “Get Started” option on the right-hand side.
Step 4: After that, choose “Keep my Files” or “Remove Everything” on the next interface that appears.
Step 5: Choose a location to reinstall Windows and then click “Local Reinstall.”
Step 6: Check the “Additional Settings” box and click “Next.”
Step 7: Tap “Reset” to confirm and wait for the process to complete.
Conclusion
The bootx64 EFI error can be pretty complex. Fortunately, we’ve carefully outlined six solutions to help Windows users fix this issue. So, follow these steps and boot up your computer to resolve this issue.
Frequently Asked Questions
If your computer doesn’t boot, try starting it in Windows Safe Mode first. After that, check your battery and unplug all USB devices.
To resolve this, disconnect and reconnect your hard drive from your computer.