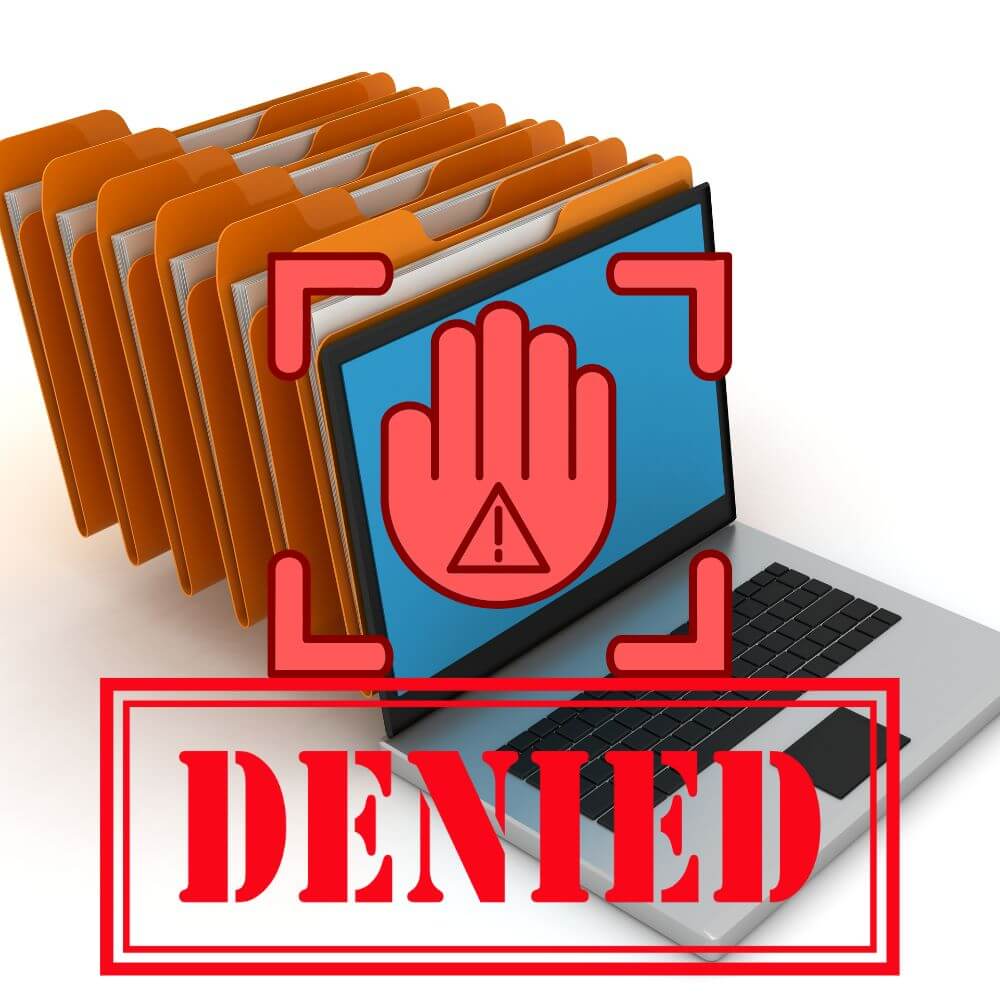
You’ve just tried opening a file in Windows to access critical information only to receive the error message “this file does not have a program associated with it.” This can be frustrating, especially if you urgently need to access information on the file.
The error also occurs when attempting to run specific applications, such as Explorer, Word, Adobe Reader, or even Excel. You can also encounter the error when launching OneDrive or opening a USB drive.
Causes of the Error “This File Does Not Have a Program Associated With it to Perform This Action.”
You’ll receive this error message when Windows can’t find a program to open your file type. Windows registry problems and an outdated operating system can also trigger this error.
Spora ransomware pushes UAC messages that request user’s permission to run files with hidden threats, resulting in the error. The messages appear genuine Microsoft processes to ensure that users trust them and grant them the requested access.
How to Fix “This File Does Not Have a Program Associated With it for Performing This Action.”
Various factors are responsible for triggering this error associated with file opening, including differing Windows configurations and the different computer types out there. Therefore, it takes various solutions to fix this error, depending on its specific root cause. Some solutions include:
1) Reset Default File Association Settings
Windows opens files using default programs, but you can change the settings to use third-party programs. Reset default file association settings as follows:
Step 1: Click on the “Search” icon in the taskbar’s bottom-left corner.
Step 2: In the text box, type “settings” and hit the “Enter” key to open the window.
Step 3: Click on “Apps” and choose “Default Apps” on the left pane of the window.
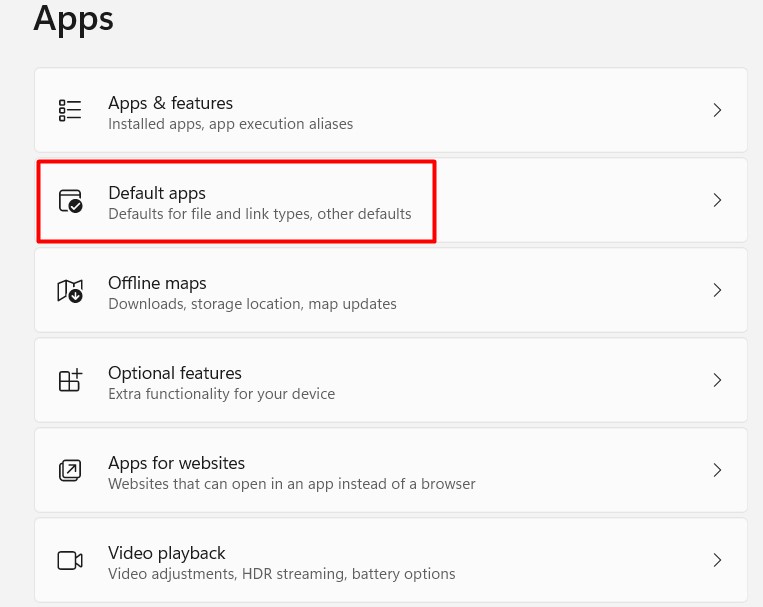
Step 4: Scroll down the right pane to display “Reset to the Microsoft recommended defaults.”

Step 5: Click on the button “Reset” and check if the problem has been solved.
2) Change Your System Registry
Create a registry backup before changing anything in the database to prevent system instability linked to even the minutest error. With the backup, you can easily roll back the changes if something goes amiss. Here’s how to edit your system registry:
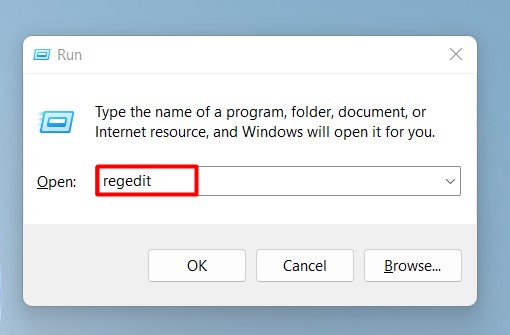
Step 1: Press the combination of Windows + R keys to launch the “Run” dialog box.
Step 2: In the text box, type “regedit” and hit the “Enter” key on your keyboard.
Step 3: Find the path:\HKEY_CLASSES_ROOT\Inkfile.
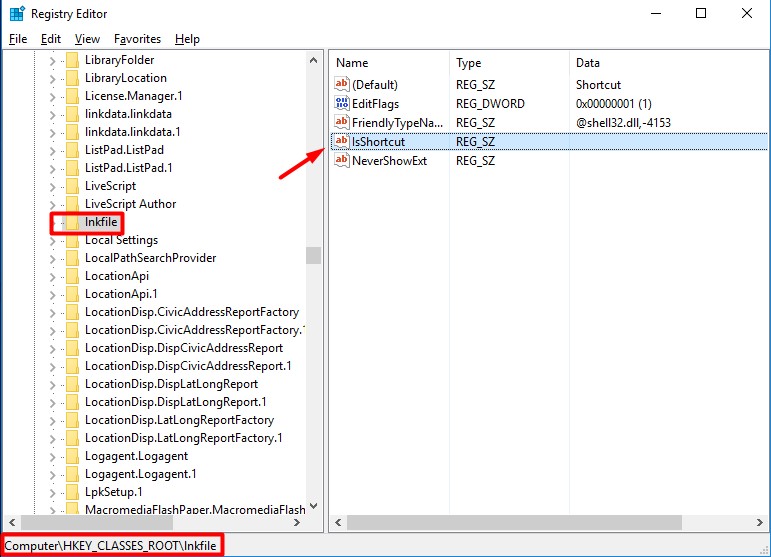
Step 4: Check the availability of the “IsShortcut” value on the right pane. Click on an empty space on the window pane to the right if the value is missing.
Step 5: Click on the “New and String Value” and rename it as “IsShortcut.”
Step 6: Close the registry editor when done.
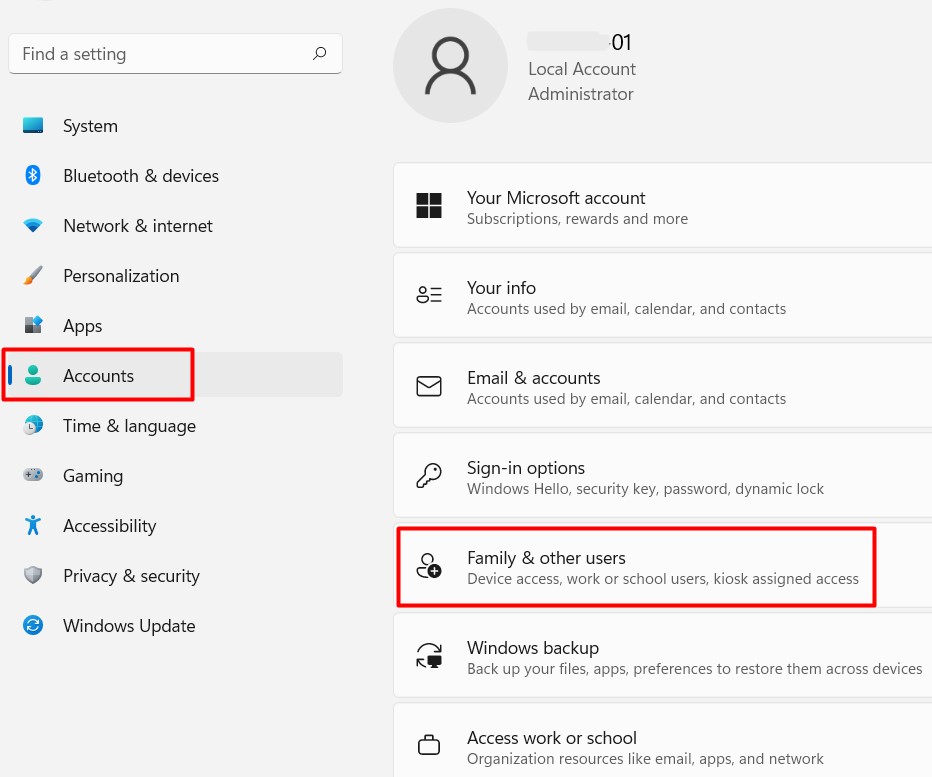
3) Creating a New User Account in Windows
Step 1: Click on the “Search” icon to the left of the taskbar and type “Settings,” then hit the “Enter” key.
Step 2: Choose “Accounts” and click on the option “Family & Other People” to the left of the window.
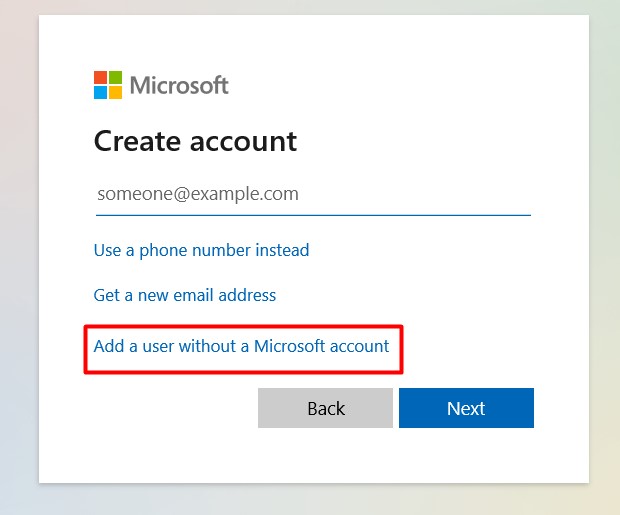
Step 3: Click on “Add Someone Else to this PC” and check off the option “I don’t have this person’s sign-in information.”
Step 4: Select the option “Add a user without a Microsoft account.”
Step 5: Click on “Submit” to create a new account, and then click on the “Next” button.
Step 6: Follow the prompts to the end and check if the error has been solved.
4) Scan DISM and SFC for Corrupted System Files
Get rid of corrupt system files causing the error as follows:
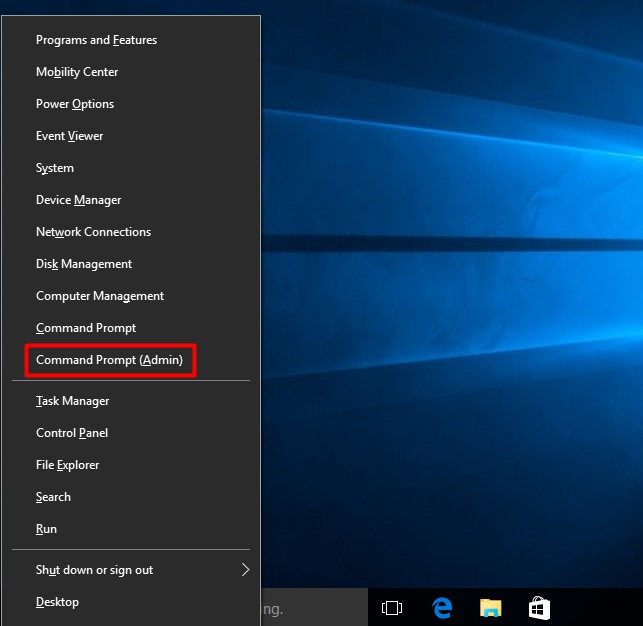
Step 1: Press the combination Windows + X keys and choose “PowerShell (Admin)” or “Command Prompt (Admin).”
Step 2: Type the command “sfc /scannow” on the command prompt and hit the “Enter” key.
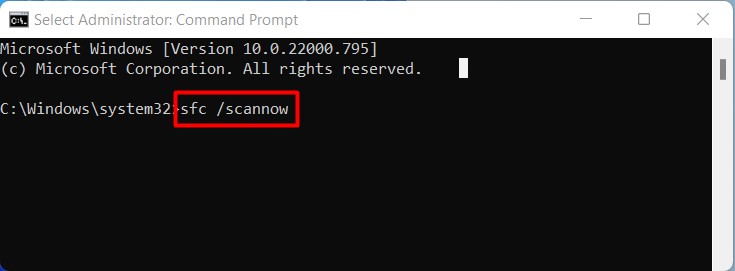
Step 3: Wait for the SFC scan to run and complete without disruption – it may take about 15 minutes.
If the error persists, do a DISM scan as follows:
Step 4: Press the Windows and R keys simultaneously to launch the “Run” dialog box.
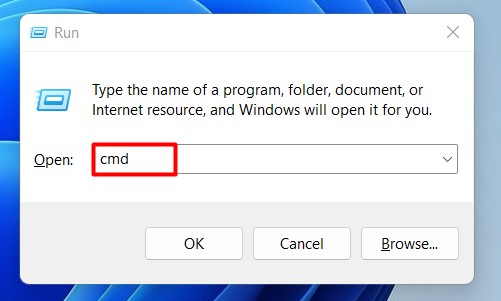
Step 5: Type “cmd” in the text box and press “Enter” to launch the command prompt.
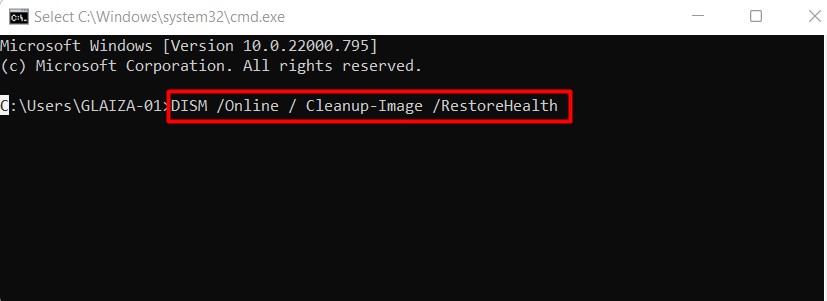
Step 6: Type the command “DISM /Online / Cleanup-Image /RestoreHealth” and press the “Enter” key to execute it.
Step 7: Let the DISM scan run to completion, then check if the error has been solved.
5) Add Your User Account to the Administrators Group
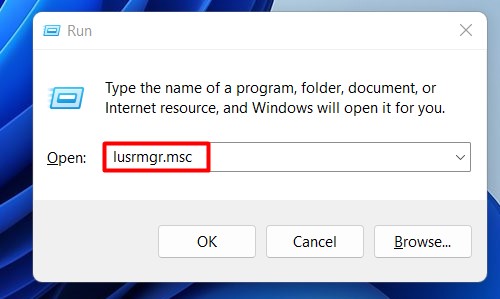
Step 1: Press the Windows key and R key simultaneously to launch the “Run” dialog box.
Step 2: Type the command lusrmgr.msc at the command line and hit the “Enter” key.
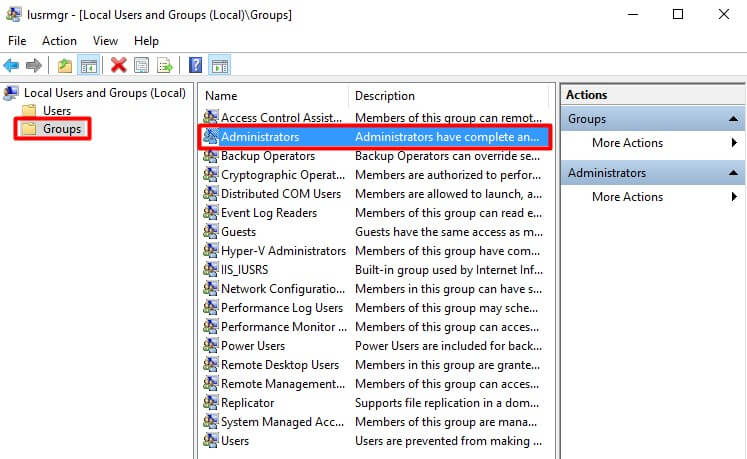
Step 3: Choose the “Groups” folder on the dialog box’s left pane.
Step 4: Click on the “Administrators Group” on the right pane twice.
Step 5: Click on the “Add” button on the open Properties window.
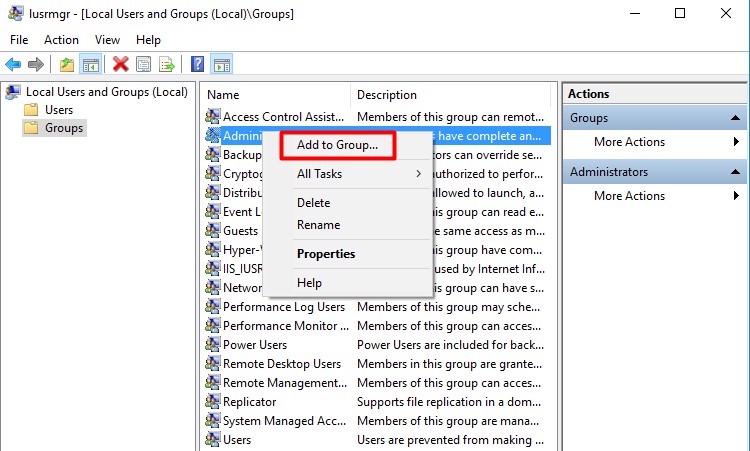
Step 6: Check off the box next to the section labeled “Enter the object names’ section.” Then, type your username and click on “Check Names.”
Step 7: When done, click on “Ok.”
Step 8: Alternatively, click on the “Advanced” button to search for your username manually, then “Find Now.” When done, your account becomes part of the Administrators group.
Step 9: Click on “Apply” then “Ok” to save the changes made.
Step 10: Restart your PC to reflect the changes in your system.
6) Remove Some Registry Keys
Delete some entries in your registry to fix the issue with opening computer files on your PC as follows:
Step 1: Press the Windows and R keys simultaneously to launch the “Run” dialog box.
Step 2: Locate the path: HKEY_CLASSES_ROOT_\Directory\Shell on the left pane.
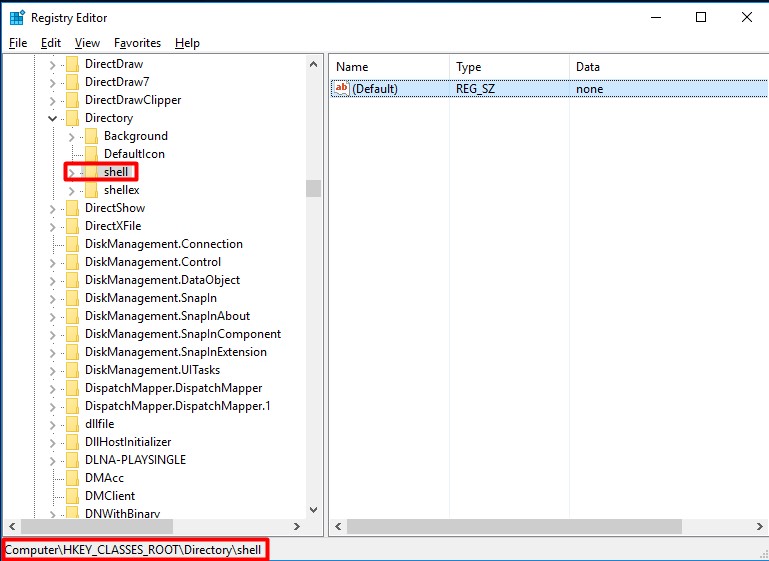
Step 3: Expand the Shell key and its contents, then remove CMD and Find keys.
Step 4: Close the registry.
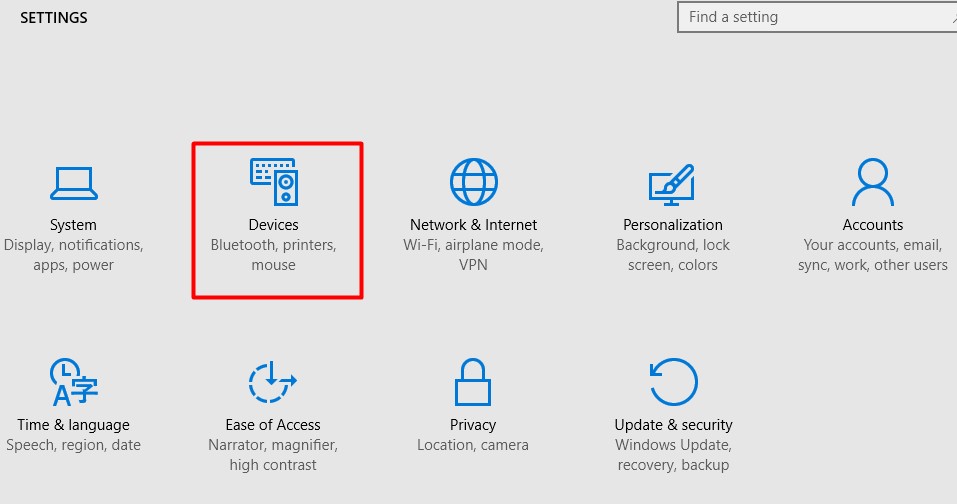
7) Disable AutoPlay
Disable the AutoPlay settings feature as follows if it’s behind the error:
Step 1: Press the shortcut keys Windows + S and type “Settings” in the text box, then press the “Enter” key.
Step 2: Click on the option “Devices.”
Step 3: Click on the “AutoPlay” button and deselect the option “Use AutoPlay for all media devices” to disable the feature.
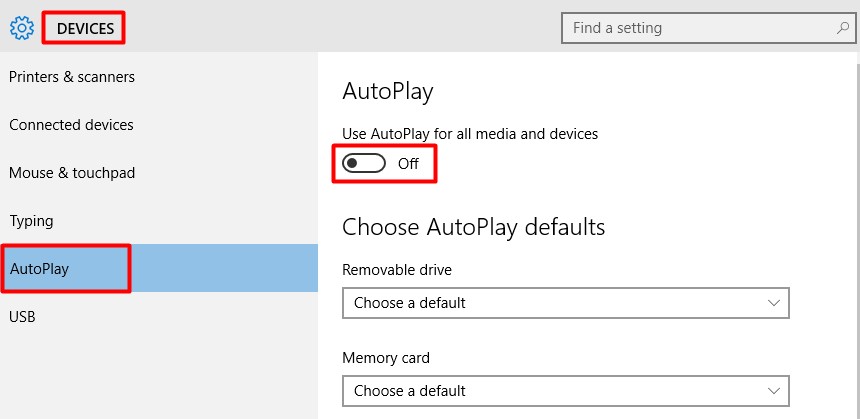
Step 4: Set “Removable Drive and Memory Card” to “Take no Action” to ensure they aren’t affected.
Conclusion
“This file does not have a program associated with it for performing this action” is a common Windows problem when attempting to open a file or folder. You can disable AutoPlay, remove certain registry keys, perform SFC and DISM scans, add your account to the Administrators group, or change the system registry to solve the issue.
Creating a new Windows user account or resetting default file associations can also resolve this error. We hope that you found this helpful article and you were able to determine the error in your system.