Security certificates are the primary way for Windows to determine if a trusted authority creates a website or software. This issue is primarily because of a lack of information, meaning Windows cannot verify the website or software’s certificates. A quick fix to this issue involves installing the necessary certificates.
However, installing the necessary certificates can be challenging if you don’t know what to do. Luckily, we’ll outline six possible solutions you can try to fix this issue. So, if you’re tired of seeing this error message, continue reading to find out the best ways to fix it.
What Causes The “Windows Does Not Have Enough Information To Verify This Certificate” Issue?
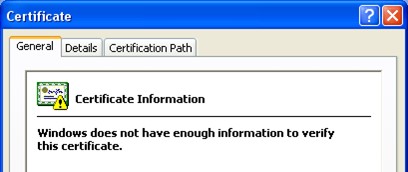
Domain certificate issues are pretty common. The most common cause of certificate verification errors in Windows is the absence of relevant certificates on your computer. This means Windows cannot verify this certificate due to a lack of information. Fortunately, this problem can be fixed by reinstalling the affected certificates. Continue reading to learn how to fix this error.
Solution #1: Enter Incognito Mode
You can also experiment with browsing in incognito mode to verify if you can access the websites. However, if you can access the sites, the problem isn’t with your certificates but most likely with the browser.
Solution #2: Clear Browser Data
Corrupted cache files can also cause this error. Try clearing them to see if the problem is resolved.
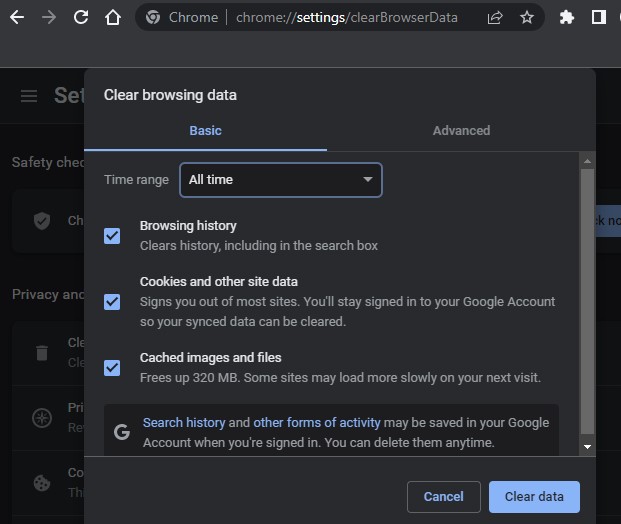
Step 1: In the browser’s address bar, type chrome://settings/clearBrowserData and press Enter.
Step 2: Check the cache and cookies boxes, and make sure the time range is set to All time. To delete all data, click the Clear now button.
Step 3: Restart your browser and try opening a website again.
Solution #3: Use another DNS
You can resolve this issue by using one of several free DNS providers.
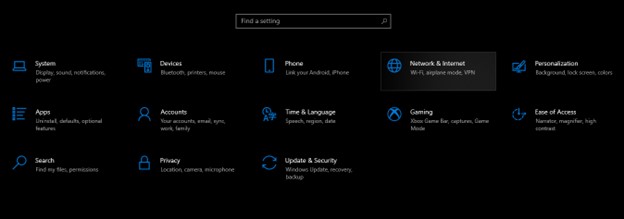
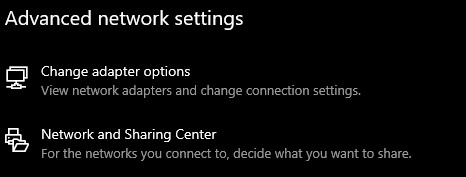
Step 1: Open the settings window by pressing the Windows key + I and then select Network & Internet.
Step 2: Select Change adaptor options.
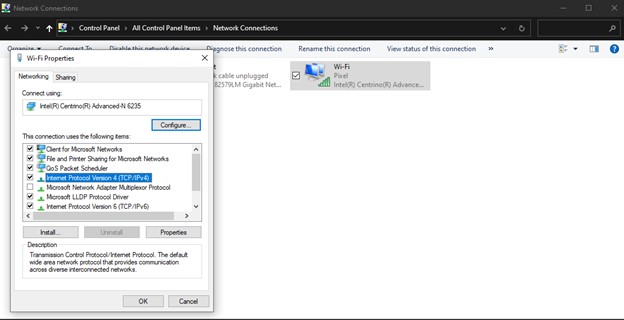
Step 3: Select Properties from the context menu of your current network (LAN or Wi-Fi).
Step 4: Locate Internet Protocol Version 4 on the list, right-click it, and select Properties.
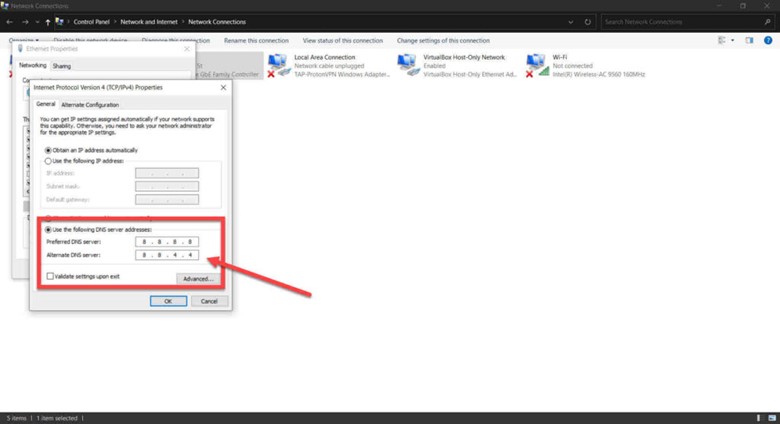
Step 5: Examine the Use the radio button for the following DNS server addresses and enter 8.8.4.4 and 8.8.8.8 in alternative and preferred DNS addresses.
Solution #4: Use CMD to flush DNS
Misconfigured DNS settings can be inconvenient. Here are the steps to reset these settings.
Step 1: Tap the Windows key + R, type cmd, and press Enter.
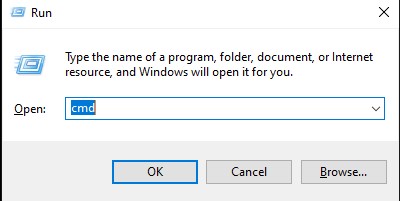
Step 2: Enter ipconfig /flushdns to restore default DNS settings.
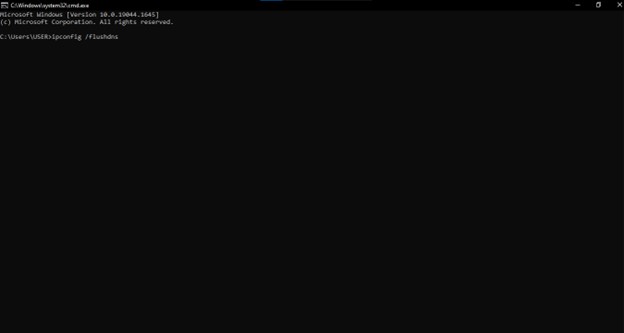
If this command does not work, input these commands into the Command Prompt.
- netsh int ip reset
- netsh winsock reset
If you think the problem is with your router’s DHCP configuration, enter the following commands to release the old IP address and request a new IP.
- ipconfig /release
- ipconfig /renew
Solution #5: Reset Chrome Browser
If none of those solutions mentioned above methods doesn’t work, try resetting Chrome to refresh the browser’s settings.
Step 1: First, navigate to chrome://settings/reset. Then, select Restore Settings.
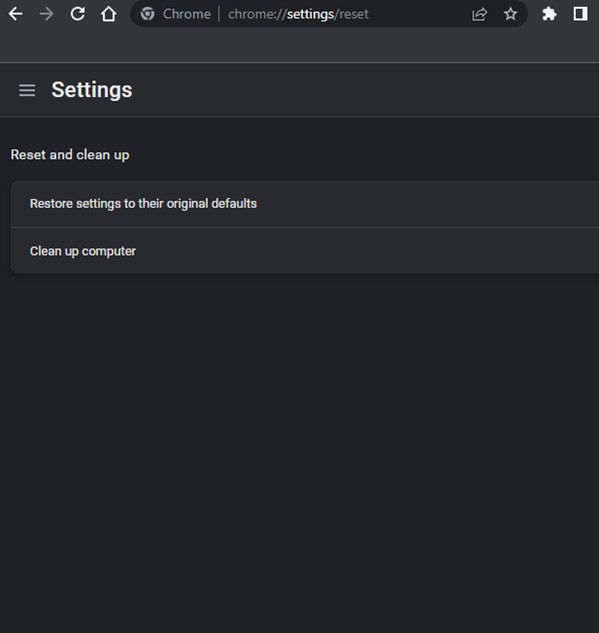
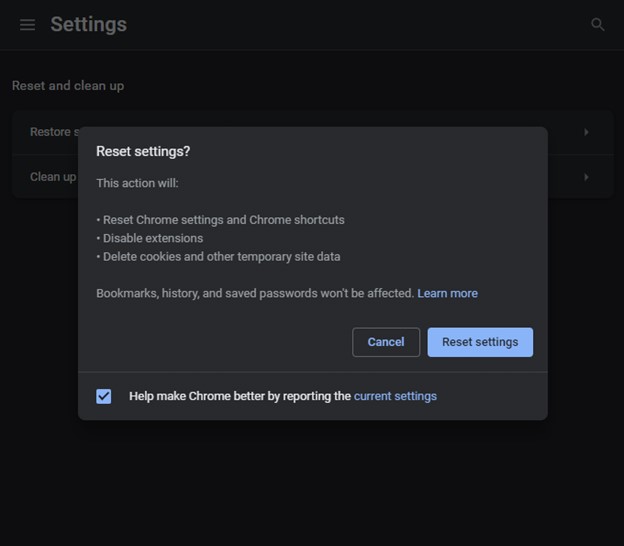
Step 2: The browser will display a warning message. When you select Reset Settings, the browser will instantly be reset to its default settings.
Solution #6: Reinstall Certificates
As previously stated, this issue occurs when root certificates are not installed correctly. Reinstalling the certificates is an effective solution. Here’s how to install all of the required certificates:
Step 1: Click on the following two links to download the required certificates:
- Symantec Class 1 Individual Subscriber CA – G4.cer
- VeriSign_Class_1_Public_Primary_Certification_Authority _G3.cer
Step 2: Save the downloaded certificates to your computer.
Step 3: Run each of the certificate files by double-clicking on them.
Step 4: Select Certificate Installation.
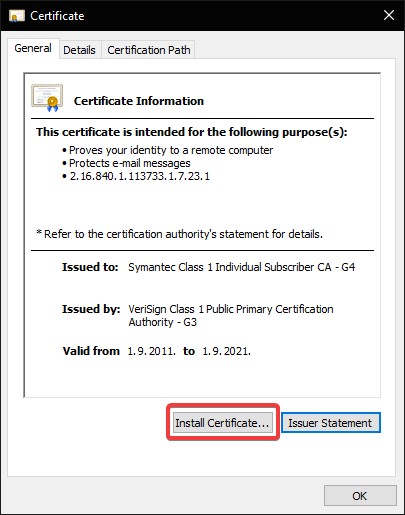
Step 5: Click on Next on the Certificate Import Wizard, and click Place all certificates in the following store.
Step 6: Select Browse.
Step 7: Afterward, select Intermediate Certification Authorities for Symantec Class 1 Individual Subscriber CA – G4.cer.
Step 8: Select Symantec Class 1 Public Primary Certification Authority _G3.cer as a Trusted Root Certification Authority.
Step 9: Confirm your selection by clicking Next.
Step 10: When the process is complete, click Finish.
Follow these steps to ensure the certificates were installed correctly:
Step 1: Launch Internet Explorer.
Step 2: Click the Gear icon in the upper right corner to open the Internet Options.
Step 3: Go to “Content“.
Step 4: Select “Certificates.”
Step 5: Select “Personal.”
Step 6: All certificates should show: This digital signature is OK.
Conclusion
Hopefully, these solutions will assist you in resolving the “Windows does not have enough information to verify this certificate.” Experiment with these six solutions and continue to enjoy assessing the internet.
Frequently Asked Questions
A quick way to guarantee a correct SSL certificate installation is to use the free “SSL Checker” tool to check SSL certificate installation. Examine the certificate to determine whether you want to trust the certifying authority.”
If you see this warning, it simply means that Google Chrome is blocking access to an unsafe website. The message “Your connection is not private” appears when Chrome cannot verify the SSL certificate or detects an error while initiating an SSL connection.
The most common reason for a “certificate not trusted” error is that the certificate installed on the website server was not correctly completed. Use the SSL Certificate tester to check for this issue.
In Google Chrome, check the SSL certificate’s expiration date.
Click the website’s address bar and select the padlock icon.
Choose “Valid”. In the pop-up box, click “Valid” next to the “Certificate” question.
Then, check the Expiration Date.

