Permissions can be all you need to keep people from poking their nose into your files and folders. Especially when you share it among other local users, and you don’t want them editing your files or when your files get transferred to other systems. However, if the situation turns around and you are the one at the receiving end, you might not find it way too fun.
The “Access Is denied” error is typical with files or folders that are already secured. Technically, you can’t change the content of the folders or tweak anything. In most cases, you are only allowed to view it. And to solve this kind of issue, it is generally important to fix it from an administrative account.
This guide will run you through some of the most efficient fixes to try out, and we hope you follow it closely. Be assured that a permission-encrypted folder isn’t the beginning of the apocalypse. Hence, you should know that with the right tips, you can get the party started again in no time.
The Best Fixes For The “Failed To Enumerate Objects In The Container; Access Is Denied” Issue
The error could have come up when you attempted to alter the permission of a file or folder. Or maybe, you shared a folder with some people, and it returned to you with permission-encrypted access. And now, for you to access the information contained in the folder, you will need the permission of the person who secured it.
It is fixable, of course. But we’ll advise that you use an admin account for the fix, and if you aren’t already using one, try to log into it. Another thing you should do before starting up these solutions is to run your system through safe mode.
Solution #1 — Performing An Ownership Change On The Troublesome Document
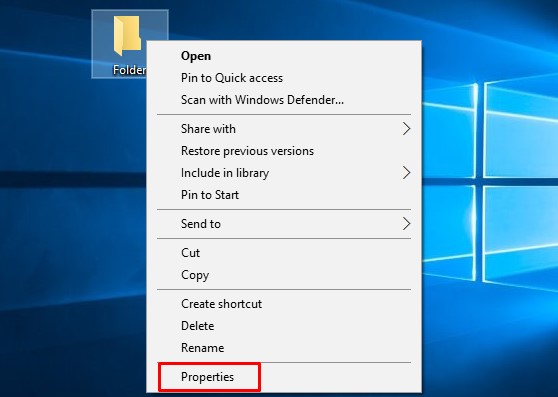
Step 1: Scroll over to the file you are having an issue with, and press down the right side of your mouse on it. Now, move your cursor down on the context page that pops out and then press down on the “Properties” option.
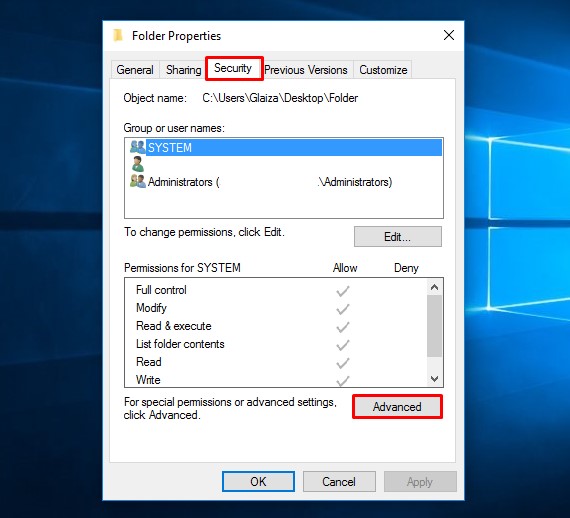
Step 2: Under the Properties page, you’ll find five tabs. You should press down the one labeled “Security.”
Step 3: Under it, find your way to Advanced. Choose it and in front of the owner option, place your cursor on Chance and click it.
Step 4: On the page that comes up, scroll down to the last box and press your username into the box. Once done, run the Check Names option. You will notice that the name gets lined underneath. If this is so, go ahead and choose “OK.”
Step 5: Close the page. And you should be able to easily set permissions for the folder or file now.
However, if the account name you pressed in doesn’t get lined underneath, you should move to the Advanced option.
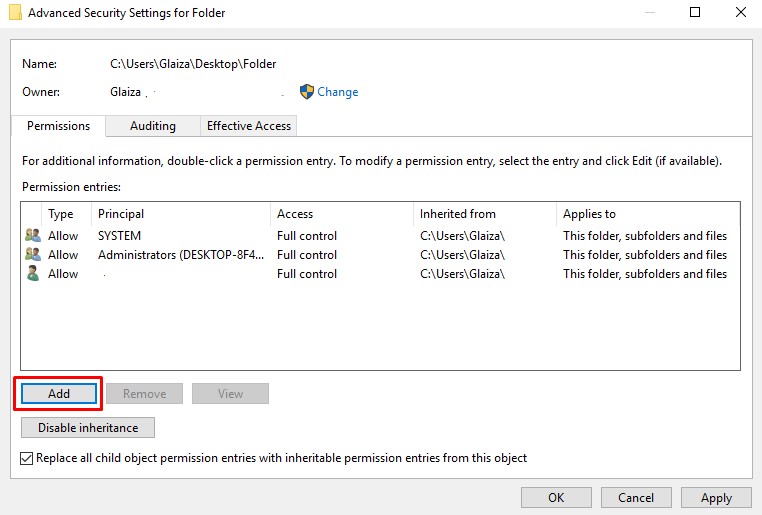
Step 1: Under the Advanced security settings page, tick the box that allows you to replace the owner objects and sub-containers. And then move your cursor down to tick the box that will enable you to replace every child object permission entry.
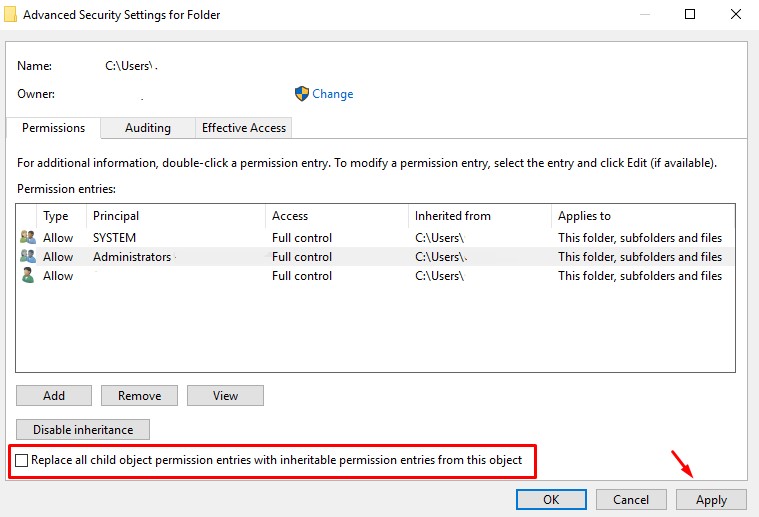
Step 2: Press down on Apply
Step 3: Now, choose the Advanced option again.
Step 4: Move your cursor down and this time, click on the Add option, which you will find before the disable inheritance button.
Step 5: On the page that comes up, move your cursor to “Select a Principal” and choose it.
Step 6: Once more, you will be directed to the Select User or Group page. Now, move to the last box again and type in “Everyone” this time.
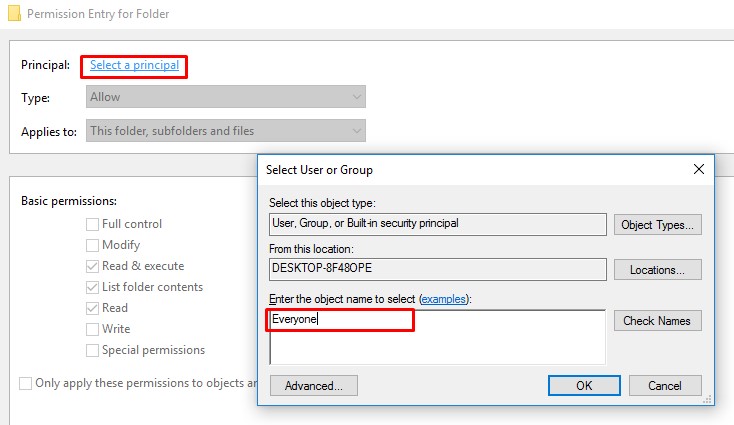
Step 7: Run the “Check Names” option.
Step 8: Go ahead and select OK.
Once done, you can reset the permissions to fit your taste now.
Solution #2 — You Can Run Some Commands
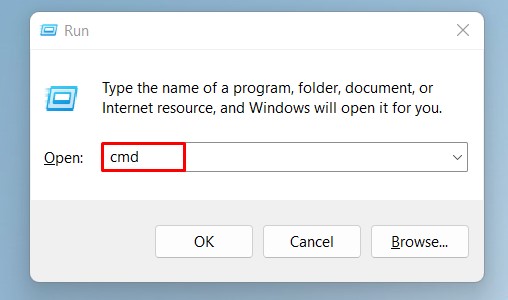
Step 1: Find your way to the windows key and the “R” button on your keypad and press them down together. Doing this will help you open the Run dialogue box page.
Step 2: Next, press cmd into the box and hold down on the shift, enter, and ctrl buttons. You will be directed to a command prompt that bow has admin authorizations.
Step 3: Now, if you are prompted to allow or disallow the command prompt to permit alterations, do allow it. You might require an admin account for this, though.
Step 4: Finally, press the commands below. And make sure you click on the Enter button after each command. Here are the commands:
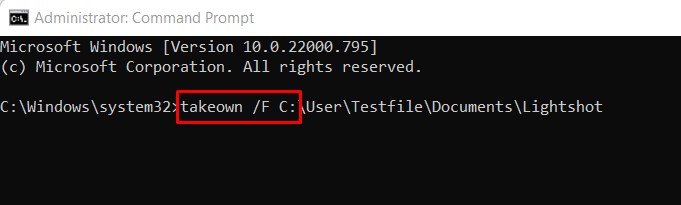
Step 5: takeown /F X:\ PUT IN The LOCATION OF YOUR AFFECTED FILE HERE
Step 6: takeown /F X:\ PUT IN The LOCATION OF YOUR AFFECTED FILE HERE /r /d y
Step 7: icacls X:\ PUT IN The LOCATION OF YOUR AFFECTED FILE HERE / grant Adminstrators:F
Step 8: icacls X:\ PUT IN The LOCATION OF YOUR AFFECTED FILE HERE / grant Administrations: F /t
You can now close the page and go ahead to change the permissions access of the folder or file.
Do Note: You should know that you are to change the “PUT IN The LOCATION OF YOUR AFFECTED FILE HERE” written in the command to the path name of the affected folder or file.
Solution #3 — Removing The Control Of The User Account Also Helps
Ideally, the two methods above should help fix the “Access is denied” error. However, if the issue still fails to leave, this is another method to try out.
Step 1: Together press down on the Windows icon and the letter “S” on your keypad to bring up the Search bar context page
Step 2: Next, you should press Change User Account Control Settings into the bar and then select it on the page it brings up.
Step 3: The following page should have a slider. Here, press and drag the slider down to the “Never notify” option.
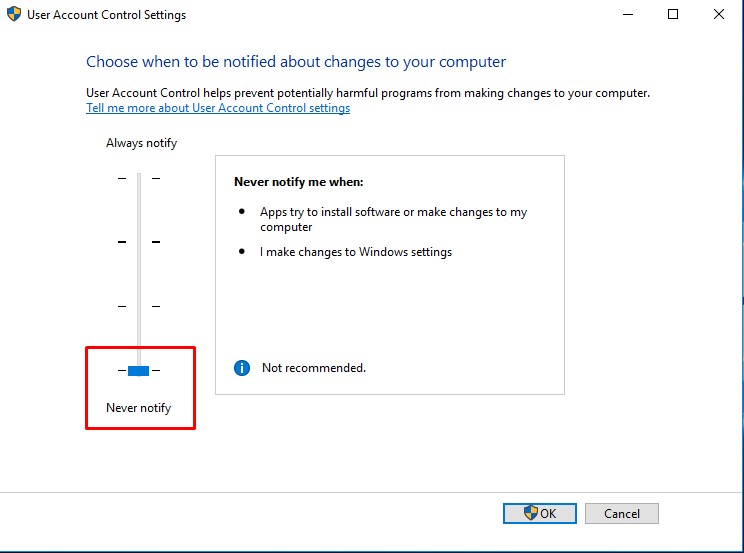
Step 4: Move your cursor down now and select Ok.
Step 5: Reboot your system
You can now go ahead and change the folder or file’s permission option. Now, if you are still stuck, try to create a new folder and re-add the needed files.
Causes Of The “Failed To Enumerate Objects In The Container Access Is Denied” Error
There aren’t many causes of this error. Generally, it has to do with how the permissions of a file or folder are set. The issue is common in files that are gotten externally or shared between many local users. So, if any of the users have the shared document secured, it might be hard for others to access it.
Nonetheless, securing your files in this manner can be a good thing if you want to prevent people from going through your folders, especially if it’s a work computer or a shared system.
Conclusion
We’ve come quite a long way. This guide has covered some of the solutions you can try out when faced with the “Access is denied” issue, and we do hope they work for you. You can be assured that they are nothing so complex, as we’ve made the solutions fairly easy to get.
Frequently Asked Questions (FAQs)
It makes it difficult for you to access the affected folder or file.
Performing an ownership change on the affected document, removing the control of the user account and so on. To further grasp this, you will find easy-to-understand explanations of these fixes in the guide above.