Verification codes are essential, especially for maintaining the security of your online accounts. Without verification codes, anyone can crack your password and gain access to your social media and online banking accounts. With that said, it can be such a frustrating experience waiting for a verification code that never arrives.
This post will provide a detailed breakdown of why you’re not receiving verification codes on your iPhone and how to fix this problem.
Why Can’t I Receive Verification Codes on My iPhone?
Before trying to fix this problem, you need to know why it’s happening in the first place. Here are the reasons why you may not be receiving verification codes on your iPhone:
- Your phone is on “Do Not Disturb”
- The phone number or email you provided is inaccurate
- Your phone has blocked messages from unknown senders
- Airplane mode is enabled
- Your SMS mailbox is full
- SMS messaging has been disabled on your phone
- Your phone has a weak signal
- Your mobile carrier is flagging or filtering the messages
How to Ensure You Receive Verification Codes on Your iPhone [8 Solutions]
If your iPhone is not receiving verification codes, here are various ways you can fix the problem and restore normalcy:
1) Ensure “Do Not Disturb” Is Off
This feature on your iPhone stops all incoming notifications, text messages, calls, and even alerts from making noise or activating your display.
If you were playing a video game, follow these steps to turn off “Do Not Disturb” automatically after exiting the game:
- Open “Shortcuts,” tap on the “Automation” tab, and click “Create Personal Automation”
- Scroll down to the bottom, tap “Open App,” choose the gaming app of your choice, and then click “Next” in the top-right corner
- Tap on the “+” button, type “Do Not Disturb,” and then select the “Set Do Not Disturb” option
- Toggle it to “On” and click “Next” in the top-right corner
- Set “Ask Before Running” to “Off” and confirm the change (this way, you won’t be asked to run the automation every time you open the gaming app)
- Click “Done” in the top-right corner
Here’s how to turn off this feature in iOS without using Siri:
- Go to the top of your screen and swipe down
- Access the “Control Center”
- Tap the “moon” next to the word Focus
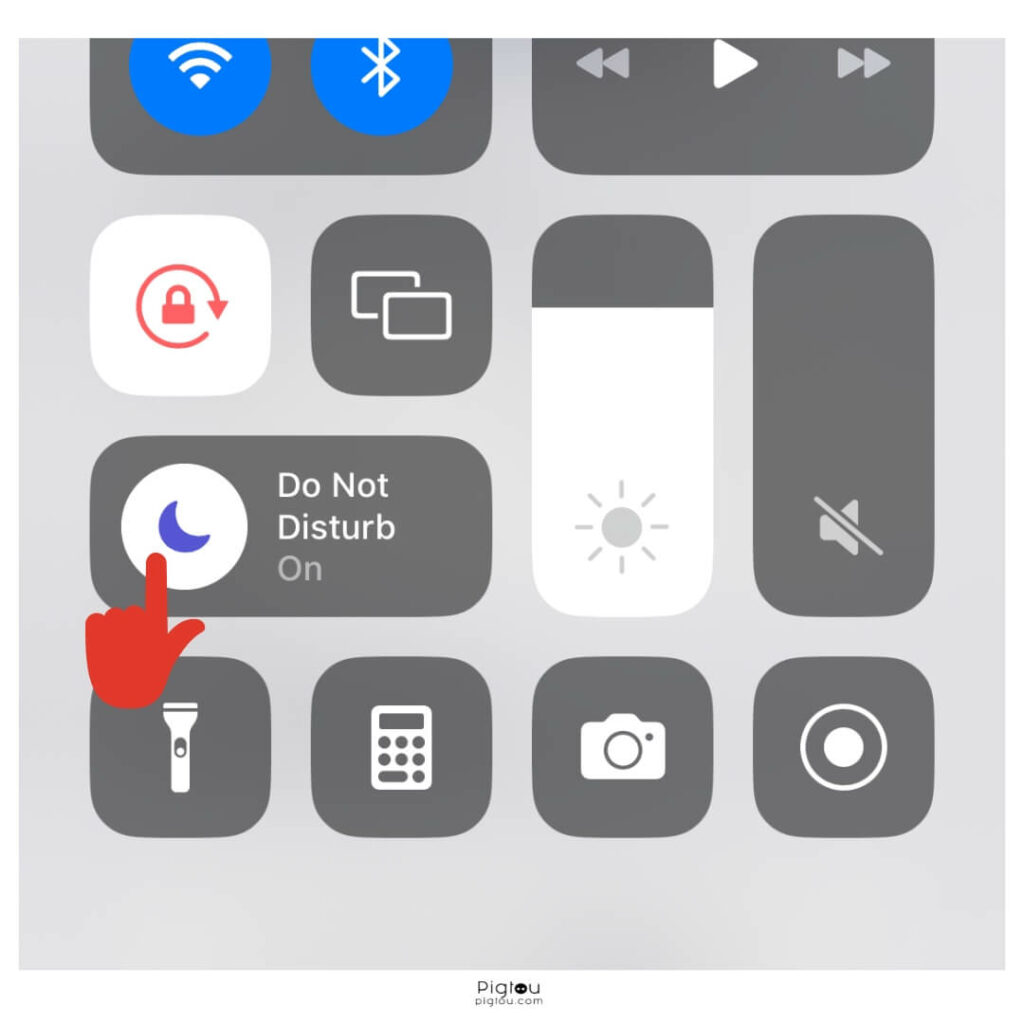
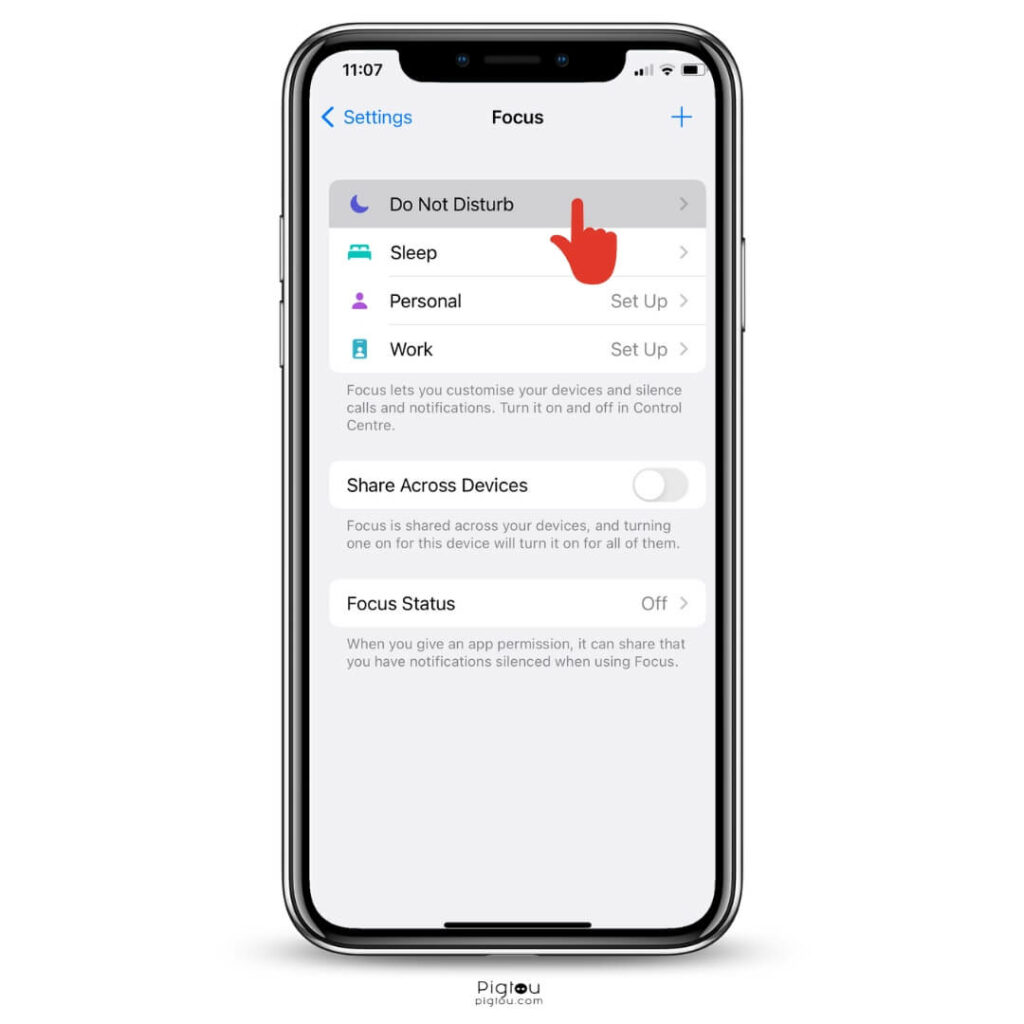
To turn off ‘Do Not Disturb’ from the settings:
- Go to “Settings”
- Tap the “Focus” option
- Tap “Do Not Disturb”
- Click on the three dots to set “Do Not Disturb” to turn on automatically while using a certain app or at a specific time
2) Turn on ‘Send SMS’
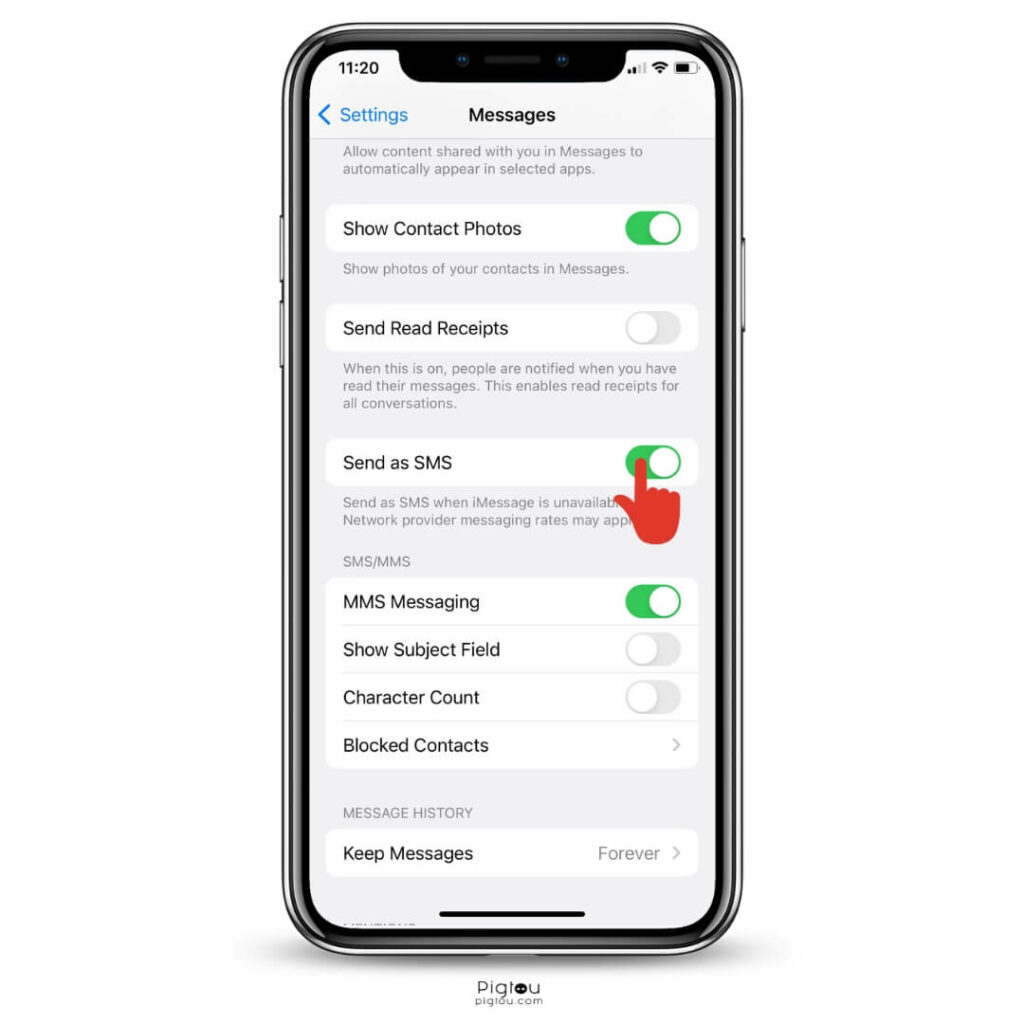
Here is how to enable ‘Send as SMS’ on your iPhone when iMessage is unavailable:
- Go to “Settings”
- Click “Messages”
- Scroll down and toggle the “Send as SMS” option to on
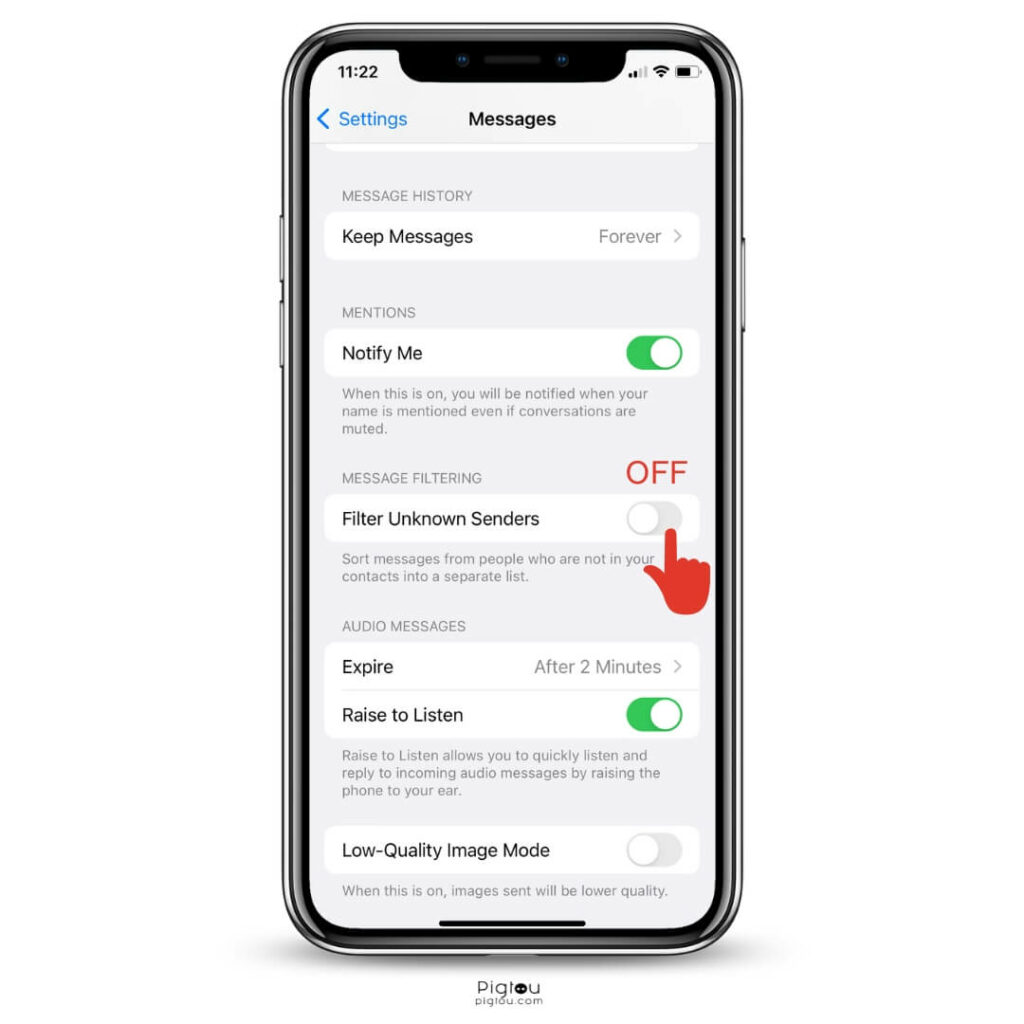
3) Turn Off ‘Filter Unknown Senders’
It’s implausible the phone numbers that might send you verification codes are among your contacts. Therefore, you won’t receive verification codes if the setting is on.
- Open “Settings”
- Go to “Messages”
- Scroll down to “Filter Unknown Senders”
- Toggle it “Off” if it’s on
4) Check ‘Blocked Contacts’
One of the main reasons you’re not receiving verification codes on your iPhone is that you may be actively blocking them. Whether you did it intentionally or not, adjusting the blocking option can fix the problem instantly.
- Go to “Settings”
- Tap on “Messages”
- Scroll down and select “Blocked Contacts”
- Unblock the numbers that might be trying to send these verification codes by swiping left
- Click “Done”
5) Ensure You’re Using the Correct Email Address to Receive Messages
Although this isn’t common, you may not receive verification codes on your iPhone because you’ve added the wrong email address and phone number to receive messages.
Follow these steps to fix the problem:
- Go to “Settings”
- Click “Messages”
- Toggle “iMessage” to “On”
- Click the “Send and Receive” option below iMessage to ensure you’re using the correct email address and phone number
5.1) Change Your Email Address
If you’d like to change the email address you’re using for iMessage, here’s how to do it:
- Tap on the email address at the bottom of the “Send and Receive” section
- Select “Sign Out”
- Proceed to add the email address you want to use for your iMessages (you can use your Apple ID or any other email address of your choice)
6) Reset Your Network Settings
This will erase all the cellular settings, Wi-Fi names and passwords, VPN & APN settings, and paired hardware data. As a result, your network settings will be restored to their original state.
Follow these steps to reset your iPhone’s network settings:
- Go to “Settings”
- Tap “General”
- Scroll down and click “Reset”
- Select “Reset Network Settings”
- Wait for your phone to restart
7) Reset Your iPhone to Factory Settings
Factory resetting should be the last resort for fixing any software problems your phone is experiencing.
- Go to “Settings”
- Tap on “General”
- Select “Transfer” or “Reset”
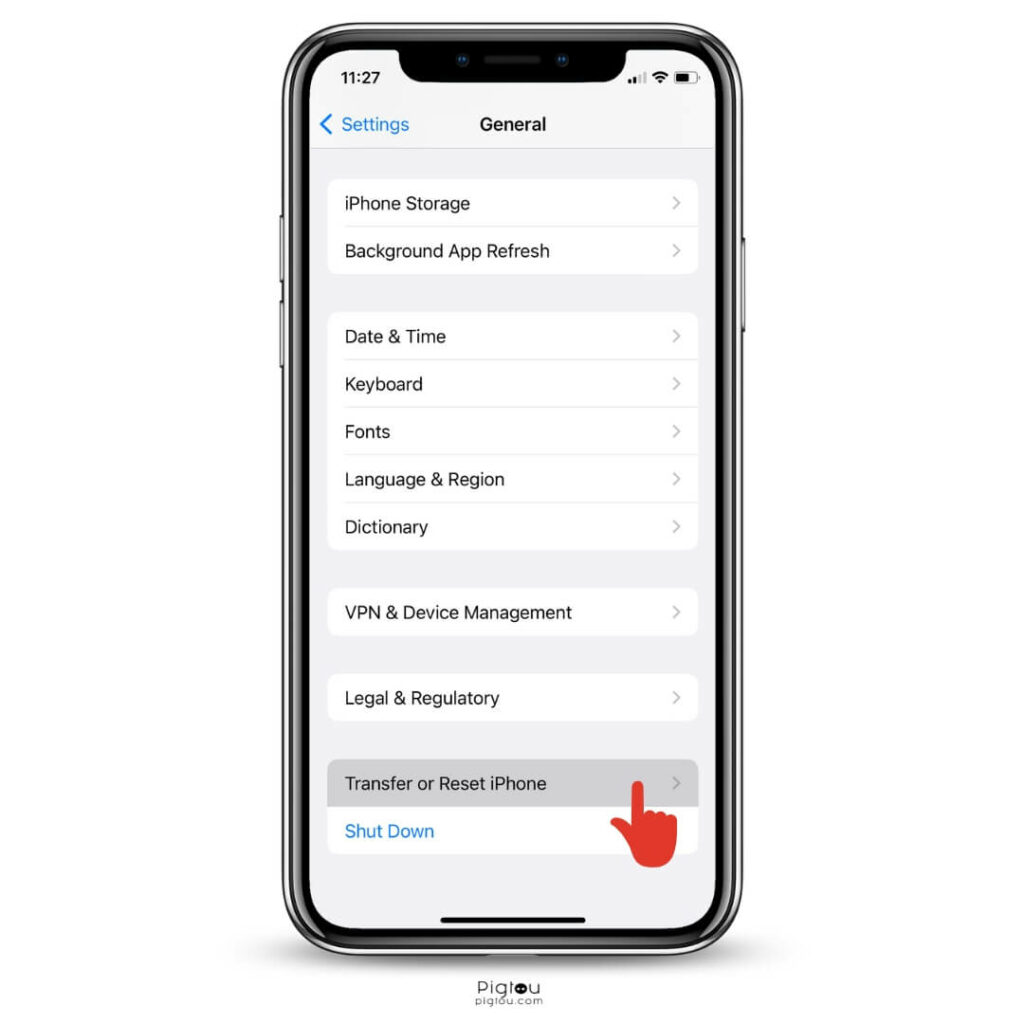
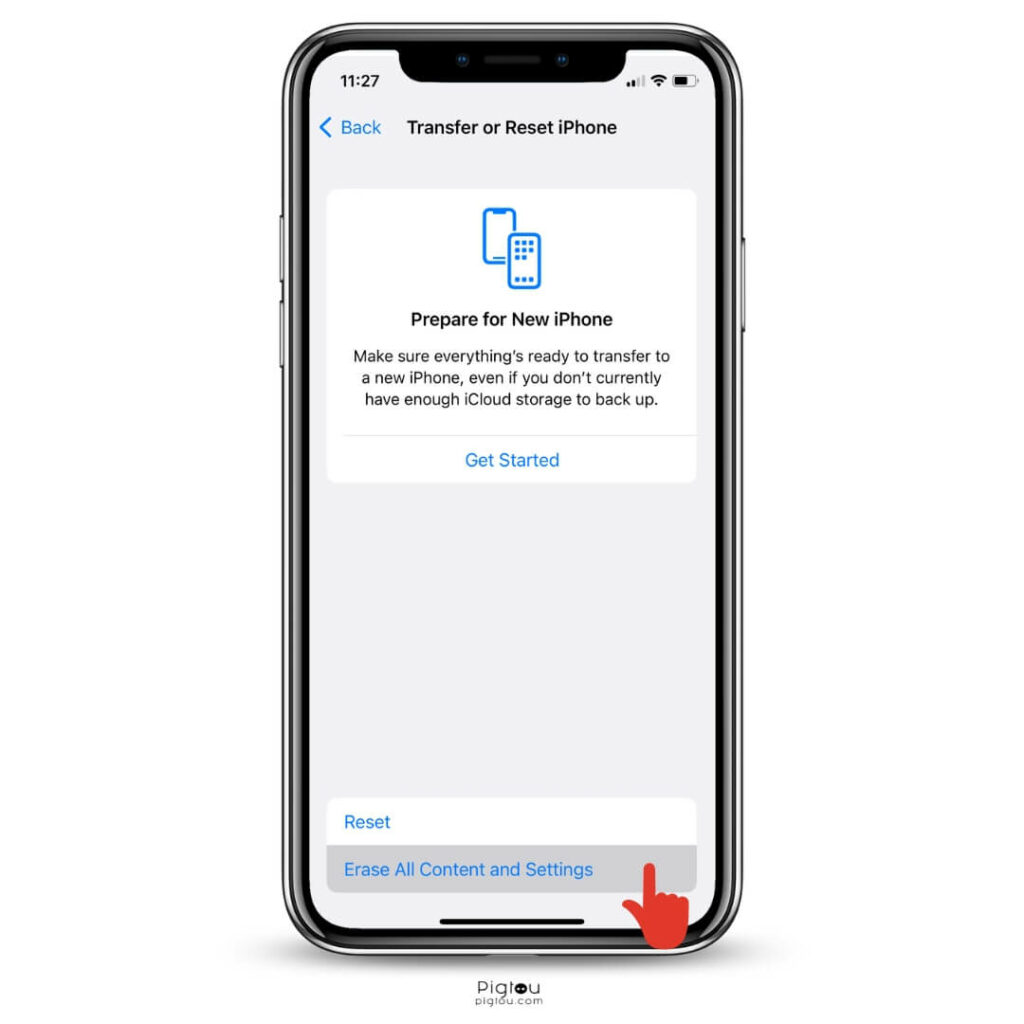
- Tap on “Erase All Content and Settings”
- Enter your passcode or Apple ID password
- Confirm you want to factory reset your iPhone
- Wait for your iPhone to erase all data and restart
8) Reprovision Your Line
Reprovisioning your SIM card entails erasing all the initial settings that may have been causing issues with your line. This can help improve your cellular network speed and ensure you receive verification codes almost instantly. You can reprovision your SIM card by visiting one of your mobile carrier’s official stores to replace your line.

