Microsoft Teams has become an indispensable tool for many businesses and individuals. However, like any software, it can sometimes exhibit quirks that can be frustrating. One of the most common issues is when the camera doesn’t work in Microsoft Teams even though it functions perfectly in other applications. Below are some troubleshooting steps and potential solutions.
Understanding the Problem You’re Dealing With
Before diving into solutions, it’s vital to understand the root causes of the problem:
- Camera selection: Microsoft Teams might be set to a different camera or no camera
- Privacy settings: The app might not have the required permissions to access the camera
- Driver issues: Outdated or incompatible camera drivers can cause problems
- Interference: Other applications might be accessing the camera simultaneously
Best Solutions to Troubleshoot and Resolve the Issue
1. Check Camera Settings in Teams:
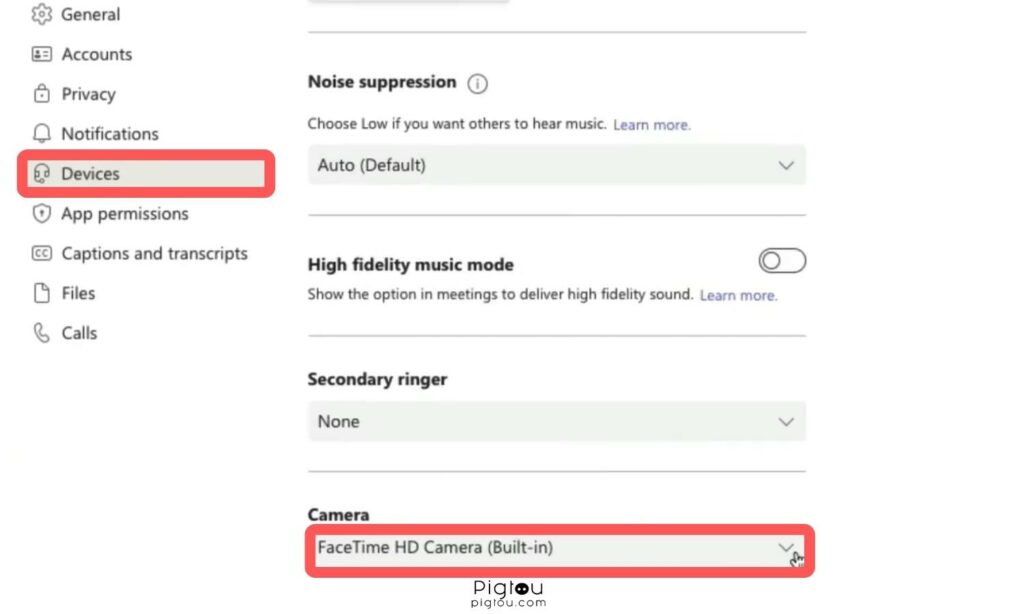
For users who notice their camera not working within Microsoft Teams, it’s essential to first verify the in-app camera settings. This ensures that Teams is configured to access and use the correct camera device.
- Open Microsoft Teams.
- Click on your profile picture at the top right.
- Select Settings.
- Navigate to Devices.
- Under the Camera dropdown, ensure the correct camera is selected.

2. Adjust Privacy Settings (For Windows 10 Users):
Windows 10 offers specific privacy controls that govern app access to device components like cameras. Ensuring that Microsoft Teams has the necessary permissions will likely resolve the camera not working issue.
- Go to Settings.
- Click on Privacy.
- Choose Camera from the left sidebar.
- Ensure “Allow apps to access your camera” is toggled On.
- Scroll down and verify that Microsoft Teams is allowed to access the camera.
3. Update Camera Drivers (For Windows Devices):
Outdated or corrupted camera drivers can cause visual issues in applications like Teams. Ensuring that the camera drivers are updated can help restore functionality.
- Right-click on the Start button and select Device Manager.
- Expand Cameras or Imaging devices.
- Right-click on your camera’s name.
- Select Update driver and follow the prompts.
Note: Remember to have admin rights when updating drivers or altering settings.
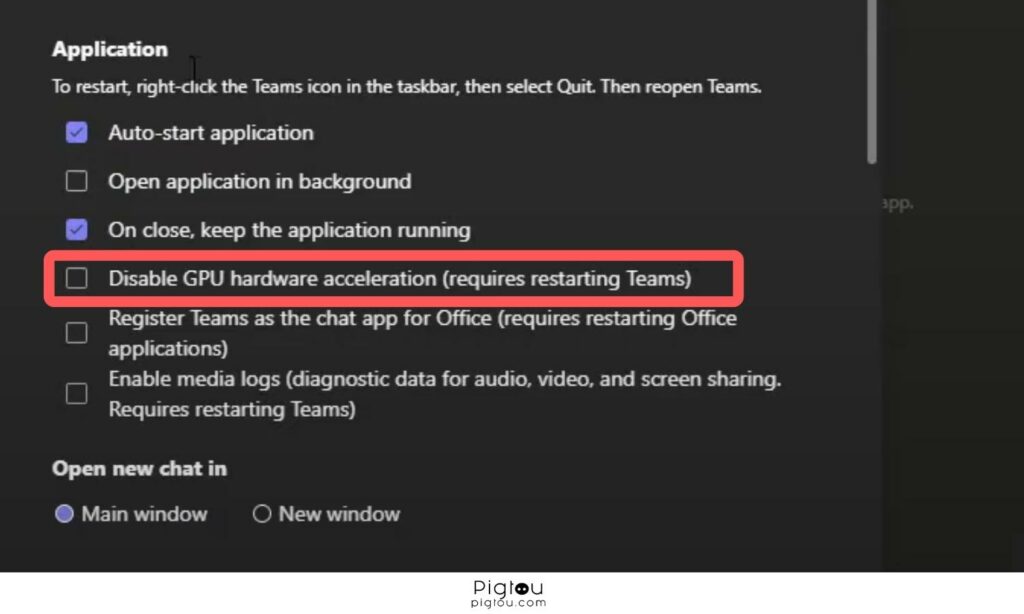
4. Disabling GPU Acceleration in Teams (Web Version):
For users accessing Teams via a web browser, GPU acceleration might cause some graphic issues. Disabling this setting can provide relief, albeit with potentially slower graphic performance.
- Go to Settings within your browser.
- Scroll down and click on Advanced.
- Under the System section, deactivate the toggle for “Use hardware acceleration when available“.
- Relaunch the browser upon prompt.

5. Close Other Applications:
Multiple applications accessing the camera simultaneously can create conflicts. Ensuring only one app uses the camera can lead to smoother operation.
- Close any other applications that might use a camera
- Restart Microsoft Teams afterwards.
6. Reinstall Microsoft Teams:
Occasionally, the best solution to persistent problems is a fresh installation. This ensures any corrupted files or settings are replaced.
- Uninstall Microsoft Teams.
- Download the newest version from Microsoft’s official site.
- Reinstall and verify if the camera issue persists.
7. Try Using the Web Version of Teams:
For those facing issues with the desktop version of Teams, the web version might offer a temporary or alternative solution.
- Launch your preferred browser.
- Navigate to the Microsoft Teams web version.
- Login and check the camera’s functionality.
8. Check for Software Updates:
Like any software, Microsoft Teams can have issues that get fixed in subsequent updates. Regular updates are crucial for the best experience.
- Open Microsoft Teams.
- Click your profile picture at the top right.
- Choose “Check for updates“.
- Install any available updates and then restart Teams.
9. System Updates (For macOS):
Ensure your macOS system is up-to-date as software updates can enhance compatibility and performance with applications like Teams.
- Navigate to System Preferences > Software Update.
- Install any available updates.
10. Clear Teams Cache (For macOS):
Accumulated cache files can occasionally disrupt the normal functioning of apps. Clearing the Teams cache might restore the camera’s operation.
- Shut Microsoft Teams.
- Utilize Spotlight (Command + Space) and input “Terminal”.
- In Terminal, access the Teams cache directory using the provided command.
- Within the directory, type “rm -rf *” to eradicate the cache.
11. Switch to a Different Browser:
If accessing Teams via a web browser presents issues, trying another browser might offer a solution. Whether you’re using Chrome, Opera or another browser, switching might be worthwhile.
12. Restart Your Computer:
A timeless troubleshooting method, restarting the computer can resolve a multitude of conflicts and issues.
- Save and close all active files and programs.
- Restart the computer.
- Once rebooted, launch Microsoft Teams to verify the camera’s functionality.
Note: Always backup your data and settings before uninstalling or updating applications. If the problem persists, consider contacting Microsoft Support or your organization’s IT department for further assistance.

