
Anyone who has been playing video games for a while is probably familiar with the software “Direct X” and how it used to turn up whenever you wanted to install and play the latest video games. That’s because Direct X is a library of programs that help video games communicate with the various hardware components on your laptop that the video game utilizes while running. It is distinct from a hardware driver in that hardware drivers are specific to each piece of hardware and are not limited to videogames.
Due to the existence of Direct X, hardware and video game manufacturers for Windows have a standard that guarantees that, so long as you have the right version of Direct X installed, your video game will be able to run efficiently with the hardware on your laptop. Within this library exists Direct X Shader, a program that helps video games regulate the degree of light and darkness in the images they generate.
Direct X Shader keeps a cache of the previous images it has helped to generate to allow this function and the video games to load faster. However, you may notice that your video game suddenly starts stuttering or lagging after a recent video game or Windows update. This may be because your Direct X Shader cache has been corrupted.
This article will explain how to fix the issue by clearing the cache.
Why Does the Direct X Shader Cache Get Corrupted?
The Direct X Shader Cache can become corrupted by any process that interferes with programs in Direct X or programs that need to communicate with Direct X. Here are a few possible causes
- Video game patches: If you have a video game installed and have played that game in the past, your Direct X Shader cache will have created data related to how the images in your game are expected to look. If the information in the patch contains something different, Direct X Shader will be caught between 2 conflicting instructions, and this may manifest itself in a visible reduction in frame rate
- Windows Updates: Updates to Windows may also contain updates to Direct X. Hence, Direct X Shader may receive information that conflicts with what has already been established in its cache. This could also lead to stuttering or frame rate reductions.
How Do I Clear Direct X Shader Cache (1 Easy Solution!)
You can clear the Direct X Shader cache using File Explorer to delete it. The file path for the Direct X Shader cache is C:\Users\ProfileName\AppData\Local\D3DSCache.
Here is how you can locate this file path
Navigate through Windows Explorer
If you know where to look, you can use Windows Explorer ( the program that supports all the file and folder locations on your laptop or computer) to find the Direct X Shader cache and delete it.
Step 1: Move your cursor to the Windows icon located at the bottom left corner of your desktop and right-click it.
Step 2: Navigate your cursor to File Explorer and click on it; it should be the 5th option when counting from the bottom up.
Step 3: On the window that pops up, look for “This PC”; it will be located somewhere on the left side of your screen. Once you find it, navigate your cursor to hover over it and click on “This PC.”

Step 4: Next, look for “Local Disk (C:)” you will find it somewhere in the upper left quadrant of the page. If your hard drive has been renamed in the past, the name will be different, but generally, it will be the largest item (in terms of storage space) under the Devices and Drivers list.
Step 5: Click on “Local Disk (C:)” twice quickly. If done correctly, a new window will open.
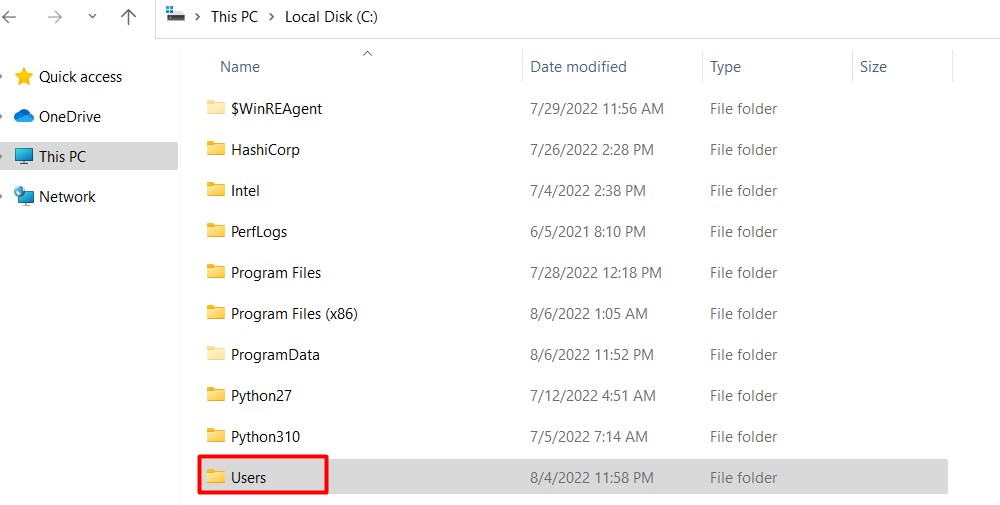
Step 6: In the new window, look through the list of folders on the page for a folder named “Users”; click on the folder twice in quick succession using the mouse’s cursor.
Step 7: In the next window, look for the username of your laptop; often, it is your name or something like “admin” or “user.” Click on the username twice in quick succession once you find it.
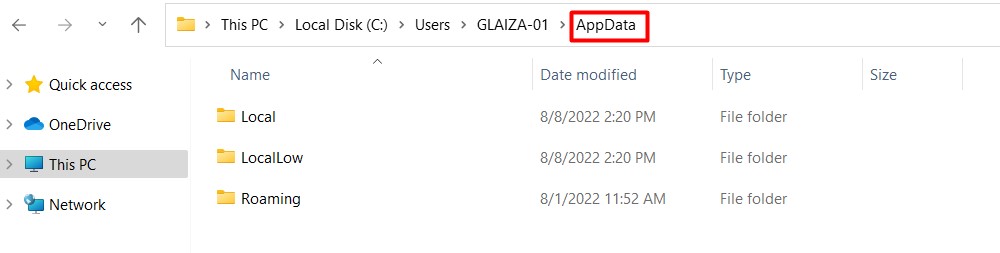
Step 8: On the next page, look through the list of folders for a greyed-out folder named “AppData”; click on the folder twice in quick succession using the mouse’s cursor. If you have found this folder, move to step 17. If you have not, your laptop or computer does not display hidden folders, and you need to change this setting. To do that, move to step 9.
Step 9: Move your cursor to the Windows icon located at the bottom left corner of your desktop and click it.
Step 10: Scroll down along the list of programs that appear by dragging the scroll bar on the right-hand side of that list until you get to Windows System.
Step 11: Navigate your cursor to the downward pointing arrow beside the Windows System option and click on it to generate a drop-down menu.
Step 12: The second item on that drop-down menu is an option that says Control Panel. Click on it.
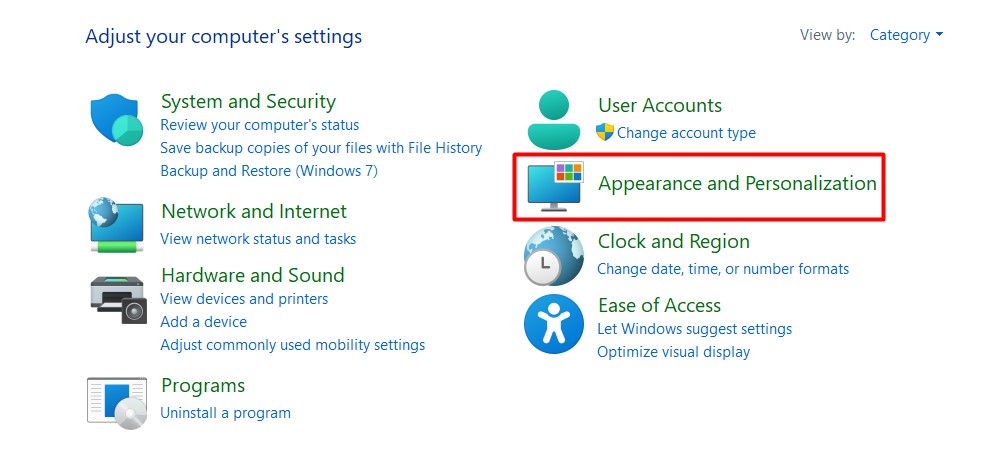
Once Control Panel opens up, navigate your cursor to Appearance and Personalization (located on the right side of the page) and click on it.
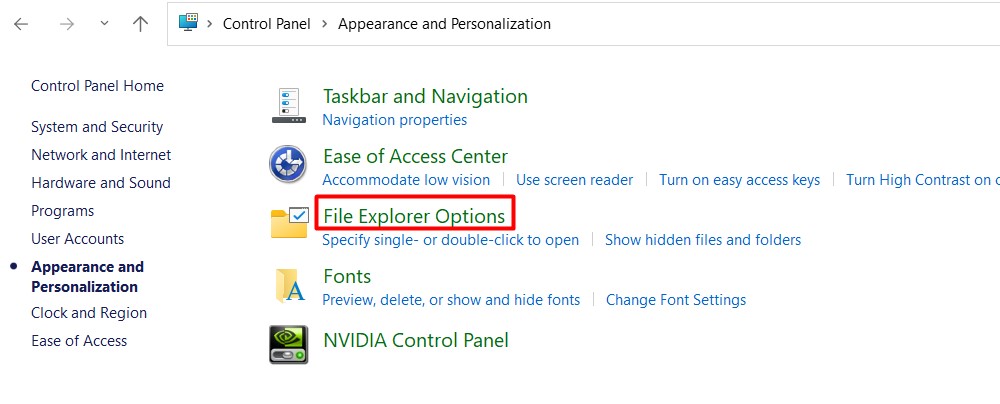
Step 13: On the next page, you will find “File Explorer Options” highlighted in green right in the middle of the page; Click on it.
Step 14: On the window that pops up, look for the View tab and click on it; you can find it on the top of the page in the center.
Step 15: Under the View tab, look for “show hidden files, folders, and drives” and use the cursor to click on the circle beside it. If done correctly, a black dot will appear in that circle.
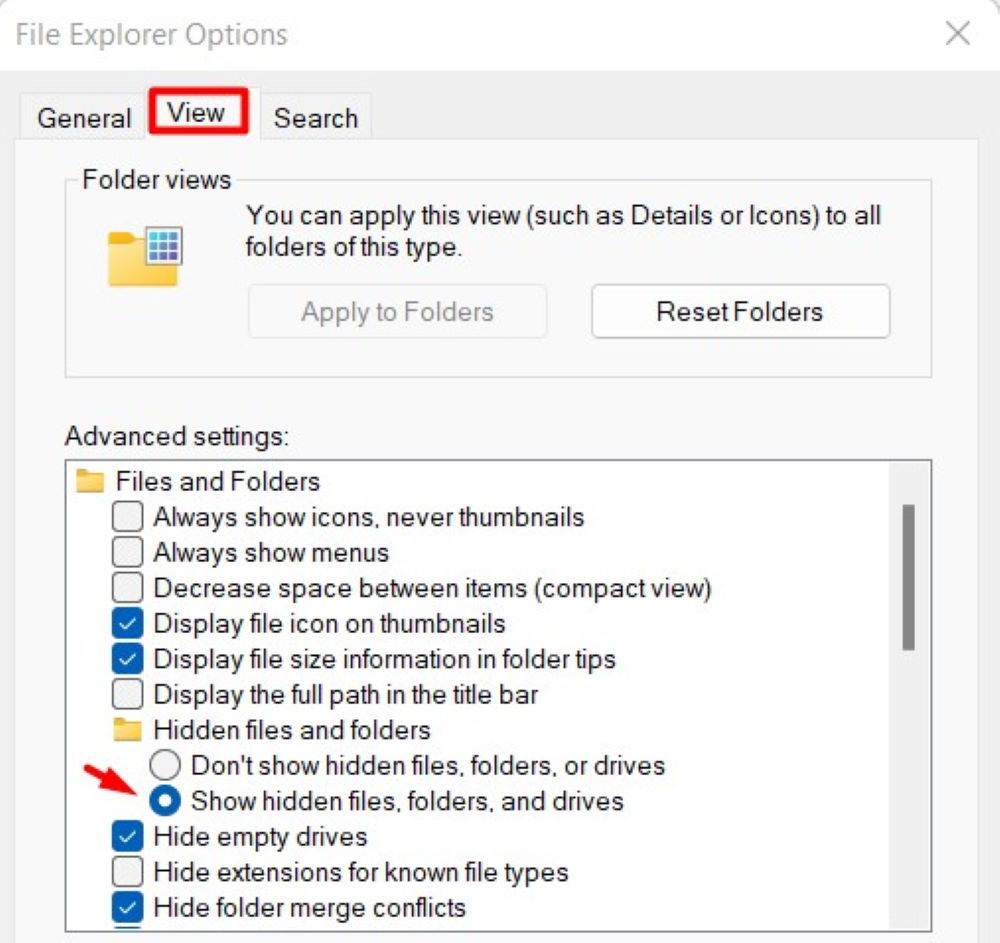
Step 16: Next, click Apply at the bottom right side of that tab. Afterward, click OK, slightly to the left of Apply.
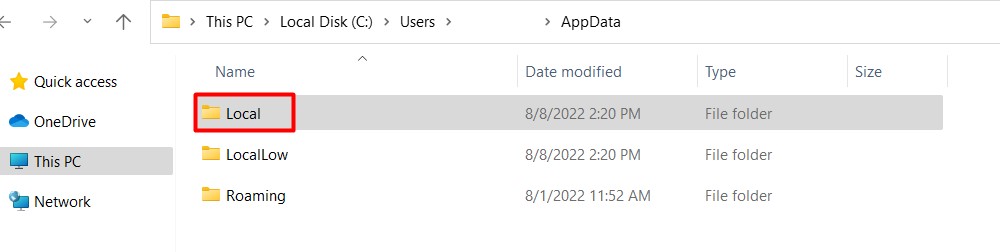
Step 17: In the window that emerges, search through the list of folders on the page for a folder named “Local”; click on the folder twice in quick succession using the mouse’s cursor.
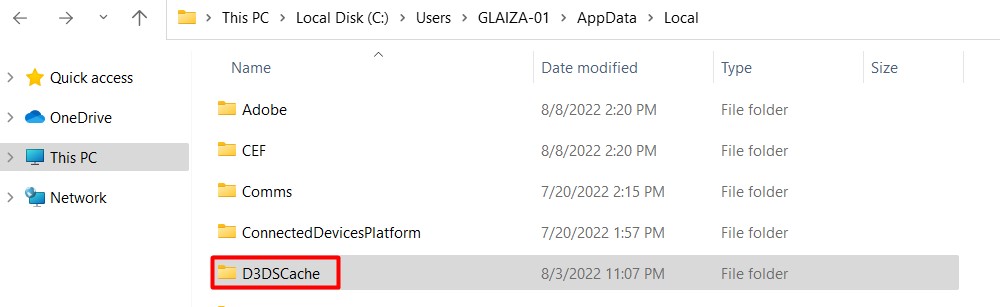
Step 18: In the next window, you will find a folder named “D3DSCache” folder. Open it by clicking it twice in quick succession.
Step 19: Finally, highlight all the contents of the folder by pressing down on the “Ctrl” button and then clicking the “A” button.
Step 20: Right-click the highlighted options and choose the “Delete” option at the very bottom of the page. Now, you can try to rerun your video game.
Final Thoughts
The easiest way you can clear the Direct X Shader cache is by using File Explorer to delete it. The file path for the Direct X Shader cache is C:\Users\ProfileName\AppData\Local\D3DSCache.
Frequently Asked Questions
• If you delete the Direct X Shader cache, no permanent harm will be done to your laptop. Instead, the next time a video game starts up, it will take slightly longer than normal.
• However, after that first instance, everything will return to normal.
• Direct X comes pre-installed for those using Windows 8, 10, and 11, and there is no separate update file for Direct X or its components.
• Hence, to update Direct X Shader, you need to update your Windows version.
• To do that, go to Settings>Updates, click “check for updates.“