What are junk files on your laptop? Where do they come from, and what do you do with them? Of course, the best thing to do is delete them! This brings us to today’s main task: how do you clean laptop junk files?
You can clean junk files with the Windows Disk Cleaner. Simply press the Windows key, search for Windows Disk Cleaner and open it. Then select the files to clean (Temporary Files, Recycle Bin, and Temporary Internet Files), press OK, and click Delete.
What are junk files?
Junk files are data waste that constantly accumulates when using a computer. The term “junk files” already explains that they are garbage.
However, these files were not always garbage but were needed by a program at some point. Unfortunately, for various reasons, such files were not later properly deleted or kept for the unlikely event that you rerun the program in the near future. And so they fill up the hard drive.
These are, for example, backup copies of texts, browser cache files, saved intermediate steps of image processing, or simply constantly growing log files. Some programs can be set to delete backup copies when they are closed, but other applications can accumulate more and more junk data.
Where to find junk files?
- Your browser also saves temporary files. Therefore, you can delete browser data such as cookies and downloads to save space. These files are usually not needed and can be removed without any problems.
- Windows log files and backups of old updates also fall into the “junk” category. For example, you can clean up with a disk cleanup. Just type “disk cleanup” in the Windows search and delete unnecessary data.
How to Clean Junk Files Using Windows Disk Cleaner
The more you use your computer, the more files you will see cluttering up its hard drive. In addition, to using documents, movies or music frequently, Windows creates temporary files.
These are often error reports, cache files, or even application installers, and they can become very large over time. They end up occupying a significant amount of space on your hard drive and can reduce the level of performance of your computer. Below are the steps to cleaning junk files on your Windows laptop with the Disk Cleanup utility.
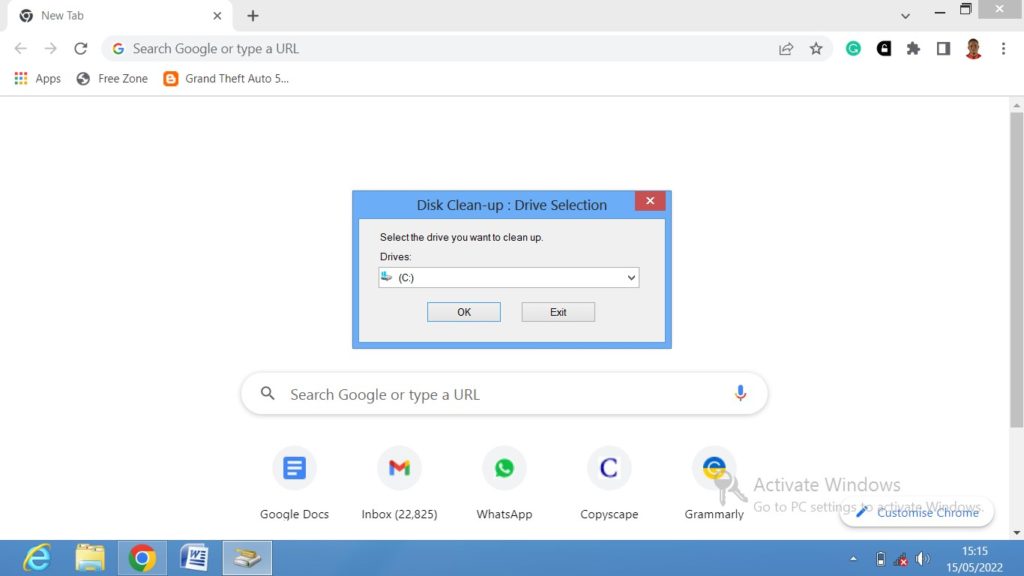
Step 1: Open the Windows Disk Cleanup utility
A simple way to launch the utility is to simultaneously press the ⊞ Win+S keys on your keyboard to activate the search bar. Then, search and click on Disk Cleaner when you see it appear in the search results. This utility is one of the fastest solutions to erase unnecessary files created by Windows.
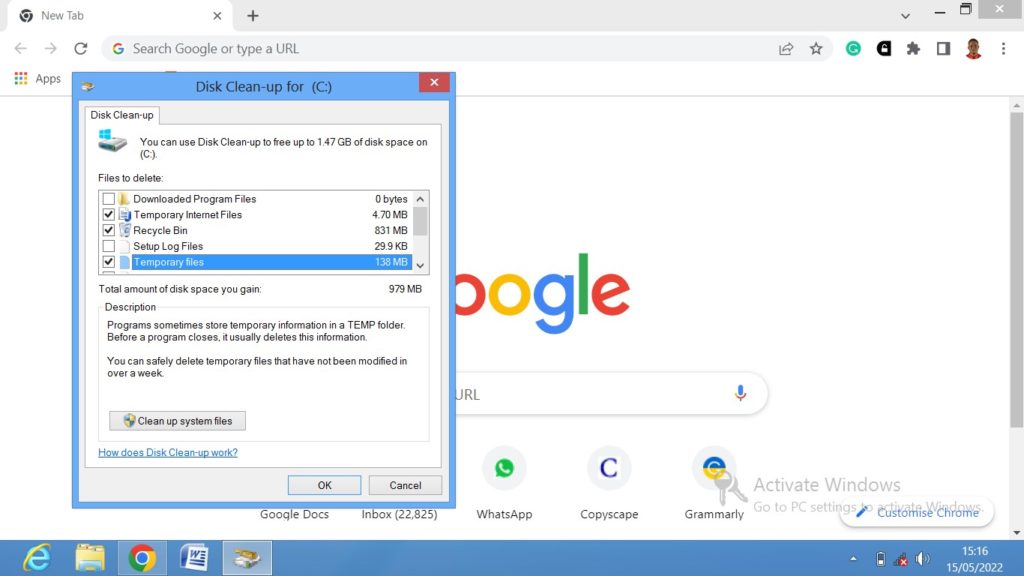
Step 2: Select the files you want to remove
The section at the top of the utility window provides options for clearing personal and junk files. You won’t usually have any problems if you delete these files, but if in doubt, it’s best to leave the options unchecked.
The size of the space reclaimed by erasing will be displayed below the list of file types to be deleted, and you will see it update as you select the options shown below.
Part of your junk files is browsing cache. They are temporary files cached while browsing the Internet. Windows Error Reports are also junk files. They list errors that have occurred while using your system. Finally, DirectX Cache is a buffer that stores graphic images on your computer to display.
Update Download Files are those that were previously downloaded to perform updates on your system and will no longer be needed. The Recycle Bin is a folder called recycle.bin containing the files you deleted before. Only choose to erase them if you are sure that you will not have to restore them later.
Temporary files were created when using applications installed on your computer. They are not intended to be permanent, and you need not fear any harmful consequences from deleting them.
Thumbnails are thumbnail representations of images or videos that have been cached on your computer and appear when you navigate between your files to identify them at a glance. Deleting them will have no consequence, and they will be automatically recreated by the system when needed.
Step 3: Confirm the deletion by clicking OK
You will see a message asking you to confirm if you permanently want to erase files from the selected categories.
Step 4: Click Delete Files to confirm.

Click Delete Files when asked, “Are you sure you want to delete these files permanently?” After clicking this, all files in the selected categories will be erased from your system. In addition, Windows Disk Cleaner will close automatically after deleting files.
Is it safe to delete all found junk files?
The various programs that proudly present you with long lists of found junk files after their scans are sometimes quite dangerous! Because what exactly these programs consider junk is subject to their own rules.
One should, therefore, not blindly rely on such programs. Tools that, for example, classify all files with the extension DAT or JS as junk and delete them can cause many problems.
So when one of these junk file hunters gives you a list of their results, you should be patient and go through the list and check it. And if you simply don’t know what is essential, what is worth preserving, and what isn’t, you should simply leave the files on the hard drive.
In general, the totality of junk files does not take up much space on the hard drive. But the damage that may be done takes a lot of time and work. So, it’s better to use reliable programs such as Windows CCleaner or Windows Disk Cleaner.
Conclusion
Junk files take up valuable hard drive space and can also significantly slow down your computer. However, by manually deleting the files or by finding and removing them with the help of a tool, you can help clean up your PC.
However, most users are not always sure which files can be easily deleted and which data are important system files. So, to avoid deleting anything wrong, you have to be careful – search the Internet for the usefulness of a particular file before you decide to remove it incorrectly and cause problems.