Trying to access a folder, file, or any other network resource without access permission results in error “you might not have permission to use this network resource. You may have to contact your network administrator to grant you an access permission.
Multiple connections to shared resources using different names from the same network device can also trigger this error. To resolve this access error, you must disconnect all previous connections to the file or folder. Other causes of this Windows shared resource network error may include:
- Disabled file printer sharing.
- Sync-back active on a network drive
- An antivirus problem.
- the Same user has multiple connections to a shared network resource
. - Stop workstation and services.
How to Fix “You Might Not Have Permission to Use This Network Resource” in Windows
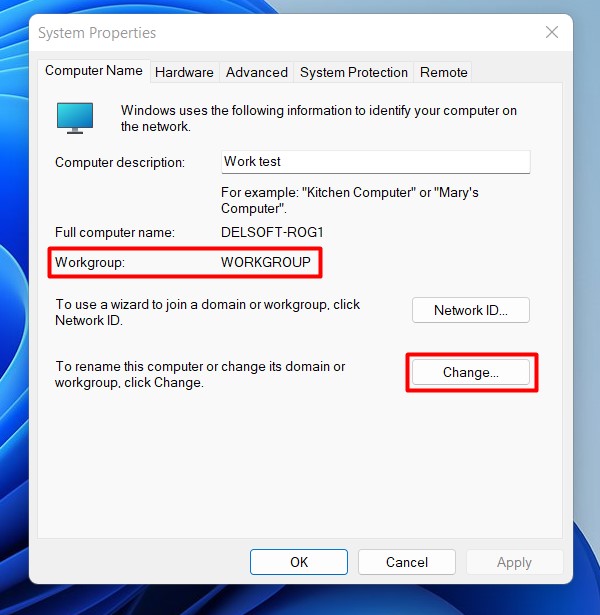
1) Create a Workgroup for All Computers
Add every computer or device on the network that you want to access to the same workgroup. The workgroup name on each PC must be similar, including the case used for the names.
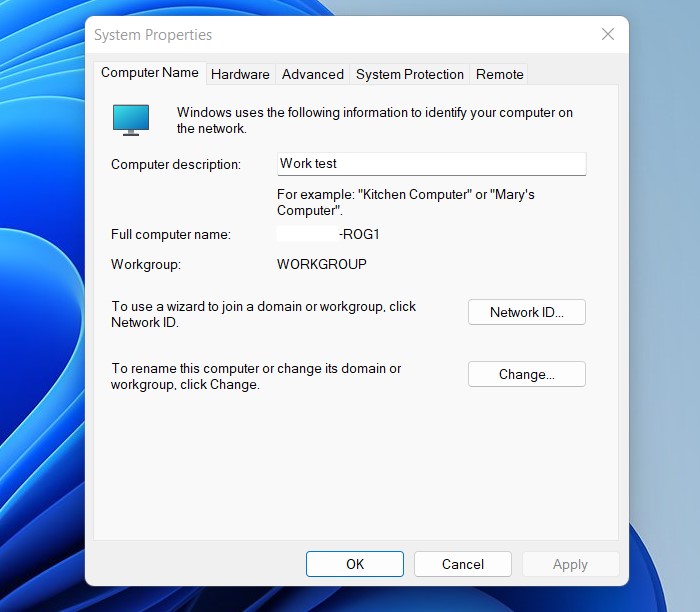
Click on the “Start” menu and type “workgroup” in the search box. Next, select “Change workgroup name” and click the “Change” button.
2) Create a HomeGroup for All Computers
HomeGroup was introduced in Windows 7 to ensure that file sharing is possible across Windows 7, 8, and 10 systems.
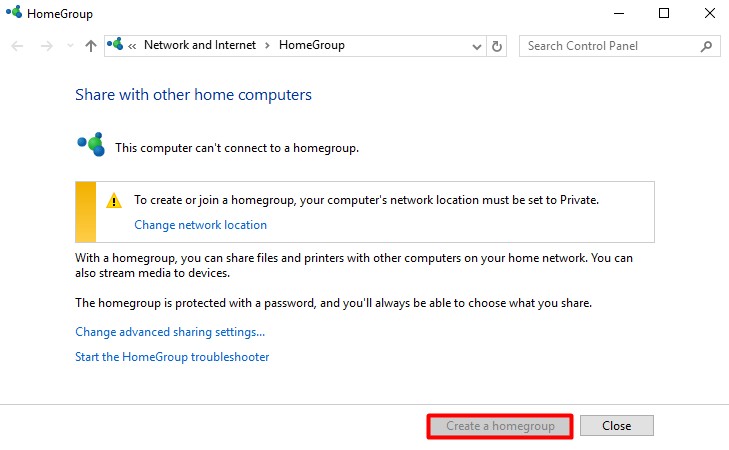
In the “Network and Sharing Center,” click on “Home Network” and select “Public Network,” then change it to Home Network to open the HomeGroup dialog box. Follow the prompts fast to create a new home group that overrides the existing one.
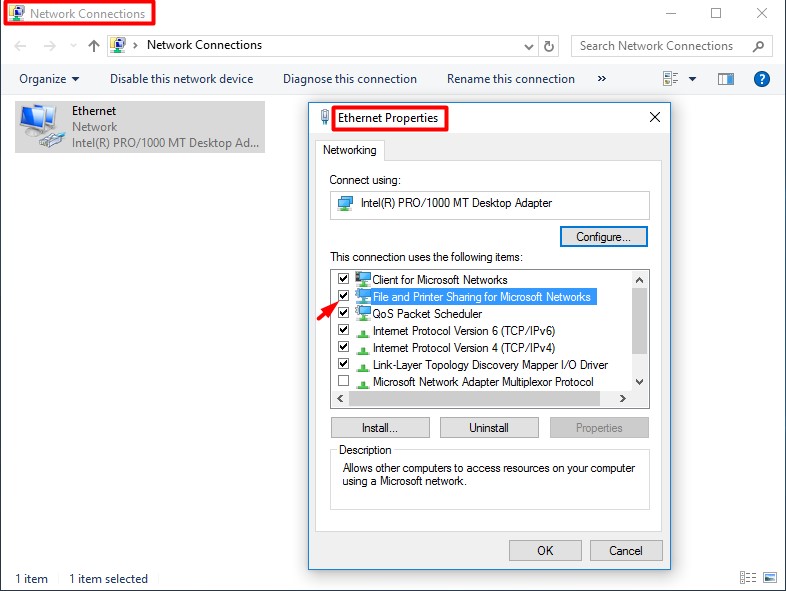
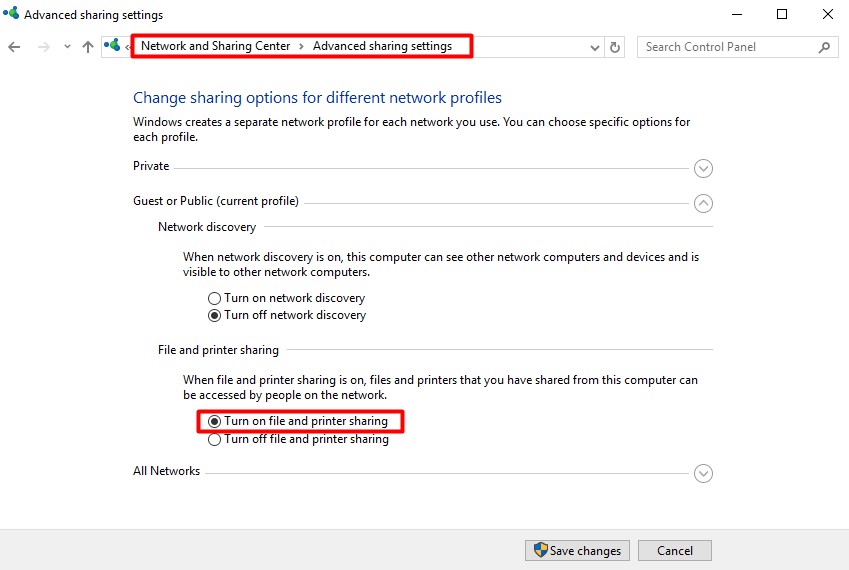
3) Enable File and Printer Sharing
Turn on file and printer sharing for your network adapter to give you access to shared network resources.
Right-click on the “Start” menu, then right-click on “Network Connections” and select “Properties.” Check off the “File and Printer Sharing for Microsoft Networks” option to turn it on.
If you’re using Windows 7, navigate to the “Network and Sharing Center” and select “Advanced Sharing Settings.” Then, follow the prompts to turn on file and printer sharing.
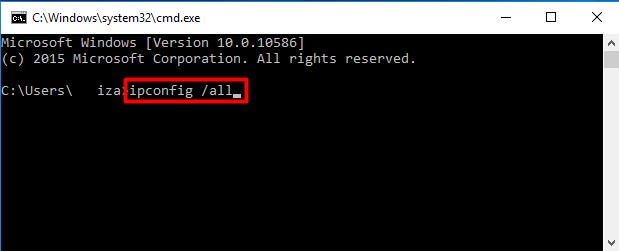
4) Check IP Addresses and Subnets for Correction
This may not be a problem if all your network computers use the same router. But, it’s worth checking to ascertain that it’s not the cause of the network access error.
All the computers should have the same Default Gateway and Subnet Mask to ensure they connect to the network easily.
Right-click on the “Start” menu and select “Run.” Type CMD on the command prompt, then type IPCONFIG /ALL on each PC in the network.
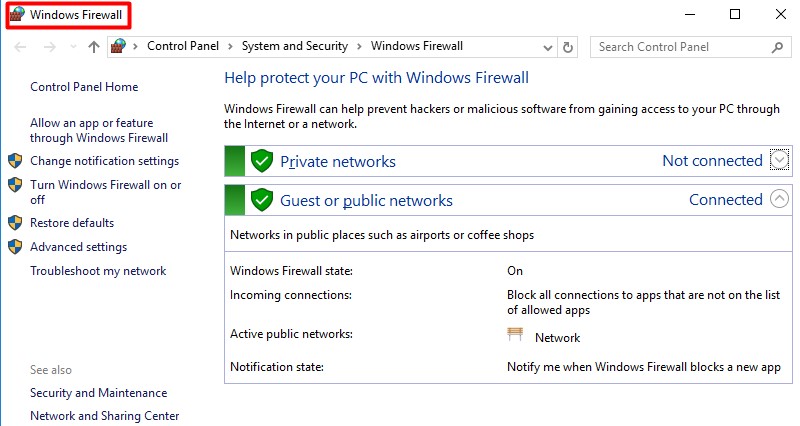
5) Check the Network Firewalls
Disable the Windows Firewall and third-party firewall programs, such as Comodo and Norton. Then, try accessing the network resource again to see if it works with the firewalls turned off.
Instead of turning off the firewalls for security reasons, you can add File and Printer Sharing to the programs as exceptions.
6) Set Shared Permissions
Configure file sharing on your Windows computers. Enable NTFS and share permissions to allow all computers connected to the same network to access shared resources.
Right-click on the shared resource and select “Properties” then “Security.” Click on a specific user or computer to create or edit permissions.
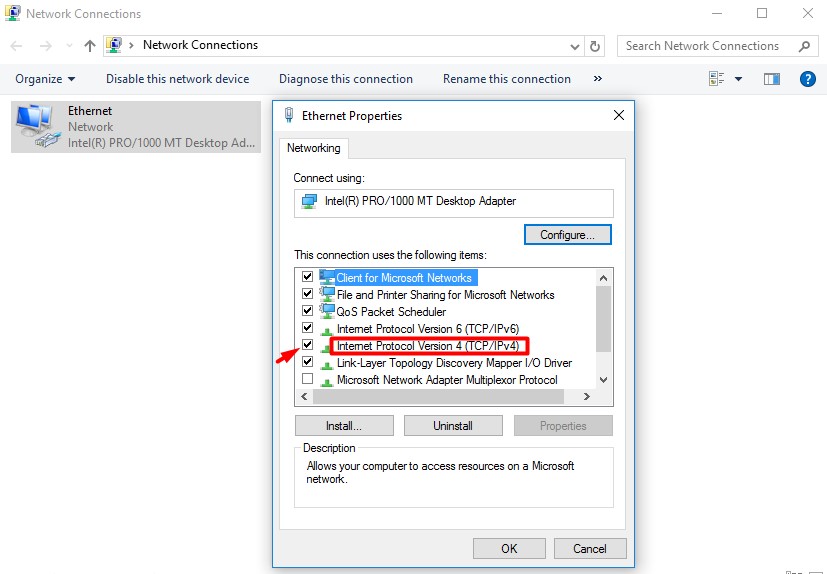
7) Configure TCP/IP Protocol
Setup all the computers in your network to use the Internet TCP/IP protocol for communication. Click on the “Start” menu and select “Control Panel.” Right-click on “Network Connections” and select “Properties.” Make sure that the option for TCP/IP is selected.
8) Check Usernames and Passwords
If all the solutions above have failed, check all the usernames and passwords to ensure they’re correct. All network computers should use similar passwords to access shared resources.
Please create a new account on each computer, ensuring they use the same username and password for network access. It’s also essential to give the accounts administrator privileges.
You can also turn off password-protected sharing, which may leave your system vulnerable to unauthorized access.
9) Create Unique Computer Names
Each computer in the network should have a unique NetBIOS name, up to 8 characters long. The first 8 characters in the NetBIOS name must be unique for each PC running earlier versions of Windows to prevent problems. Windows 7 or higher don’t have this requirement.
10) Create a Local Security Policy
A local security policy can also prevent you from accessing a network resource. Click on “Start” and navigate to the “Control Panel.” Select “Administrative Tools” then “Local Security Policy”.
Click on “Local Policies” then “Security Options” and disable “Network access: Do not allow anonymous enumeration of SAM accounts and shares.” Next, uncheck the option “SAM accounts and shares” only, but not “SAM accounts.”

11) Uninstall Internet Security and Antivirus
Turn off or uninstall your internet security and antivirus programs to test your network connections. Disable programs, such as Kaspersky Internet Security or Norton Internet Security.
Click on “Start” and select “Control Panel” then “Programs” and uninstall the security programs. However, you must open individual programs to disable them.
Conclusion
“You might not have permission to use this network resource” is an error when trying to access a file or any other shared resource without permission. Depending on the cause of this error, you can solve it in multiple ways.
Some solutions include enabling file and printer sharing, uninstalling security programs, correcting IP addresses and subnets, and configuring the TCP/IP protocol. We hope that you found this article helpful and that it helped you solve the error and gain access to the network resource.