![Is Your HubSpace App Not Finding Wi-Fi [FIXED!]](https://pigtou.com/wp-content/uploads/2023/09/Is-Your-HubSpace-App-Not-Finding-Wi-Fi-FIXED.jpg)
A strong Wi-Fi connection is essential in today’s technologically driven environment. With shared areas like HubSpace, where users need constant access, the inability to connect to the internet can be incredibly annoying.
The main causes of this problem include weak signals, network visibility problems, incorrect password entry, device airplane mode, Wi-Fi router glitches, network congestion, physical obstructions, wrong device settings, and trouble connecting to 5 GHz networks. Addressing these areas step-by-step can help diagnose and fix the problem.
1. Check Wi-Fi Signal Strength and Coverage
The smooth operation of HubSpace depends on a robust Wi-Fi connection, so issues with poor signal strength and limited coverage can impede this. Weak connectivity or the inability to connect could also arise when you locate the device beyond the network’s optimal coverage area.
You might need a Wi-Fi extender for this step.
- Reposition the device closer to the Wi-Fi router
- Remove unauthorized devices connected to the network
- Minimize physical obstructions (such as cordless phones, microwave ovens, and Bluetooth devices) between the device and the router
- Check whether your neighbor’s Wi-Fi networks are interfering with the connection (use a tool like NetSpot to conduct the test)
- Use a Wi-Fi range extender to boost the signal strength
2. Check Your Network Visibility
Sometimes, the network’s Service Set Identifier (SSID) can remain concealed, leading to confusion and connection hurdles. Hiding the SSID prevents a device from receiving its broadcasted name, adding complexity to detection and connection efforts.
2.1 Unhide Your Network SSID
Here are the steps to take to access router settings and make a hidden network SSID visible:
- Find your router’s IP address (in the router’s documentation or on the router itself), e.g., “192.168.1.1” or “192.168.0.1”
- Enter your router’s IP in a web browser
- Log in to the router’s settings
- Use the administrator username and password (provided on the router or in the documentation)
- Navigate to “Wireless Settings” (it might be labeled “WLAN” or “Wi-Fi”)
- Locate the hidden “SSID setting”
- Select the “SSID (network name)” option (it may be labeled as “SSID broadcast” or “hide SSID”)
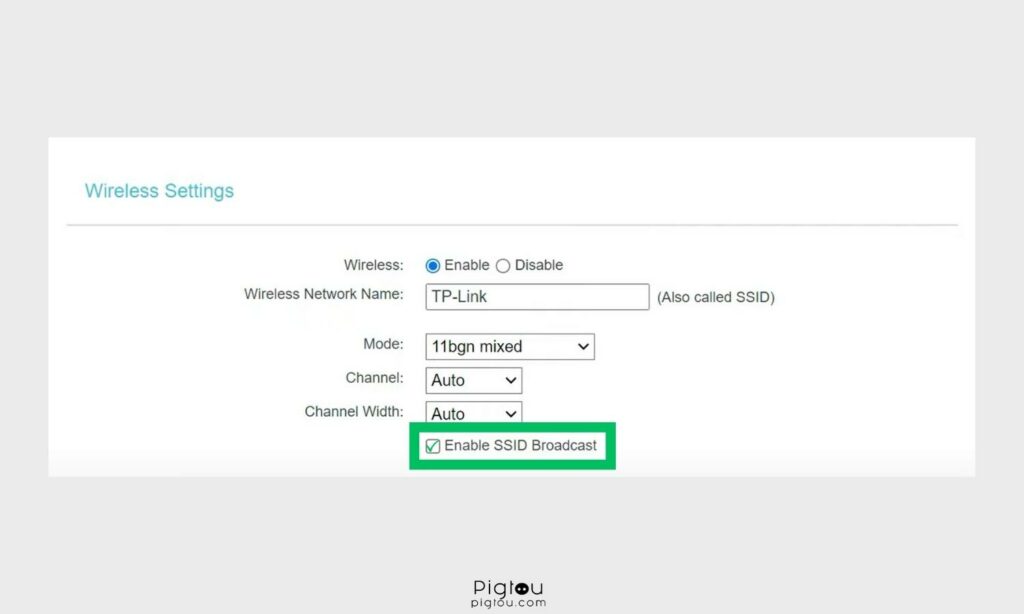
2.1.1 Enable SSID Broadcast
Toggle the setting to enable SSID broadcasting and make your network’s SSID visible to devices. After doing this:
- Scroll to the bottom of the page
- Look for a “Save” or “Apply” button
- Click on it to save your changes
- Search for (available) networks
- For other routers, Check the box labeled “Enable SSID Broadcast”
2.2 Reboot Your Router
Some routers may require a reboot to apply the changes. You can also power cycle the device to remove any temporary glitches or bugs.
- Press the “Power” button on the router
- Wait for the device to power off
- Press the “Power” button to turn on the router
- Wait for all lights to turn white or green
- Alternatively, you can power cycle the router:
- Unplug the power cable while the router is still on
- Wait for about 60 seconds
- Plug the power cable in and wait for the device to power on
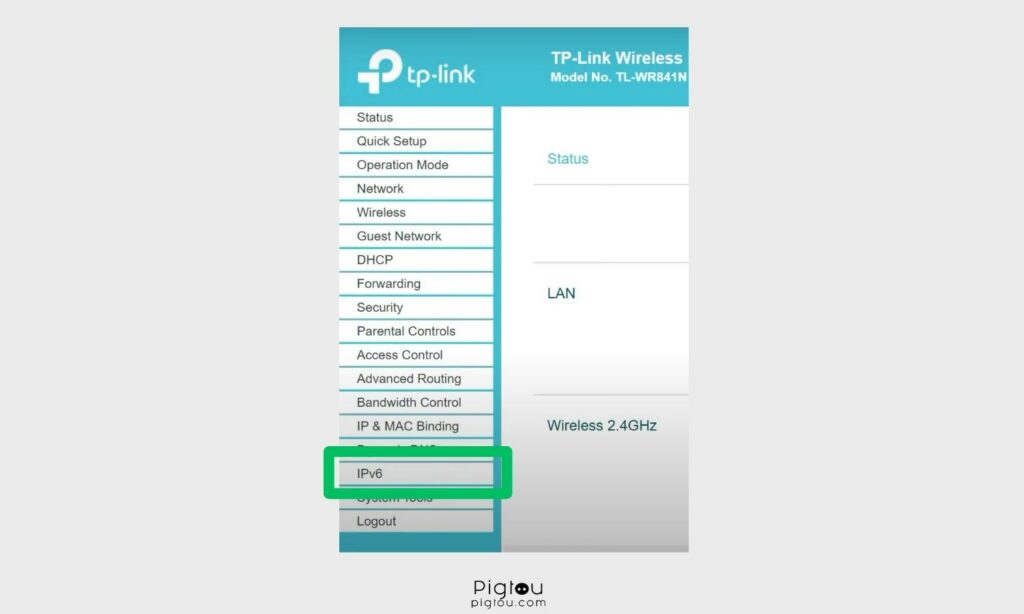
2.3 Disable IPv6
Sometimes, smart devices have problems connecting to a Wi-Fi network due to an old IP address. A reboot manually assigns a new IP address to your router, but disabling IPv6 could help resolve wireless connection errors.
- Log into your router’s configuration page
- Select “Advanced settings”
- Disable “IPv6” and click “Save”
3. Use the Correct Network Password
While it might seem trivial, some users who forget their passwords can struggle to connect HubSpace to a wireless connection.
- Cross-reference the password with the administrator’s records or router details
- Pay attention to uppercase letters, special characters, and numbers
- Promptly update your device’s Wi-Fi settings with the most recent password in case there have been recent changes
- Log into your router’s configuration page
- Find the “Wireless Settings/WLAN” section
- Set a new password
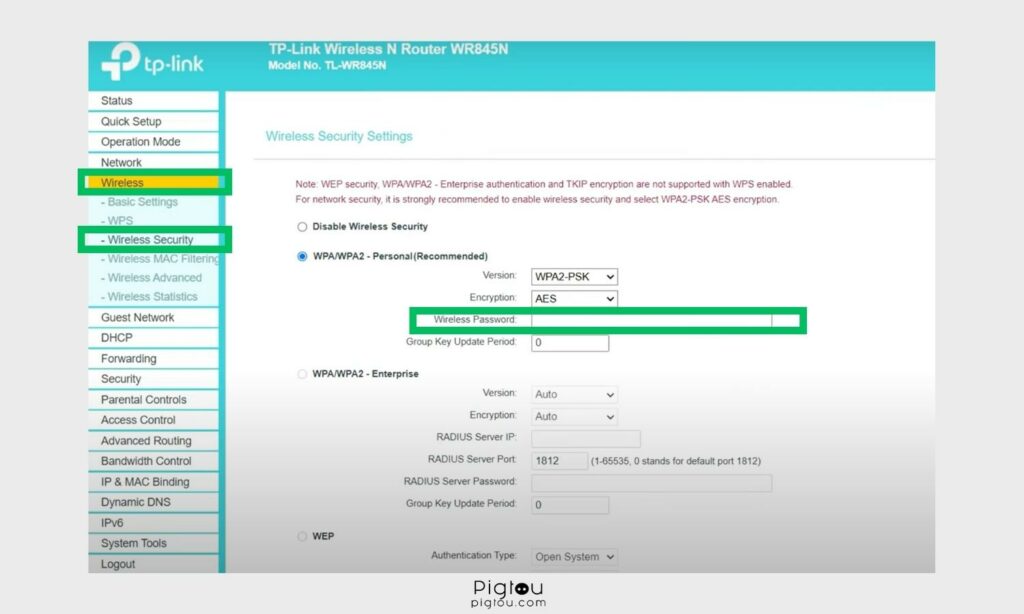
- Save the changes within the router settings
3.1 Restore Factory Settings for Renewed Access
Resetting the router may be your only option if you can’t remember the login credentials. It’s also viable if you’re trying to recover access to an older Wi-Fi router for which you’ve forgotten the admin and Wi-Fi passwords. This method allows you to use the default access to configure the router according to your desired settings.
- Locate the “Reset” button on the router (it’s usually a tiny hole in the back or bottom)
- Find a paperclip, toothpick, or pin
- Press and hold the “Reset” button for about 15 seconds
- Unplug the power cable while holding the “Reset” button
- Plug the power cable back in and release the “Reset” button
- Connect your computer to the router (you can use an Ethernet cable or any other Wi-Fi login credentials you remember)
- Log in to the router’s interface (using default or known credentials)
- Update your wireless network name and password (go to the “Wireless/WLAN” setting and enter new credentials)
NOTE: Resetting the router reverts all custom settings to default, requiring you to enter any specific configurations after the reset.
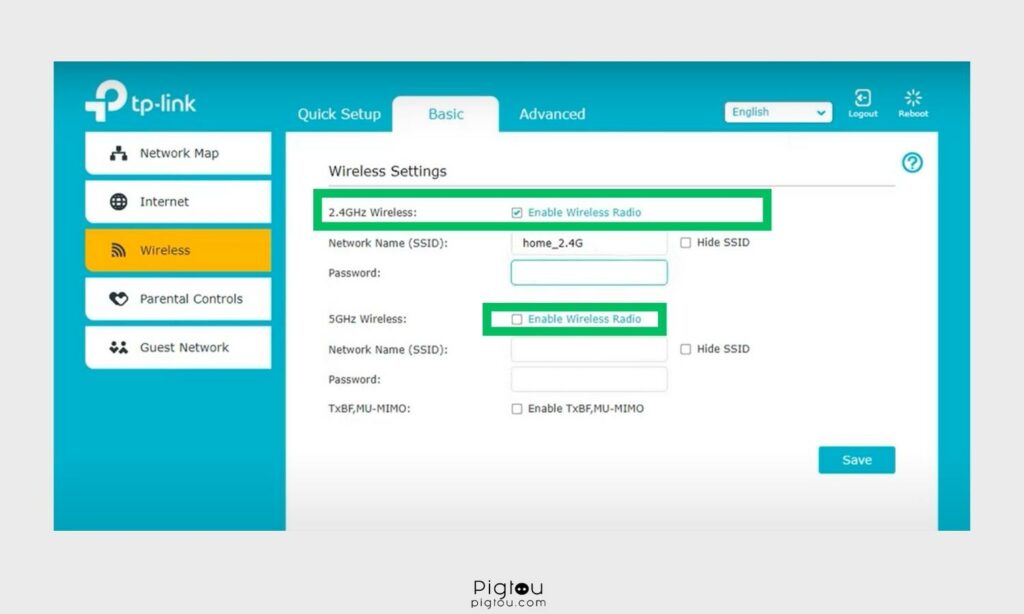
4. Change Network Band to 2.4 GHz
Most smart home gadgets operate within the 2.4 GHz frequency range, but some home routers only operate on a 5 GHz frequency, leading to potential Wi-Fi compatibility challenges.
If your router only has one band, upgrade to a dual-band router that supports both frequencies for better performance and compatibility.
Follow these steps to connect a 2.4 GHz HubSpace to a 5 GHz Wi-Fi router:
- Enter your router’s IP address in a web browser
- Navigate to the “Wireless Setup” section
- Create a new Wi-Fi network on the 2.4 GHz frequency (with a distinct SSID and password); if you’re using a mesh router with both frequency bands, dedicate the HubSpace devices to only the 2.4 GHz.
- Disable the 5 GHz network band (if your router allows it)
- On newer routers, disable “Wi-Fi 6” by unchecking the “Enable AX” box
- On the HubSpace device, search for available Wi-Fi networks
- Connect to the newly created 2.4 GHz network (using the SSID and password you created)
- Test the HubSpace device’s connectivity to ensure it has internet access
- If you had disabled the 5 GHz band, you can re-enable it in the router settings (optional)
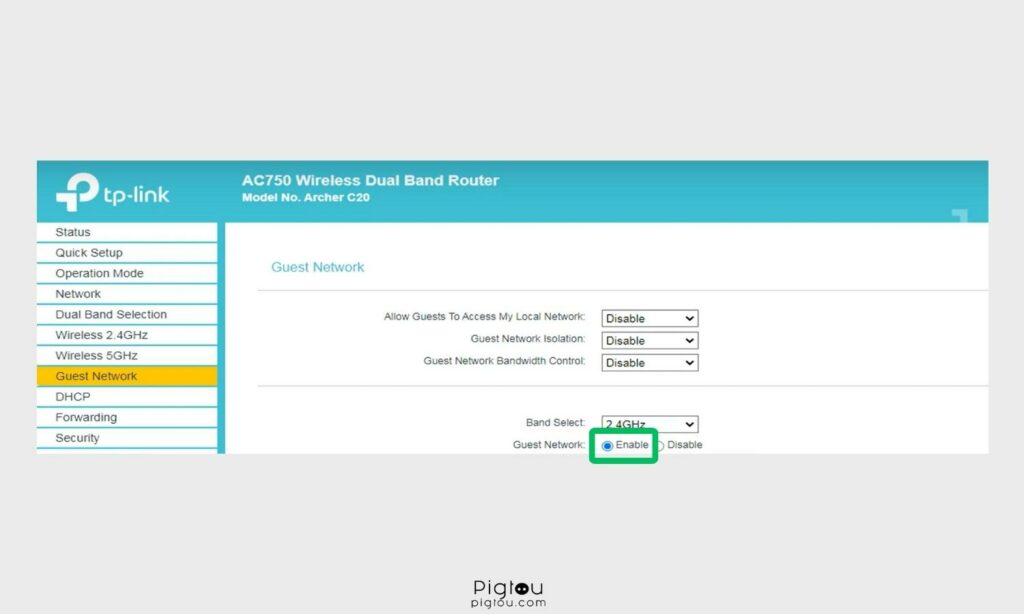
4.1 Enable a Guest Network on Your Wi-Fi Router
Enabling the guest network provides a convenient and secure way to share internet access with guests while keeping your primary network separate and protected.
- Access router settings by typing its IP address into a browser
- Navigate to “Wireless” or “Network Settings”
- Enable the “Guest network” feature
- Configure guest network; set SSID, security, and password
- Optionally, isolate the guest network from the main network for security
- Save changes in router settings
- Connect the HubSpace device to the guest network using the relevant SSID and password
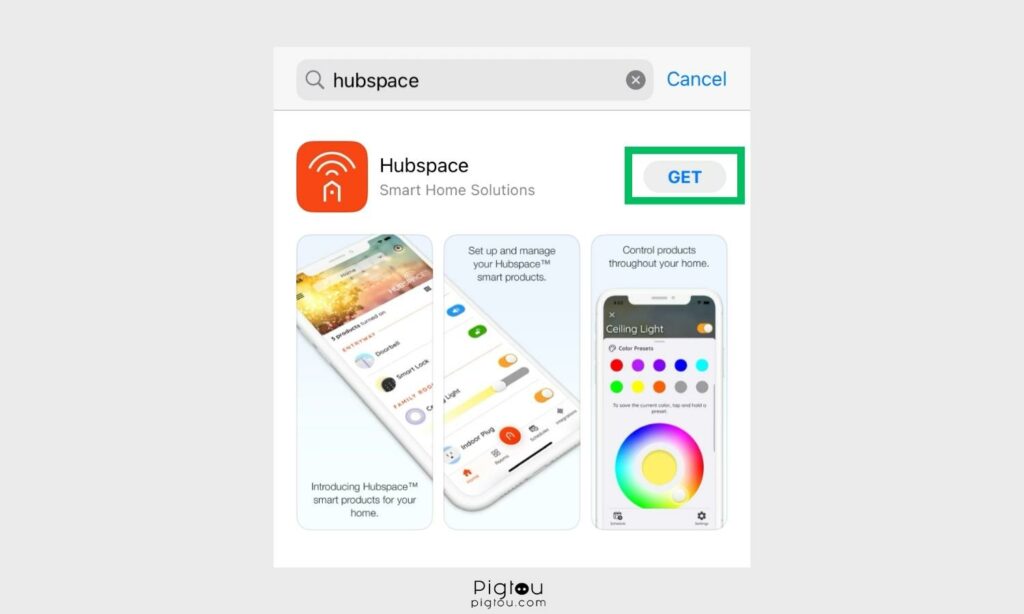
5. Update/re-install the App via Mobile Data
Since the app cannot find Wi-Fi, use your mobile data to check for pending updates that could affect the app’s performance.
- Grab your phone and open the “App Store”
- Type “HubSpace” on the search bar
- Click “Update” and wait for the process to start
- If your app is up-to-date, try uninstalling and re-installing it to clear minor software glitches
TIP: Before you try this solution, use another phone (maybe borrow your family member’s or neighbor’s) to connect HubSpace to Wi-Fi. Use an iPhone because Android and Pixel phones might have a glitch, thus causing the issue.