![iPad Not Charging but Has Lightning Bolt [SOLVED!]](https://pigtou.com/wp-content/uploads/2023/08/iPad-Not-Charging-but-Has-Lightning-Bolt-SOLVED-1.jpg)
It can be frustrating if your iPad shows a lightning bolt icon, suggesting it’s connected to a power source but doesn’t charge. Some of the causes of this problem include glitches in the software, a faulty cable or adapter, the buildup of debris or dust in the charging port, multiple background processes running simultaneously, an insufficient power supply, a higher-than-normal operating temperature, potential hardware problems, compatibility issues with accessories, and a dying battery.
Don’t worry! This article provides user-recommend steps to fix the issue so you can continue using your smart device uninterrupted.
1. Address Software Glitches
Software bugs disrupt iPad charging, causing incorrect connection recognition, battery management issues, irregular charging patterns, algorithm disruptions, power inaccuracies, communication problems, and freezing. These issues worsen with software updates, which can affect charging.
1.1 Force-restart Your iPad
Depending on the iPad model you have, follow these steps to restart the device:
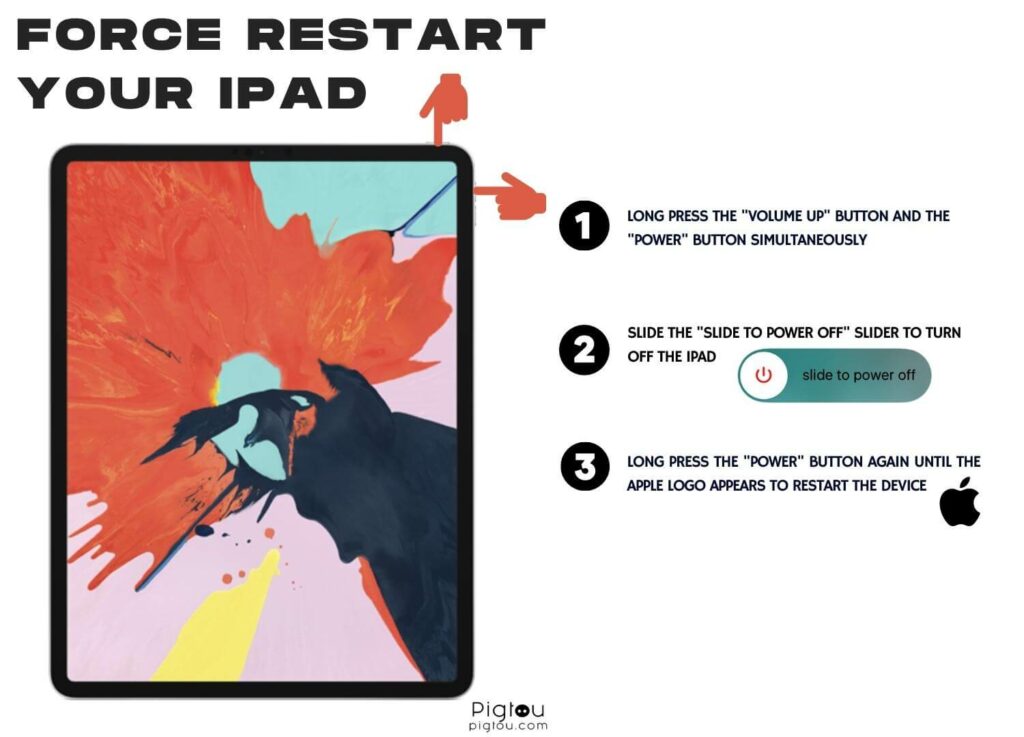
- For iPads with Face ID (iPad Pro 11-inch, iPad Pro 12.9-inch, iPad Air 4th generation, iPad mini 6th generation):
- Long press the “Volume Up” button and the “Power” button simultaneously
- Slide the “Slide to power off” slider to turn off the iPad
- Long press the “Power” button again until the Apple logo appears to restart the device
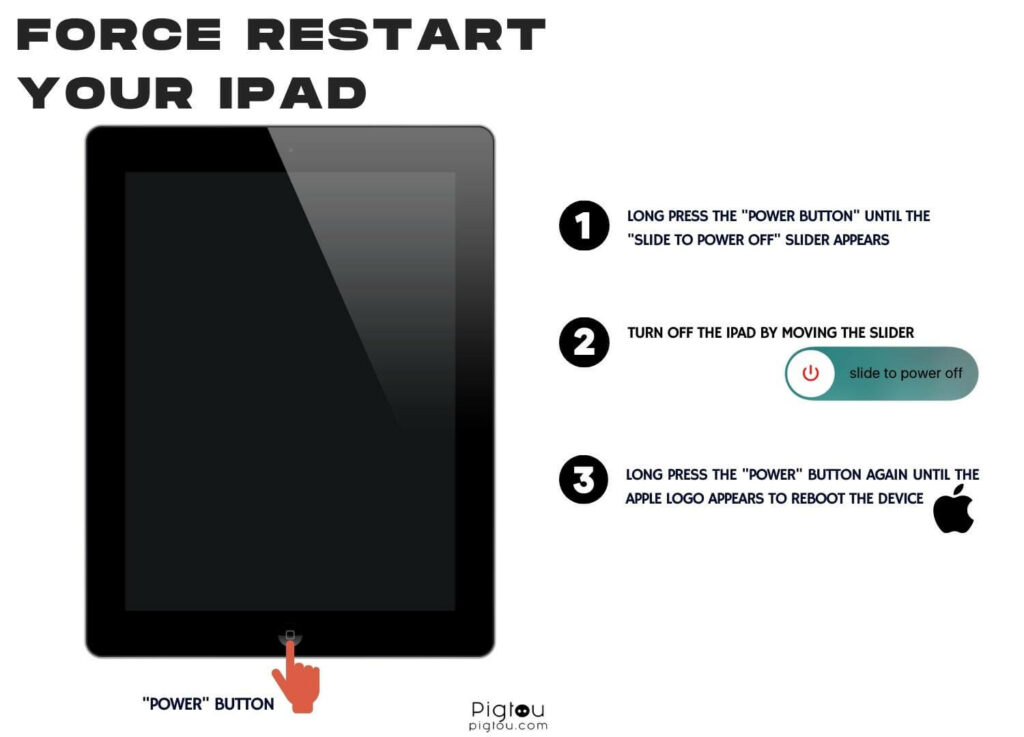
- For an iPad with a home button, do the following:
- Long press the “Power button” until the “Slide to power off” slider appears
- Turn off the iPad by moving the slider
- Long press the “Power” button again until the Apple logo appears to reboot the device
1.2 Use Settings to Restart the iPad
You can also restart the iPad using the settings on the device as follows:
- Open “Settings” and go to “General/Accessibility”
- Scroll down and tap on “Touch”
- Select “Assistive Touch”
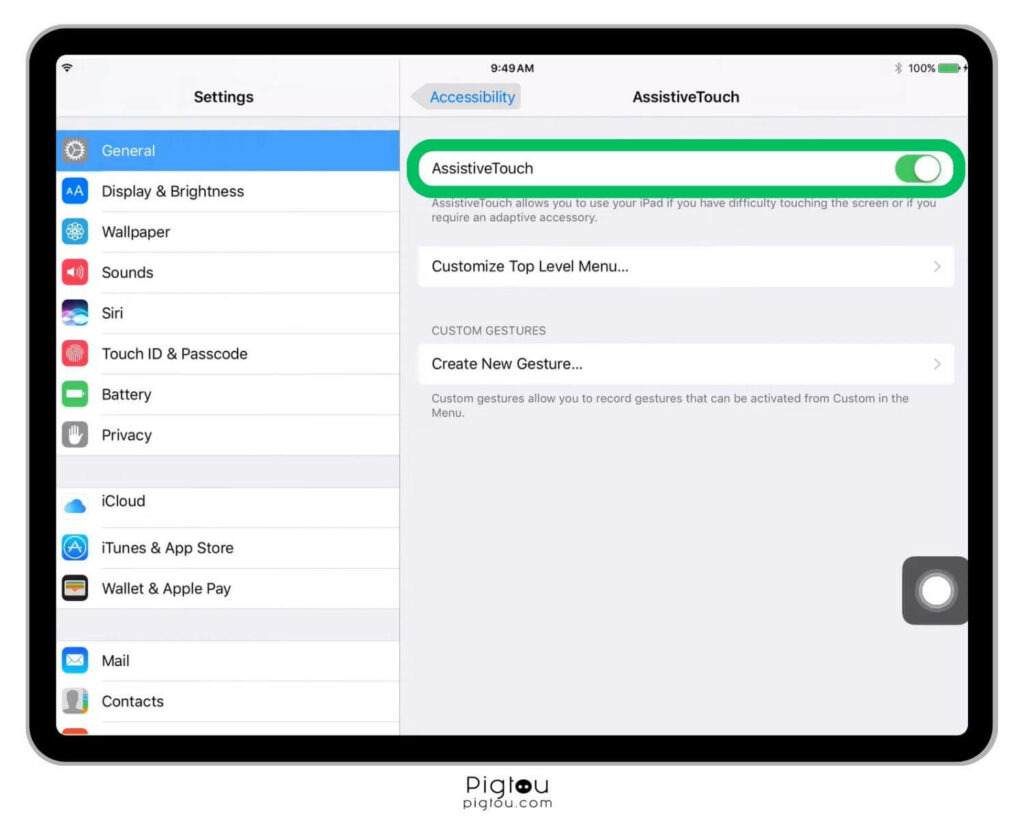
- Tap on “Restart”
- Wait for a few moments as the iPad shuts off
- Press the “Power” button to turn the iPad back on after it powers off
2. Update Software
Ensure your iPad’s operating system is up-to-date by checking for and installing any available software updates that might include bug fixes.
- Connect your iPad to a stable Wi-Fi network
- Plug into power or ensure there’s enough battery for the task
- Backup data using iCloud or computer (optional)
- Open the “Settings” app from the home screen
- Scroll down and tap “General”
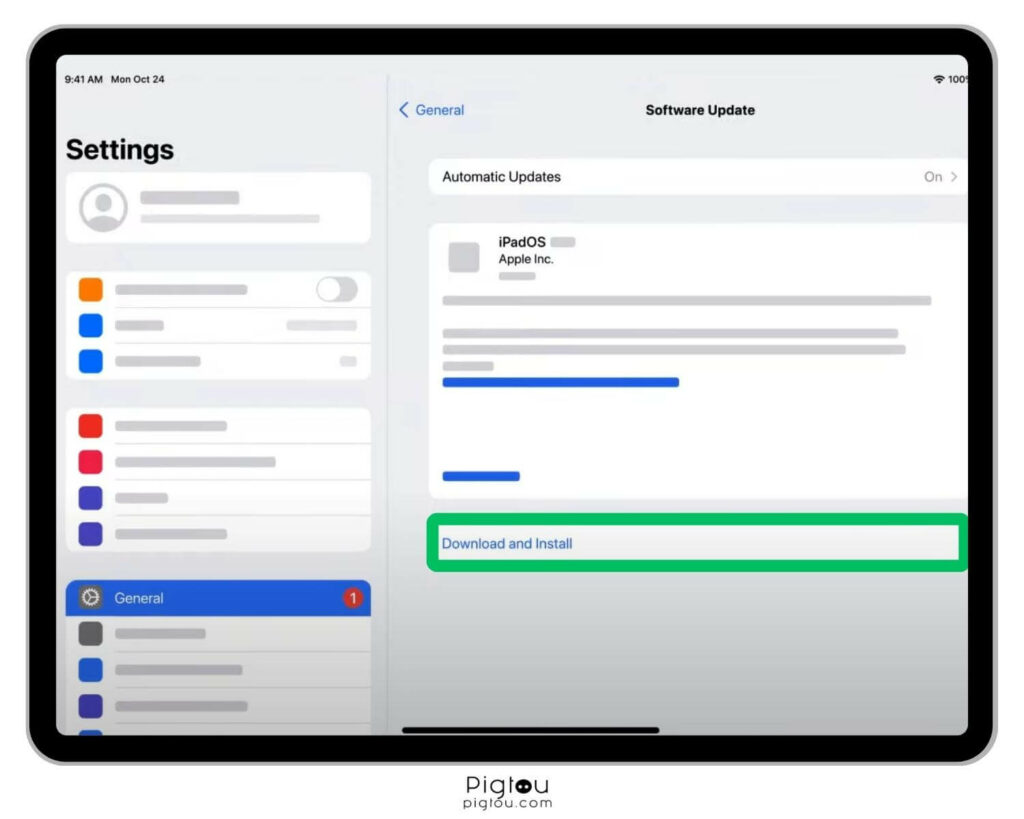
- Tap “Software Update”
- If an update is available, tap “Download and Install”
- Enter the passcode if prompted
- Read and agree to the terms and conditions
- Tap “Install” and authenticate the installation using a passcode or Face ID
- Wait as the iPad restarts for the update installation
- Wait a few more minutes as the installation completes
- Once the iPad restarts again after the update, check whether the issue is resolved
2.1 Use Your Computer to Update iPad Software
Before you update your iPad software using a computer, ensure you’re running the latest iTunes (Windows) or Finder (macOS Catalina or later) version.
- Connect your iPad to the computer using a compatible USB cable
- Open iTunes (Windows) or Finder (macOS Catalina or later)
- Locate and select your iPad in iTunes or Finder
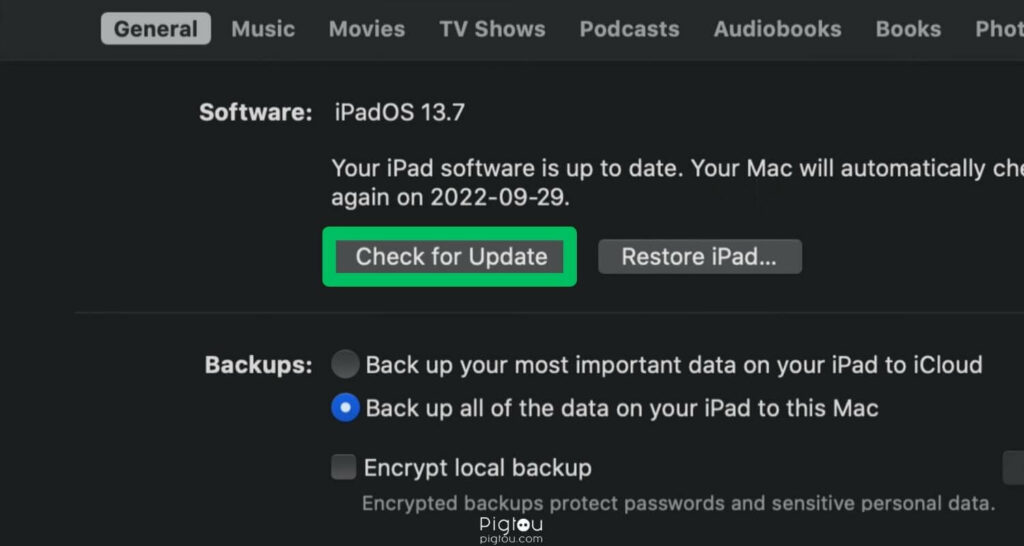
- On the device’s summary page in iTunes, click “Check for Update”
- In Finder, click “General” > “Check for Update”
- If an update is available, click “Download and Update” (iTunes) or “Download” (Finder)
- Authenticate by entering your device’s passcode
- Agree to the terms and conditions.
- Wait as it downloads the update to your computer
- Wait as your iPad restarts during the installation process
3. Reset All Settings
We recommend backing up your iPad’s data using iCloud or a computer before proceeding with this option.
- Open the “Settings” app (represented by a gear icon)
- Scroll down and tap on “General”
- Access “Reset Options”
- Tap on “Transfer or Reset iPad”
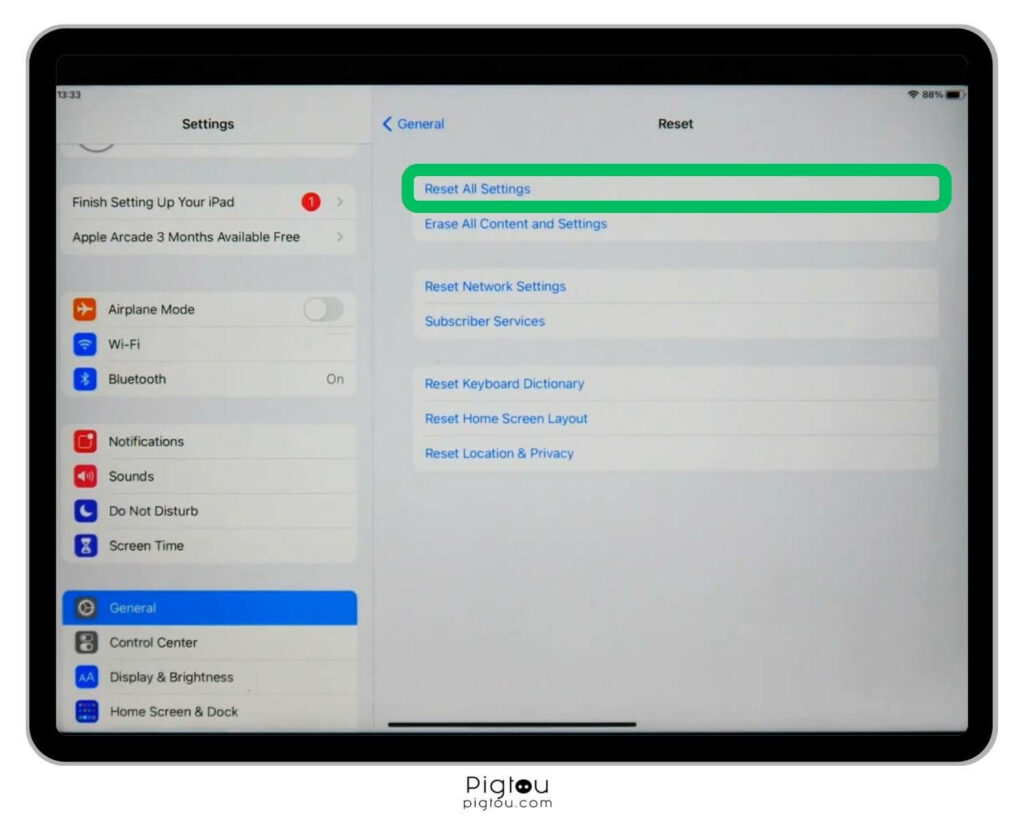
- Tap on “Reset” to access reset options
- Select “Reset All Settings” to restore defaults while keeping data
- Tap “Other Reset Options” to choose specific reset options, like network, keyboard, home screen layout, or location/privacy settings
- Confirm your action by pressing “OK” or “Apply Changes”
- Authenticate with a passcode or Face ID, as applicable
- Proceed with any prompted confirmations
- Wait as your iPad restarts after the reset
- Reconfigure settings and verify they’ve been reset to defaults
4. Check/replace the Charging Cable or Adapter
Resolving the charging issues associated with your iPad may require carefully inspecting the charging cable and adapter for any anomalies, testing various connections to rule out external causes, and verifying the device’s certification status.
You might need a compatible charging cable/adapter for this step.
- Check the charging cable and adapter for physical damage or wear
- Ensure that the charging cable (if you’re already using a replacement) is no longer than three feet (there’s plenty of voltage drop on longer charging cables)
- Reverse the end of the cable that goes into the charger (plugging the cable incorrectly into the charger results in fake charging)
- Test the cable and adapter with different outlets and devices (try plugging the iPad into a MacBook to rule out any adapter issues)
- Ensure your cables and adapters are Apple-certified
- If possible, use the original Apple charging cable and adapter
- Use a different cable and adapter to test if your iPad is charging (some users report that using other USB-C chargers, like from Samsung Note 10, also works)
TIP: If the charging cable and adapter are okay, try plugging into a power socket with ample power output. If you have a magic keyboard, connect your iPad to it to charge.
5. Clean the Charging Port
If you’ve ruled out the possibility that your charging cable or adapter is the cause of the problem, proceed to remove any accumulated debris, dust, or lint from the charging port.
Get a can of compressed air for this step.
- Turn off your iPad
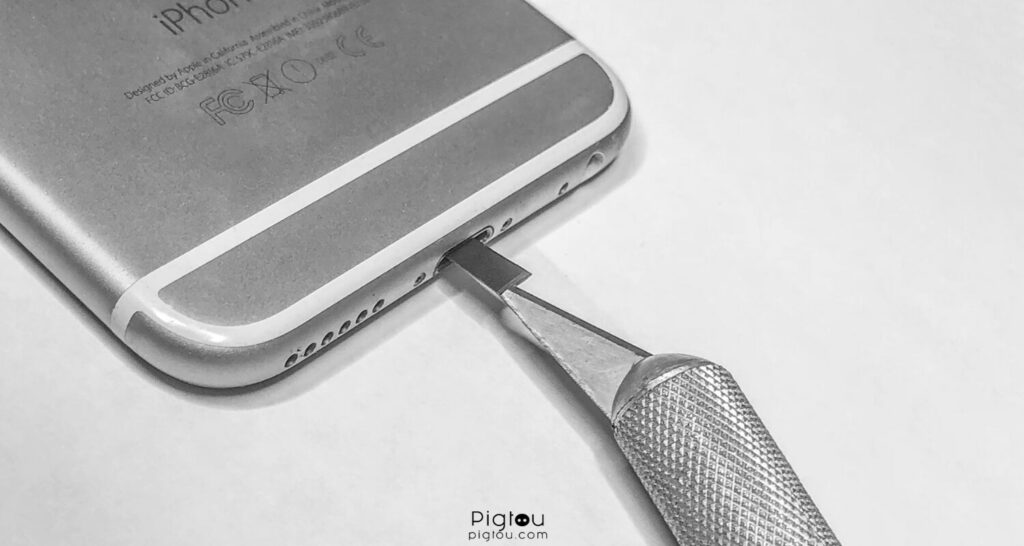
- Gather soft and non-abrasive tools (such as a toothpick or a soft brush)
- Carefully inspect the charging port for debris or lint
- Hold the device upside down
- Gently use a toothpick or soft brush to remove visible debris
- Optionally, use short bursts of compressed air if needed; however, avoid using liquid cleaners or blowing excess compressed air directly into the port
- Inspect the port again to ensure there’s no visible debris
- Connect the iPad to the charger to see if the problem is resolved
NOTE: Exercise caution and be gentle during the cleaning process to prevent damage to the charging port and the internal components of your iPad.
6. Insert an Electrical Tape in the Charging Port
Sometimes, a loose lightning charger connector port could be the cause. Insert a piece of electrical tape into the female connector hole to fix this issue.
- Shutdown the iPad and remove the casing, if any
- Cut a tiny rectangular piece of tape about half an inch
- Slide the tape into the charging slot; be careful not to hit the sides
- Place your iPad on a table facing down (ensure the charging port is facing towards you)
- Place the tape’s sticky side down lengthwise into the hole about one-quarter inch
- Wrap the quarter inch of tape that remains outside the hole around the curved edge of your device down towards the screen
- Use either the lightning connector or a small paper clip to press the tape down inside the hole so that it sticks to the screen side of the charging receptacle
- Gently insert the lightning connector in to make sure it fits snugly (but not too snugly); also, make sure that when you insert it, the tape is not being pulled inside and bunching up
7. Manage Background Processes
Close unnecessary background apps and processes because they may consume too much power, hindering the charging process.
- Open “Settings”
- Go to “General”
- Tap “Background App Refresh”
- Toggle off the “Background App Refresh” switch
- Optionally, manage individual app settings
- Exit “Settings” when done
8. Check Battery Health
Regularly assess your device’s battery health through system settings or diagnostic tools. If the battery health is significantly degraded, get a new replacement battery.
- Open “Settings”
- Navigate to “Privacy & Security”
- Tap “Analytics & Improvements”
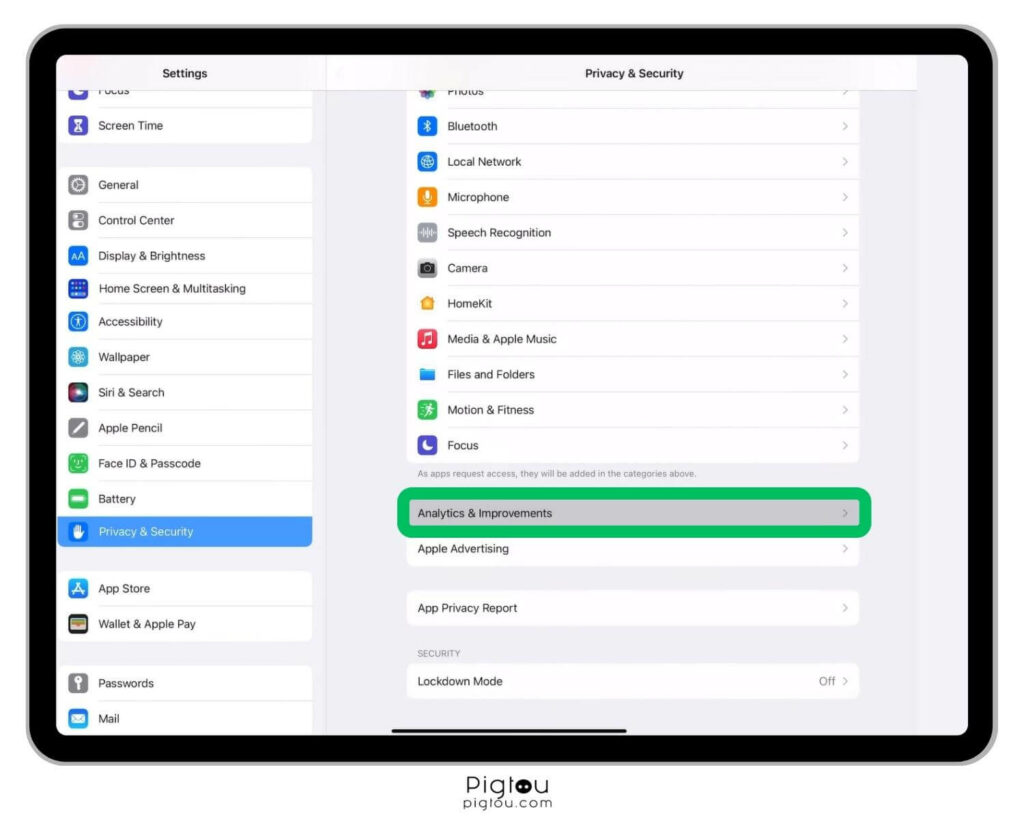
- Select the latest “Analytics” file
- Find “Maximum Capacity Percent” and “Cycle Count” values
- Check these values for your battery’s current status
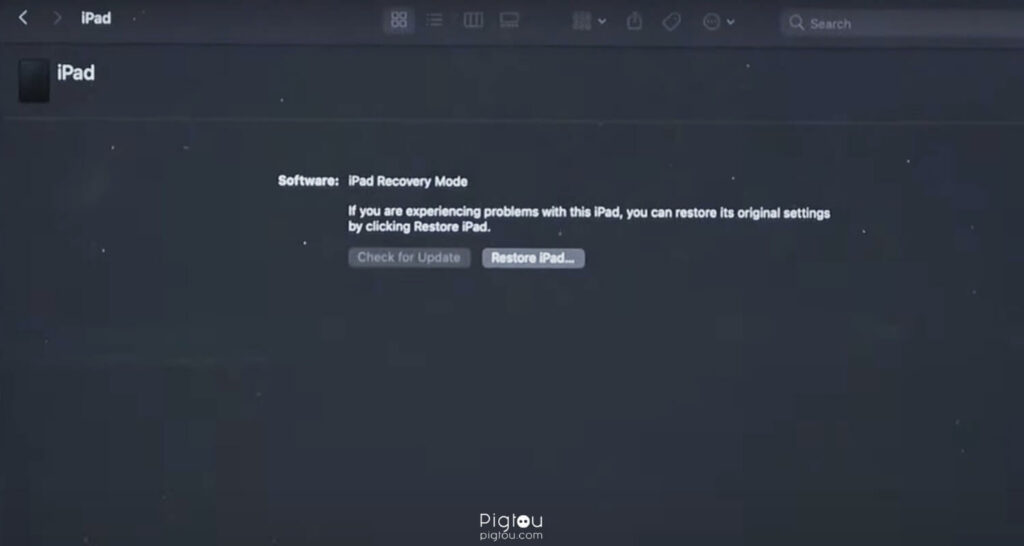
9. Perform a Device Firmware Update (DFU) Restore
A DFU restore has many benefits, including helping your iOS recover from software glitches or bugs.
- Connect your iPad to your PC
- Turn the iPad off (or leave it on)
- Press the “Home” and “Power” buttons simultaneously for 10 seconds (no more, no less)
- After 10 seconds, release the “Power” button and continue holding the “Home” button for another 15 seconds
- Wait as the device enters DFU mode
- Check whether the iPad is now charging