
The windows 10 User Accounts and Settings app under the Control Panel (CP) can allow you to edit user accounts. But with the snap-in console’s Local Users and Groups management feature, you gain access to more details such as the permissions granted to groups and users on your personal computer.
Local User and Group Management (LUSRMGR.MSC) is a tool that supports managing local computer user accounts and groups. The tool can delete, add, or edit local user groups and accounts on a PC, including adding and removing users from local groups. It can also change the attributes of user accounts, such as login scripts, password policies, and home directories.
However, the LUSRMGR.MSC tool isn’t available under the “Administrative Tools” menu on most Windows 10 and 11 Home computers. In this case, you can use a third-party program to enable the tool because it’s not activated by default.
You can also run LUSRMGR.MSC file to access Local Users and Groups Management or gain access using Computer Management Windows feature. In this article, you’ll learn how to enable LUSRMGR.MSC in Windows 10 and 11 computers, including how to view and manage all local users and groups on your PC.
How to Enable LUSRMGR.MSC in Windows 10/11 Home
Local Users and Groups Management resembles the Local Group Policy Editor function and is only available in Windows 11 Edu, Pro, and Enterprise OS editions. However, the built-in LUSRMGR.MSC snap-in isn’t available on the Home edition of Windows operating system.
LUSRMGR.MSC third-party tool, including features, resembles the built-in Windows user accounts and groups management tool. The portable application can run on any Windows 10 and 11 Home editions, making it ideal for enabling the built-in tool.
Available on GitHub, LUSRMGR.MSC download is free. However, you must assign LUSRMGR.MSC administrator privileges and set the .NET framework at 4.5 or higher for the tool to function properly. Enable LUSRMGR.MSC in Windows 11 or 10 is as follows:
1) Download an executable LUSRMGR.exe file.
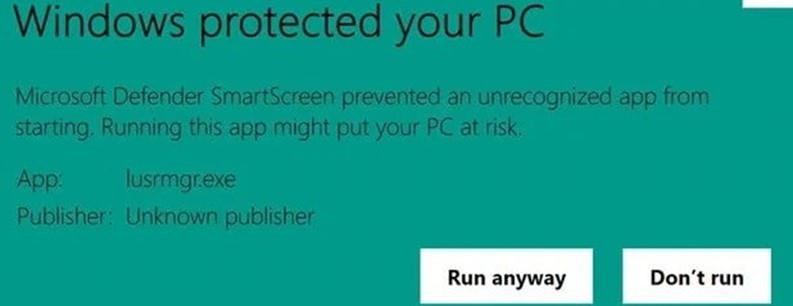
2) Double-click on the downloaded file to run it. If you encounter a Microsoft Defender SmartScreen prompt, click on “More Info.”
3) Click on “Run Anyway.”
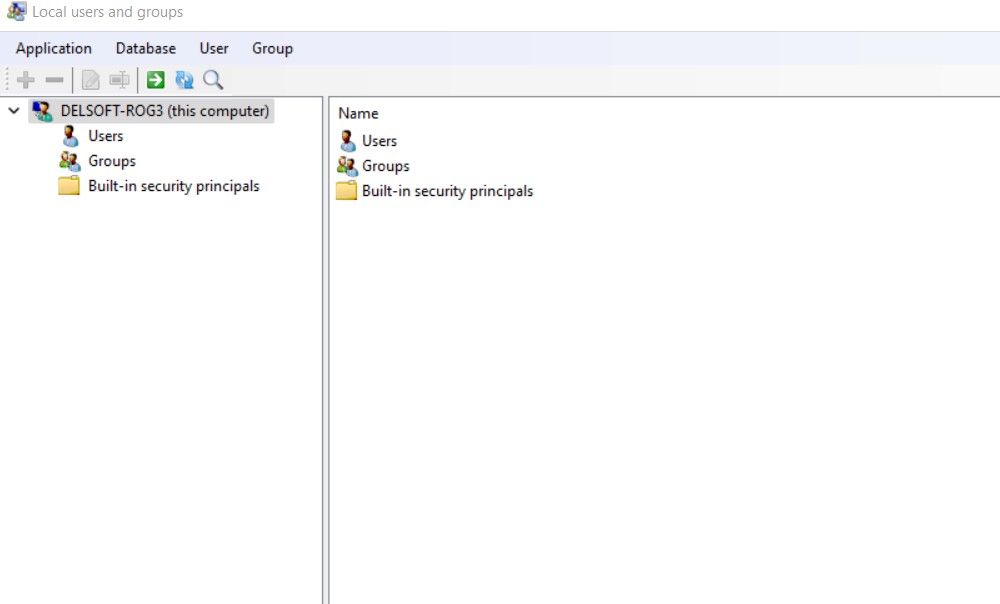
4) Launch the program, and a screen similar to that of the built-in LUSRMGR tool will appear as follows:
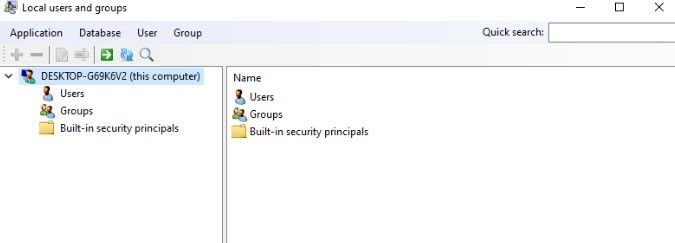
5) Create and manage user accounts and groups under the console.
How to Create a New User Account Using LUSRMGR.MSC
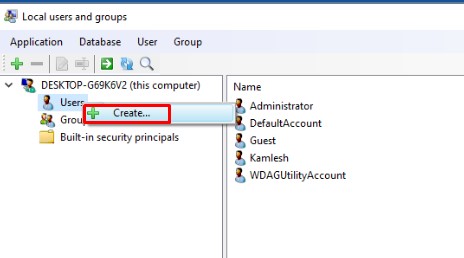
1) Click on the “Users” menu.
2) Select the option “Create” to create a new user.
3) Enter all the correct user account details and click on the “Create” button.

4) Configure the local path, advanced options, and profile, then click on the “Advanced” button.
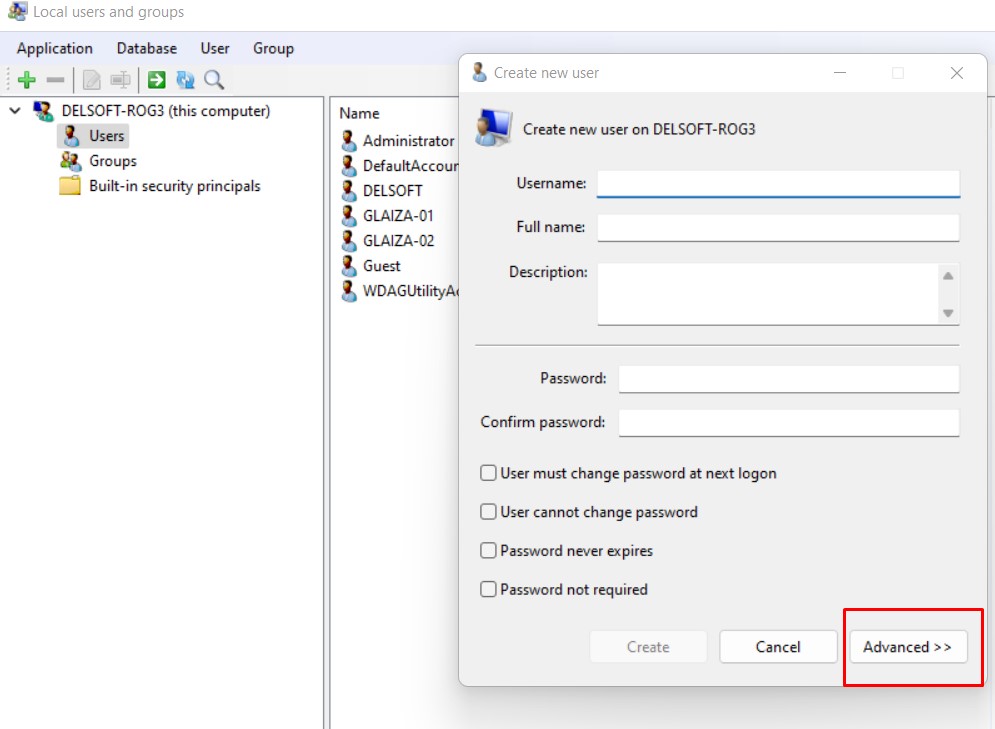
5) Click on the “Create” button to add the newly-created user account to your computer.
With the LUSRMGR tool, you can delete, edit, add, or rename an existing user account password. The tool also enables the creation of a hidden administrator account. It also allows remote connection to computers.
Other LUSRMGR.MSC Features
Apart from account management features, the LUSRMGR.MSC command line options offer other possibilities not available within the built-in utility. They include:
- Using the search function to find a particular user account. It enables system administrators to easily manage several user accounts.
- Defining individual user account access times or set blocked times for particular times and days. Right-click on an account’s username and select “Edit” to set its access time. Finally, click on the “Account” tab and select “Define access time.”
All user accounts lack a default time limit. Choose a time block for various days to define access time, if necessary.
Common LUSRMGR.MSC Errors
Some common errors linked to the local user accounts and groups include:
- Lusrmgr. Application error.
- Lusrmgr – bad image.
- Lusrmgr could not be installed.
- Lusrmgr could not be started.
- Lusrmgr could not be found.
- Lusrmgr failed to initialize properly.
- Lusrmgr could not be launched. Class not registered.
- Lusrmgr is not running.
- Lusrmgr has encountered a problem and need to close. We are sorry for the inconvenience.
- Lusrmgr is not a valid Win32 application.
- Error starting program: lusrmgr.msc
- The file lusrmgr.msc is missing or corrupt.
- Cannot find lusrmgr.msc.
- Windows failed to start – lusrmgr.msc.
- Faulting application path: lusrmgr.msc.
1. How to Fix the Common LUSRMGR.MSC Errors
Restore Your Computer to the Last Backup Image or Restore Point Prior to the Error
You can restore your Windows XP, Vista, 8, 7, 10, and 11 as follows:
1) Click on the “Start” button and type “System Restore” on the search box, then hit the “Enter” key.
2) Find “System Restore” in the search results and click on it.
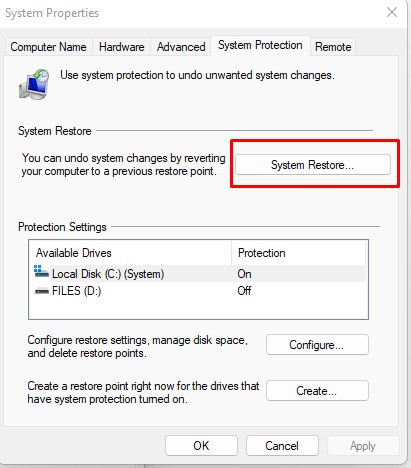
3) Enter your administrator password if prompted.
4) Follow the System Restore window prompts to select a relevant point of restoration.
5) Restore your PC to that restore point or backup image.
2. Run a Windows Update
An outdated Windows operating system is also linked to most lusrmgr.msc errors. Conduct an update as follows:
1) Click on the “Start” button and type “Update” in the search box, and hit the “Enter” key.
2) Click on “Check for Updates” on the Windows Update wizard.
3) Download available updates and click on “Install Updates.”
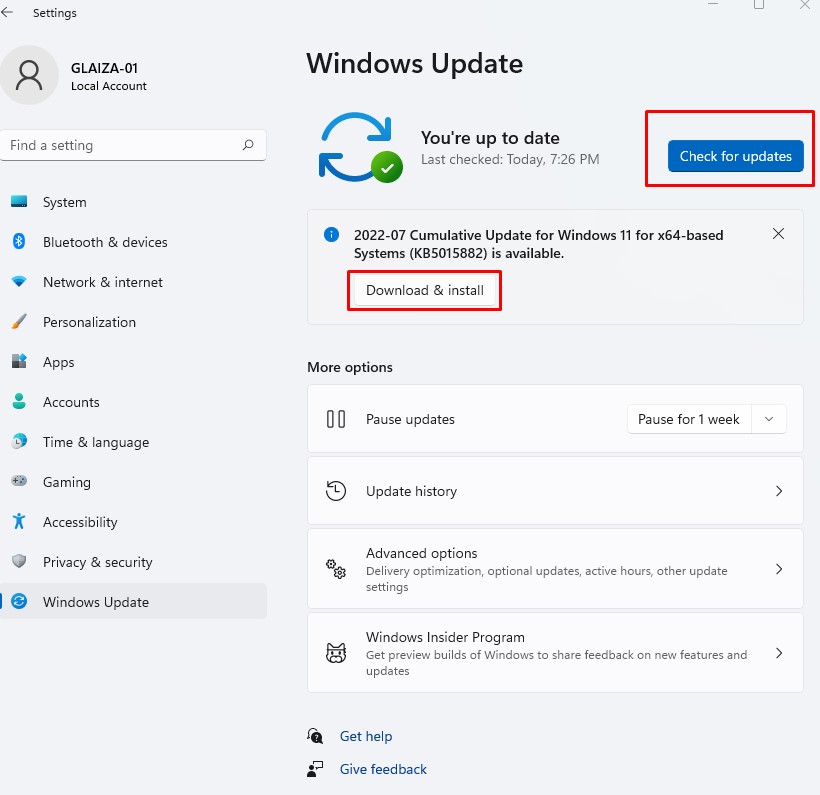
4) Restart your computer once all update downloads and installations are complete.
Conclusion
The local users and groups management tool enable easy control of local users and groups on your computer. The program allows for the addition, deletion, or modification of user accounts and groups. In addition, you can easily download the portable LUSRMGR.MSC application to enable the built-in feature on Windows 10 and 11.
Run Windows Update or restore your PC to the last restore point to fix most LUSRMGR.MSC errors, such as application error and could not be found or started. We hope that you found this helpful article and you were able to enable your local user and group management Windows feature.