![Roku Sound Out of Sync With Video [FIXED!]](https://pigtou.com/wp-content/uploads/2023/08/Roku-Sound-Out-of-Sync-With-Video-FIXED.jpg)
Audio synchronization issues on your Roku device can prevent you from enjoying your favorite streaming services. The sound might be out of sync, delayed, echoing, cutting in and out, or not working because of incorrect audio settings, corrupted cache, and outdated software.
Fret not; here are some unique solutions sourced from user-generated content to help you resolve this issue.
1. Check the Cause of the Lag
We recommend first going through the following steps to ensure that the issue explicitly emanates from your Roku Stick, not other devices or apps.
- Confirm if the issue occurs on all streaming apps or specific ones like Netflix, HBO, or Hulu
- Verify if the problem persists across different devices, such as a soundbar, Roku Stick connected to your TV, or a Roku TV itself
- Check that the TV is not muted and the volume level is okay
- Connect your Roku device to a different input to rule out faulty hardware
- Ensure that HDMI and optical audio cables are correctly attached to the Roku; it could be possible that the cables are faulty, so if you have spares lying around, switch them and see if that fixes your issue.
2. Adjust Audio Delay Settings on the TV
If your Roku TV is the issue, your audio delay settings are calibrated incorrectly. You can adjust the audio delay settings on the Roku TV or through your phone app.
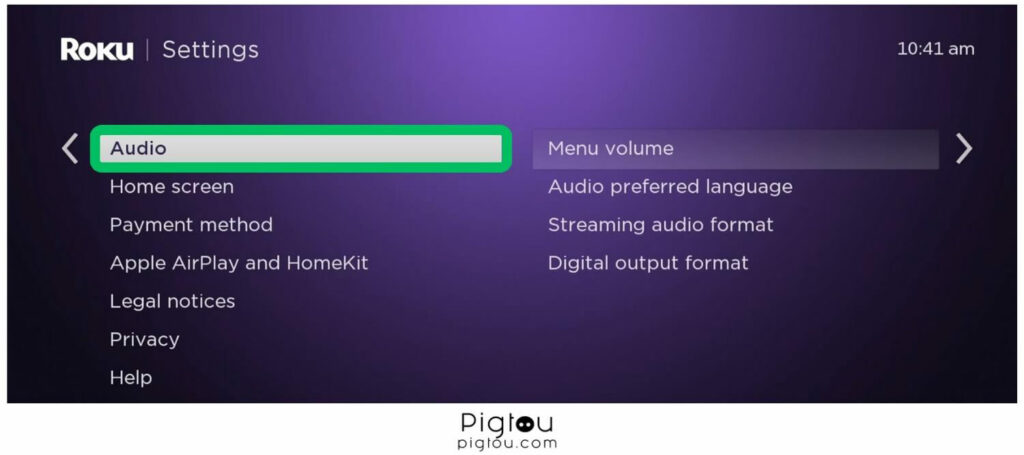
- Access the Roku “Settings” menu and navigate to “Audio“
- Select the “Audio delay” or “Lip sync” option
- Incrementally adjust the delay until the audio sync issue is resolved
- On your phone, download the Roku app and connect it to your TV (launch the app and go to Devices > Get help > Connect manually and add the device’s IP address)
- When the remote screen is active, a settings icon will appear; tap the “Adjust Audio delay” icon to conduct a 30-second audio test
- Wait as the app uses the phone’s camera to synchronize the audio
2.1. Check Audio Settings on Your Roku
Roku Sticks have many audio settings, and the best way to resolve the audio delay problems is to check out the different settings to ensure everything is in order.
- Press the “Home” button, then “Settings“
- Go to “System” and select “Remote & Devices“
- Click “Program Your Remote” and proceed to “Advanced Remote Program“
- Adjust “Switch Volume Control“
- Try different settings to see which one works best
2.2. Reset Audio and Picture Settings
Sometimes, the sound might be out of sync because of some audio settings on your Roku TV.
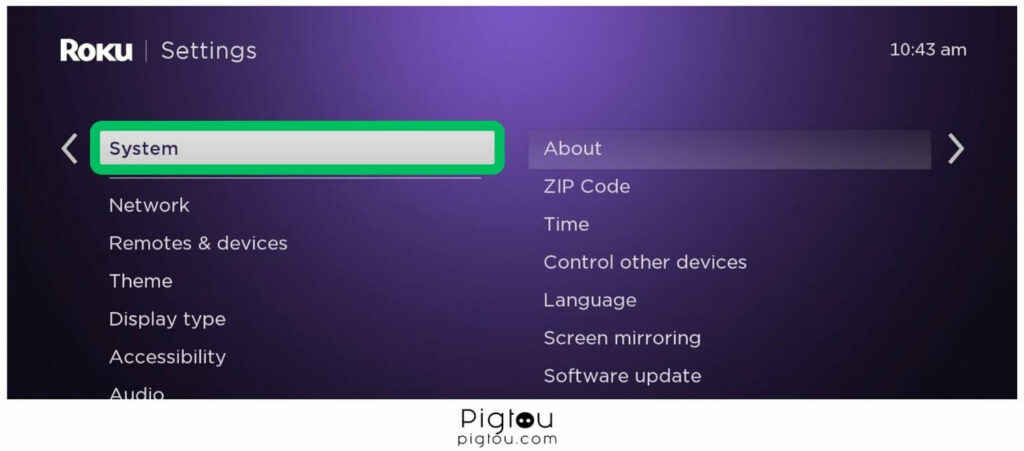
- Go to Home > Settings > System
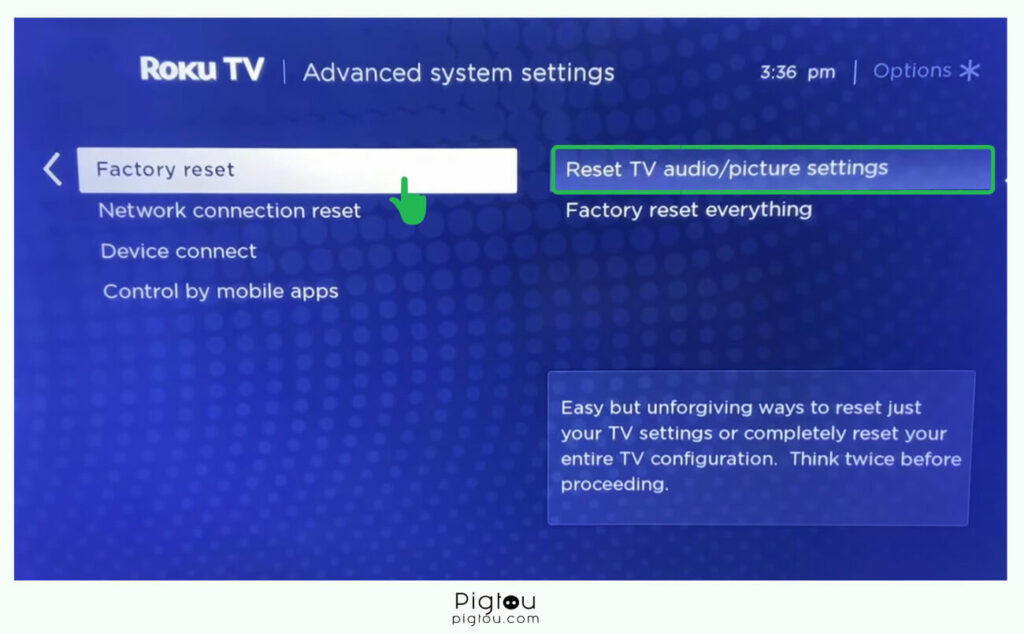
- Select “Advanced system settings“
- Move to the right twice and select “Reset TV audio/picture settings“
- Press the “Play/pause” button three times (as shown on the TV screen)
- Check whether your sound is working fine
3. Disable Volume Modes
Roku volume modes have been known to cause audio problems for some Roku users, including synchronization issues.
- Open the Roku “Settings” menu and go to “Audio“
- Find and turn off any volume modes like “Night mode” or “Leveling” (turning off these modes forces the sound from 5.1 to stereo/PCM output)
- Another option is to hit the “Star (*)” key while streaming from an app:
- Scroll to “Volume Mode“
- Turn off “Leveling“
- Exit from the video you’re watching and then resume watching it again
- Check if the sound sync problem is resolved

4. Change the Digital Output Format
The digital output format determines the type of audio signal sent from your Roku to your TV or sound system. The wrong Roku or TV formats can lead to audio sync issues.
- On your Roku device, navigate to “Settings” and select “Audio“
- Click on the “Digital Output Format” option
- Turn off the “Auto” function, then switch to “Stereo“
- Change your “Digital Output Format” to “Pass through”
- Test other different “Digital Output Formats” if the issue persists
NOTE: If the issue is with YouTube, go to “Settings” and turn off “5.1 Audio,” but if the setting was already off, try turning it on (when dealing with audio problems, turning the setting the other way around sometimes helps).
5. Restart TV Using Roku Remote
You can fix your audio sync issue by restarting your TV using a Roku remote; enter a unique key combination. This fix only works with a Roku remote, not a universal remote.
- Press “Home” five times
- Press “Up” once
- Press “Rewind” twice
- Pressing “Fast forward” twice
- Wait as the TV starts behaving funny for a few seconds, then the screen will turn black
- Once the TV boots up after about two minutes, check whether the audio sync issue is fixed

6. Update Your TV’s System
Outdated software can cause sound problems on Roku TVs, so update the system by following these steps:
- Grab your remote and go to the “Home” screen
- Scroll to “Settings”
- Move to the right and scroll to “System”
- Scroll and select “System update”
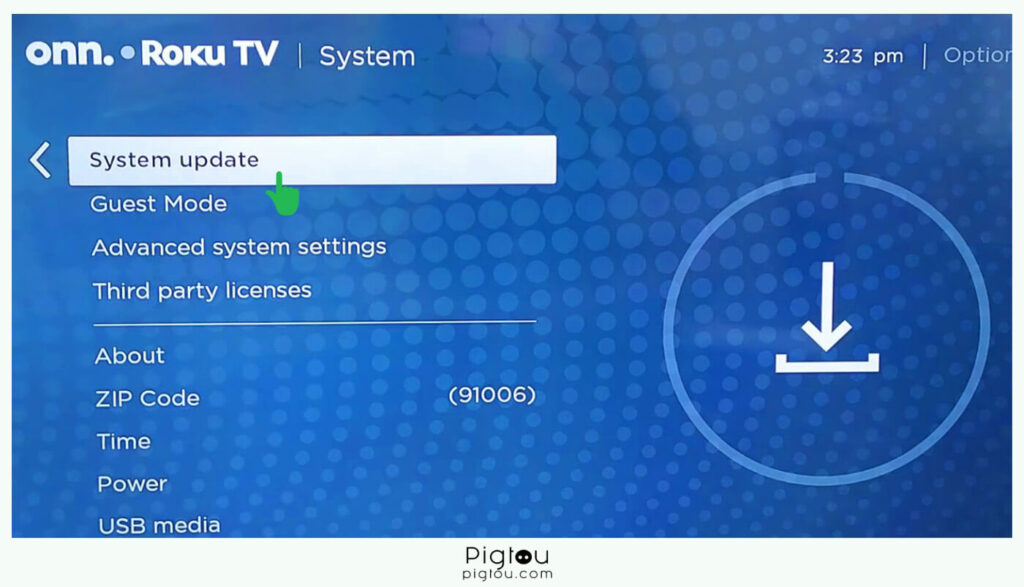
- Click “Check now”
- Proceed to download and install the update, if there’s any available
7. Perform a Factory Reset
Performing a factory reset means your Roku TV will return to its default/ factory settings. The device will forget all your login information on all apps, and you must sign in again after the reset.
- Grab your remote and go to “Settings”
- Select “System“
- Choose “Advanced system settings” and then “Factory reset“
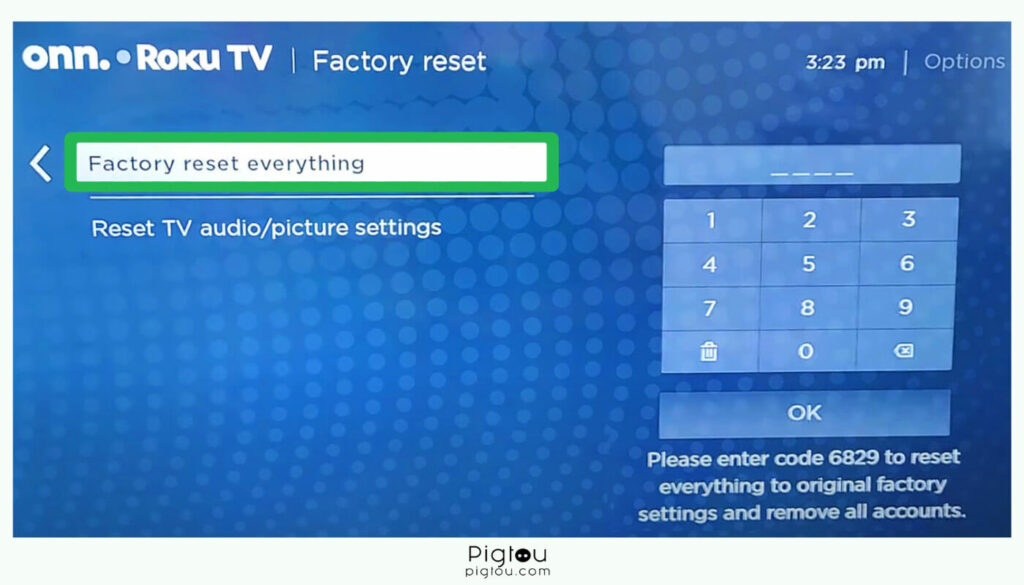
- Follow the on-screen instructions to reset your Roku TV
8. Adjust HDMI Settings
The HDMI connection carries both audio and video signals, and a mismatch in the settings can lead to audio lag or sync problems. HDMI “Pass through” and “Audio Delay” settings also contribute to the issue.
- Access the Roku “Settings” menu and go to “Audio“
- Select “Expert Settings” and choose “HDMI Audio Format“
- Switch the format from “Bitstream” to “PCM-Stereo“

- Ensure your “Digital Output Format” is the same as your “HDMI Audio Format“
- If these don’t work, you should turn on “Auto-Pass through” in your HDMI settings
9. Lower Screen Resolution
In some cases, you might be streaming at the wrong resolution or at a resolution that the Roku Stick struggles to match, resulting in a lag between the video and audio. Lower your resolution to the one immediately below the one you’re using.
- Go to the Roku “Settings” menu
- Select “Display Type’’
- Change your video setting from 1080 to 720 (select a lower resolution depending on your device)

10. Disable “Auto Adjust Display Refresh Rate”
If you’re an Amazon Prime user experiencing the audio delay issue, it could be due to the automatic display refresh rate.
- Go to the “Settings panel”
- Select “Advanced System Settings’’
- Proceed to “Advanced Display Settings’’
- Disable the “Auto adjust display refresh rate” feature
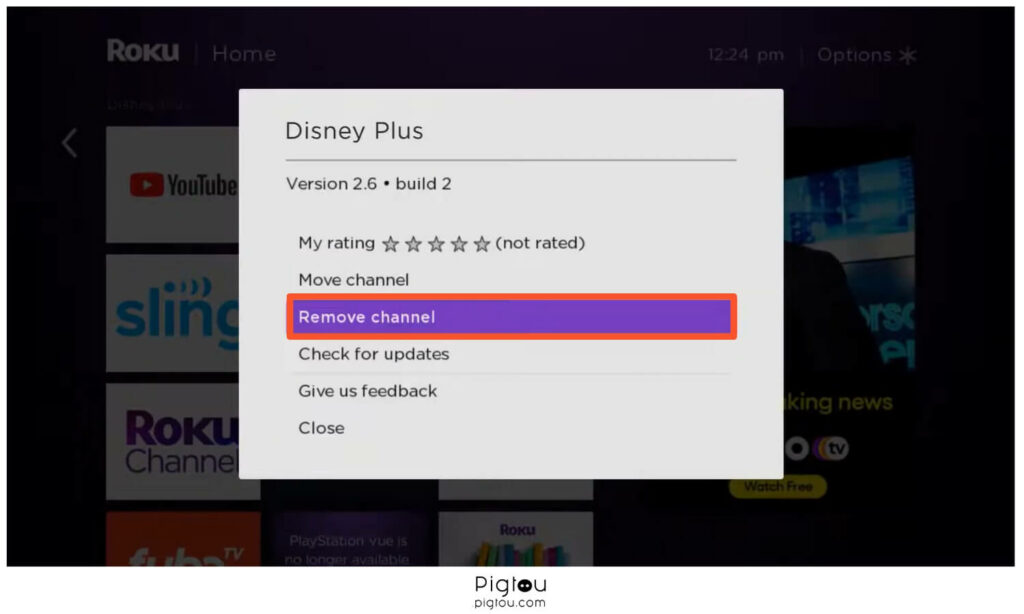
11. Remove and Add Channel
If the sound issue only affects one channel, try removing it and adding the channel back.
- Press the “Star (*)” key to navigate to the channel
- Choose “Remove channel”
- Grab your remote and go to “Settings”
- Select “System”
- Choose “System restart”
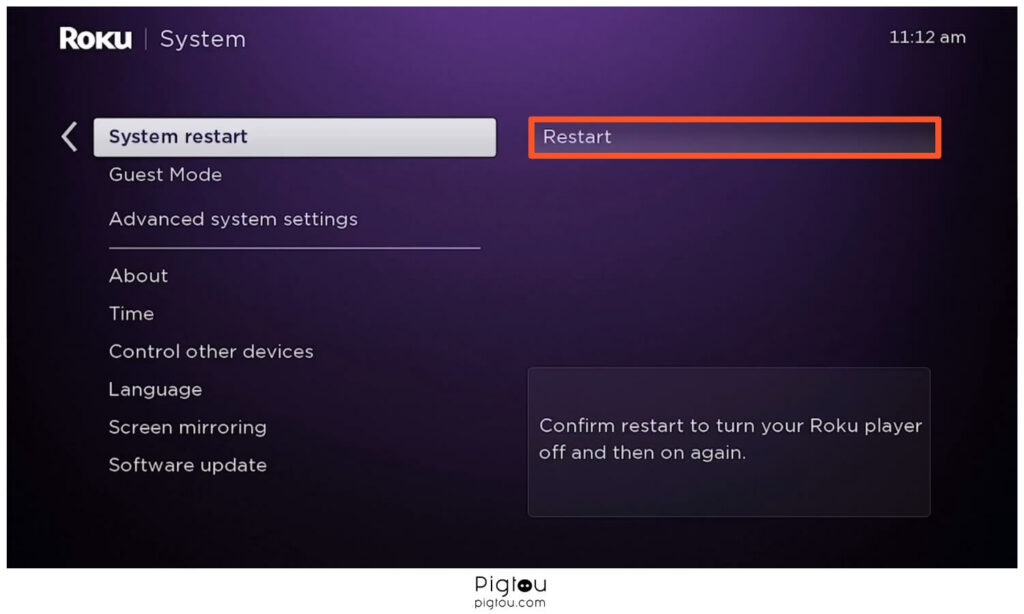
- After the TV restarts, add the channel back
- Check if this solves your sound issue
12. Release Static Energy
When static energy builds up, it can cause the audio signal to be delayed or garbled. The issue is more intense when watching movies with lots of action or sound effects.
- While the TV and Roku Stick are still on, unplug them from the power source
- Take the batteries out of the remote
- Let the devices stay that way for about 30 minutes
- Insert the batteries back into the remote
- Plug the devices back into the power source, turn them on, and check whether the issue is resolved
13. Contact Roku Support
If none of the solutions work, contact Roku support for further assistance.
- Open a web browser and open Roku Support
- Select “Account, payments, & subscriptions”
- Use your credentials to sign in
- Choose whether you want to call their number (816) 272-8106, chat with them, or send an email