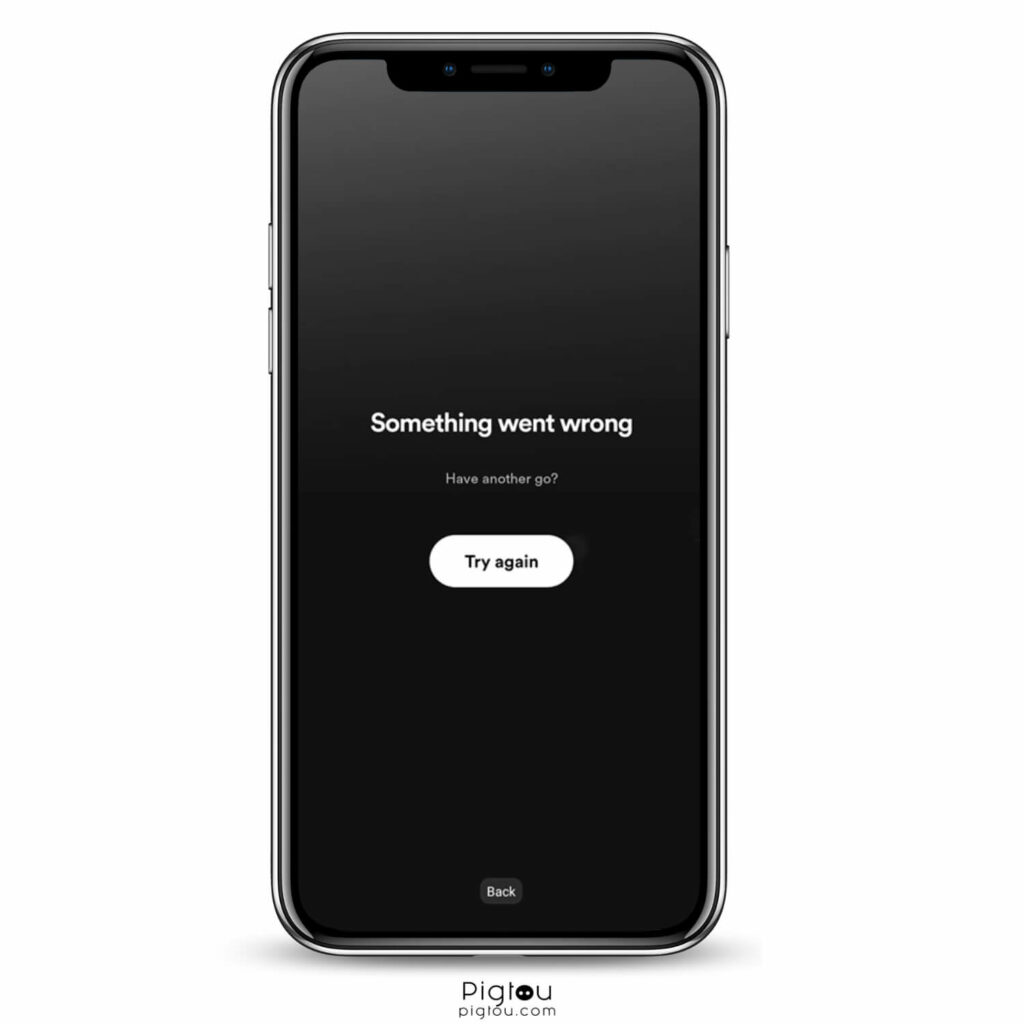
Ever tried to play your favorite Spotify songs, only to see “Something went wrong, have another go” error? Ugh, right? We’ve all hit that bump in our jam session. But hang tight! You’re in the perfect spot to fix this. Let’s dive in and get you back to listening without a pause!
Your 9 Go-to Solutions
We prepared a list of actionable solutions based on reports from real users who experienced the issue and were able to fix it. Let’s dive into solutions right now! So, let’s jump into these solutions and uncover the best ways to address the issue!
1. Check The ‘Offline Mode’
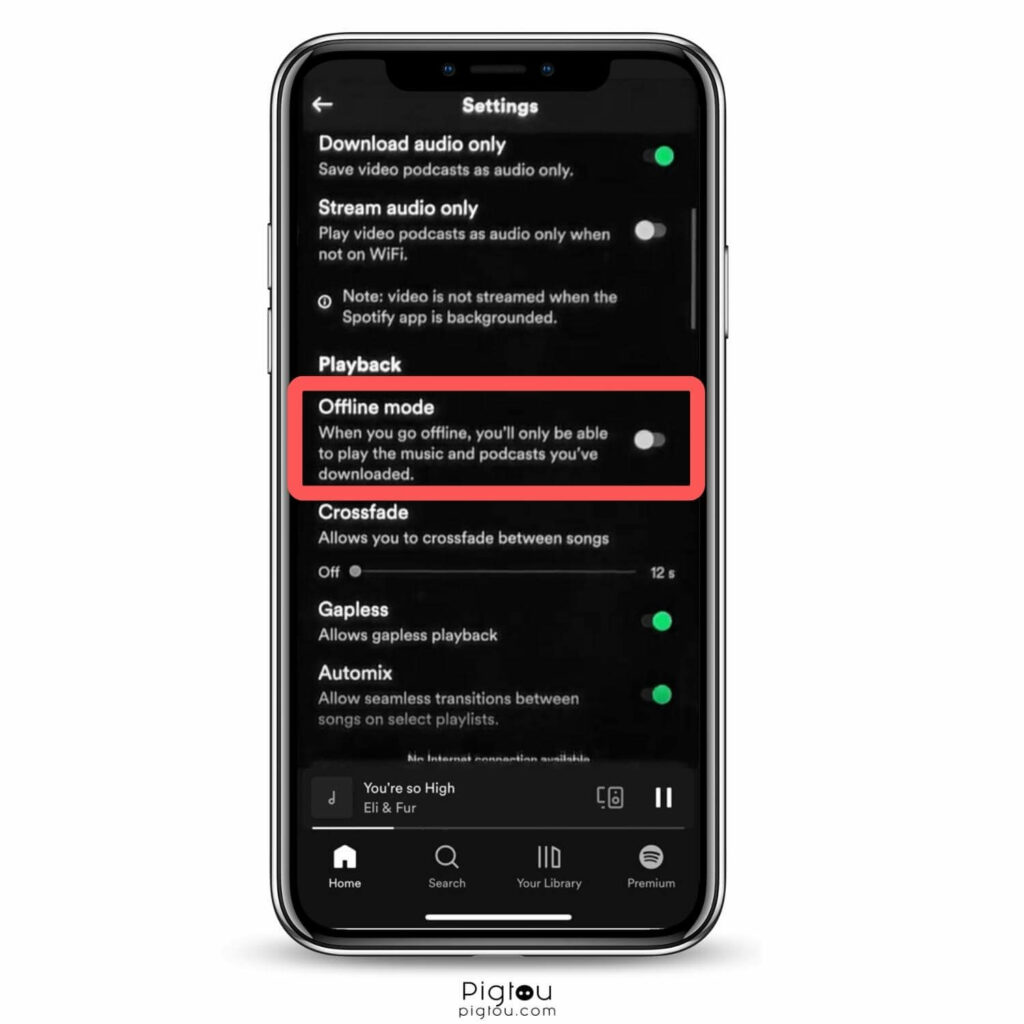
Sometimes the cause of the ‘Something went wrong’ problem may be the Offline mode.
In order to check if the offline mode is on or off, you need to:
- Open the Spotify app
- Go to ‘Settings’
- Click ‘Playback’
- Press ‘Offline Mode’ to turn it off
- Close the Spotify app completely and then relaunch it
Play a song on Spotify to check if the error message has been resolved and if you can enjoy uninterrupted playback! If your problem has not been solved, then continue reading!
2. Disable VPN
Having an active VPN on your device may be influencing the functionality of the Spotify app, and it could cause the ‘Something went wrong’ message to pop up. In order to solve the issue, follow these steps:
- If you have a VPN (Virtual Private Network) active on your device, navigate to your device’s settings or VPN app and disable the VPN connection.
- Close the Spotify application completely, ensuring it’s not running in the background.
- Relaunch the Spotify app after the VPN has been disabled.
With your VPN disabled, you should now be able to listen to your favorite tunes on Spotify, if not, proceed to another solution below.
3. Clear The App Preference
One of the solutions that seems to have worked for many users is clearing the Spotify app preference.
You can try clearing the app’s preferences by following these steps:
- Open Finder on your Mac and click Go > Library (if you don’t have hidden folders enabled, press the option key first and it should appear).
- Go to Application Support > Spotify.
- There you’ll find a file called prefs, which holds info about the currently logged-in account. Simply delete it.
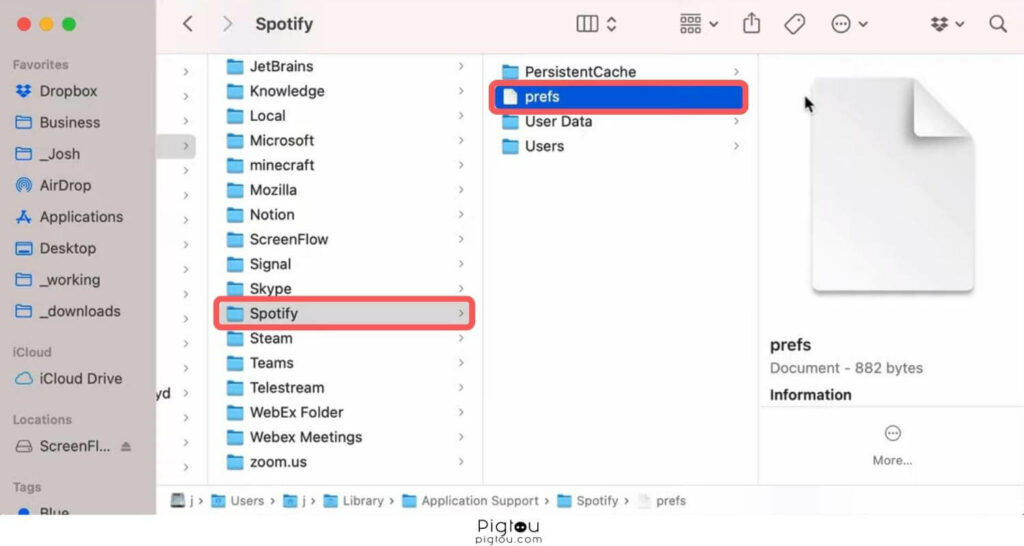
- While in the Spotify folder, you’ll also find a Users folder. Open it and delete its contents as well.
- Restart the Spotify app.
Note: You’ll be logged out and your settings will be reset, so you’ll have to adjust them again. If you had music downloaded for offline listening, you’ll have to re-download it as well. Your library, however, will not be affected, so no worries there.
4. Remove All Related Spotify Content From The Hosts
The Spotify issue may be caused by some hosts files you have downloaded, like the one someone uses to block the Ad from Spotify.
You can remove all the content related to the Spotify app from the hosts file on Mac, by following these steps:
- Open Finder and, in Finder’s menu bar, select Go > Go to Folder.
- In the box, type the following location: /private/etc/hosts and press return.
- A new Finder window will open and your Mac’s hosts file will be selected. Click and drag it out of the Finder window and drop it on your desktop.
- To open it, simply double-click and it will display the file’s contents in TextEdit.
- Check for any entries with Spotify in the address.
- If you do find any lines with Spotify, please remove them.
- Save your changes and restart Spotify.
In order to do the same thing on a Windows PC, you need to:
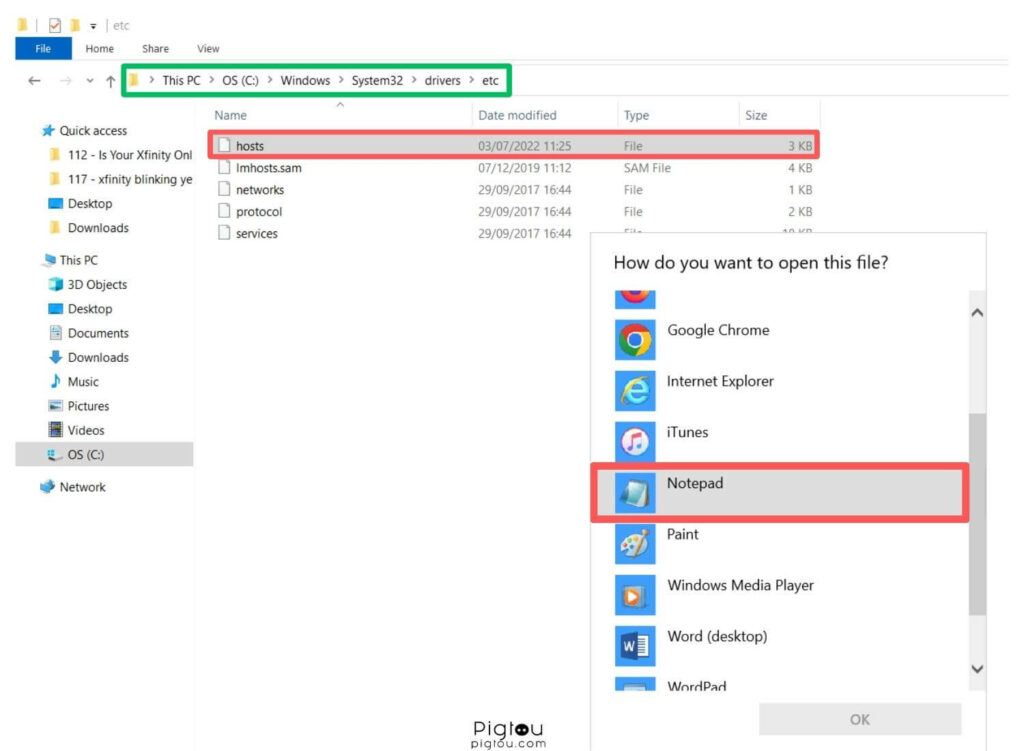
- Open the File Explorer and click on ‘This PC’.
- Click on the ‘Windows’ folder.
- Open the ‘System 32’ folder.
- Click on the ‘Drivers’ folder.
- Open the ‘Etc’ folder.
- Open the host file with Notepad.
- Check for any entries with Spotify in the address.
- If you do find any lines with Spotify, please remove them.
- Save your changes and restart Spotify.
Open the Spotify app and check to see if your problem has been solved!
5. Clear The DNS Cache
Regularly clearing your DNS cache serves a multitude of purposes. It aids in preventing phishing attempts and safeguarding your computer against potential attacks.
Furthermore, it ensures that you are directed to the latest iterations of your frequently accessed websites, reestablishes your internet connection, and upholds the privacy of your data.
It can also help with any problem with your connection that may be interfering with the Spotify app. You can clear your DNS cache by following these steps to see if that does the trick.
On MAC OS operating system:
- Press CMD+Search and search for Terminal.app.
- Enter the following command in the terminal: sudo dscacheutil -flushcache; sudo killall -HUP mDNSResponder
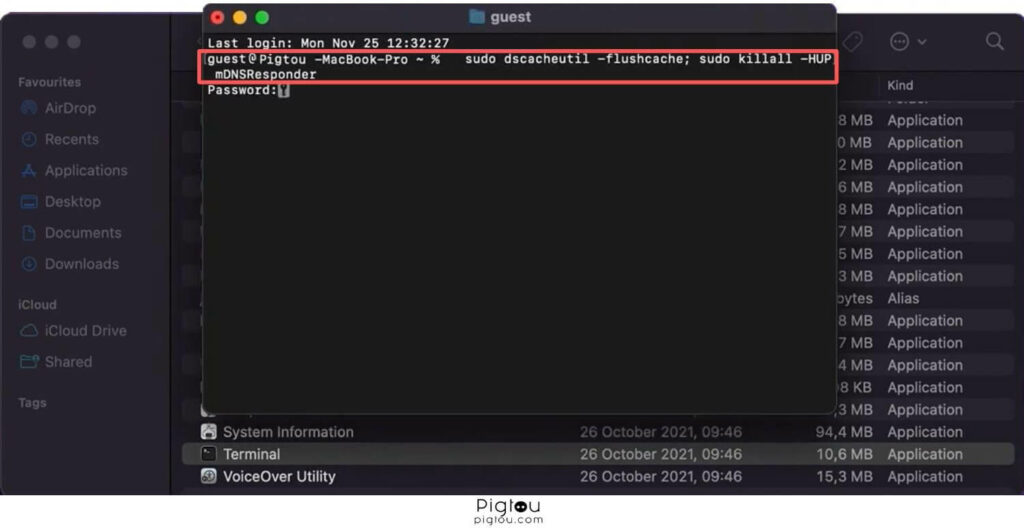
- Now enter your password to confirm.
To clear the DNS cache on Microsoft Windows, follow these steps:
- Open a DOS command window. To do this, click Start, click Run (or press Win+R keys on keyboard), type cmd, and then press Enter.
- At the command prompt, type the following command and then press Enter: ipconfig/flushdns
6. Try Connecting To A Different Network
The ‘something went wrong’ message could be related to a problem with your Network. In order to test if that’s the case, you should try connecting to a different network:
- If you have a smartphone, activate its mobile hotspot feature to create a new Wi-Fi network.
- Navigate to the Wi-Fi settings and select the newly created mobile hotspot network.
- Open the Spotify app and attempt to play a song to check if the “Something went wrong” message persists.
If the issue occurs only on your original Wi-Fi network, you may need to troubleshoot your router settings or contact your internet service provider for assistance.
7. Update The Spotify App
The problem with the Spotify app may be due to a problem directly associated with a Spotify update. In fact, the best thing is to always have the app updated to the latest software. In order to check for an app update, you need to:
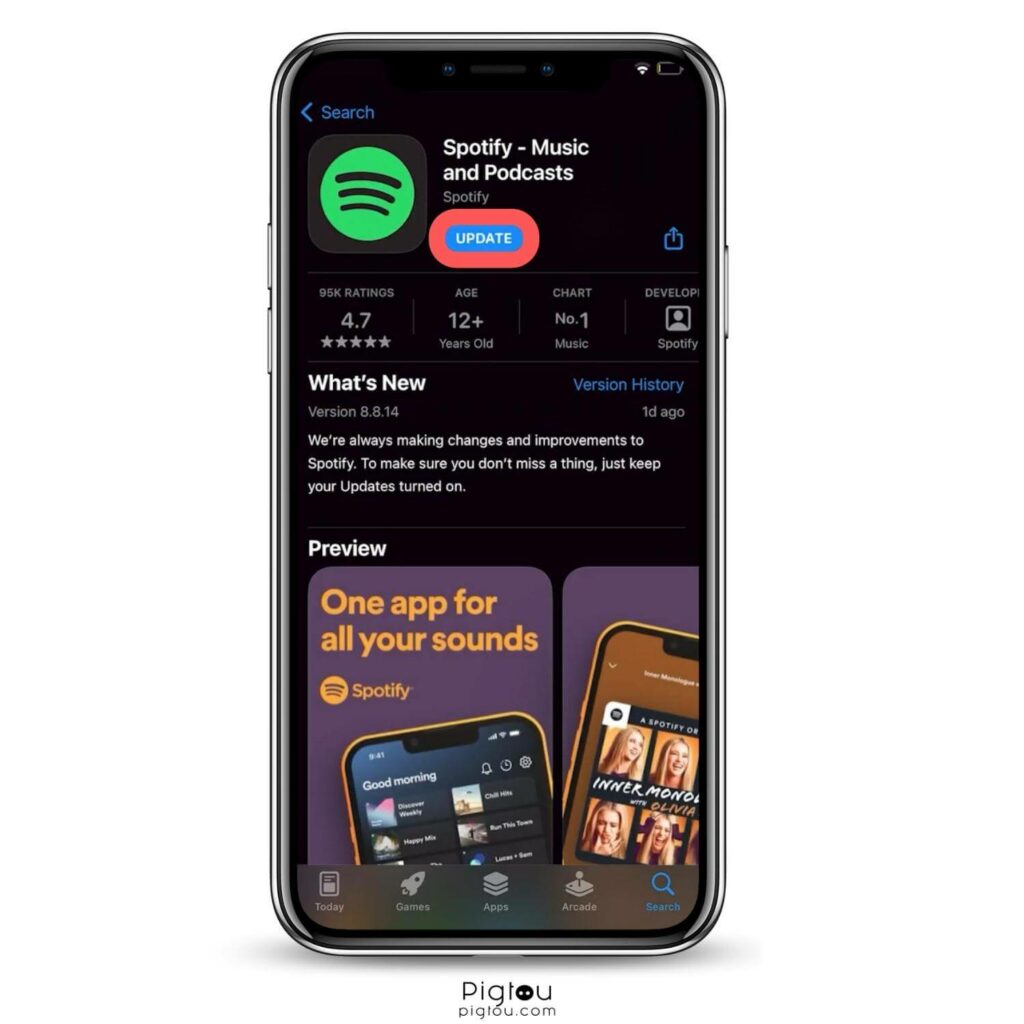
On IOS:
- Open the App Store.
- Tap your Apple ID image in the top right corner.
- Find Spotify, and tap UPDATE.
On Android:
- Open the Google Play Store.
- Use the search bar to find Spotify.
- Tap UPDATE.
On Desktop, when an update is available, a blue dot appears next to your profile picture at the top:
- Click your profile picture.
- Select Update Spotify now.
8. Clear Spotify Cache
Clearing the Spotify app cache may be an effective troubleshooting method! In any case, it’s worth giving it a try, since it’s a really simple process!
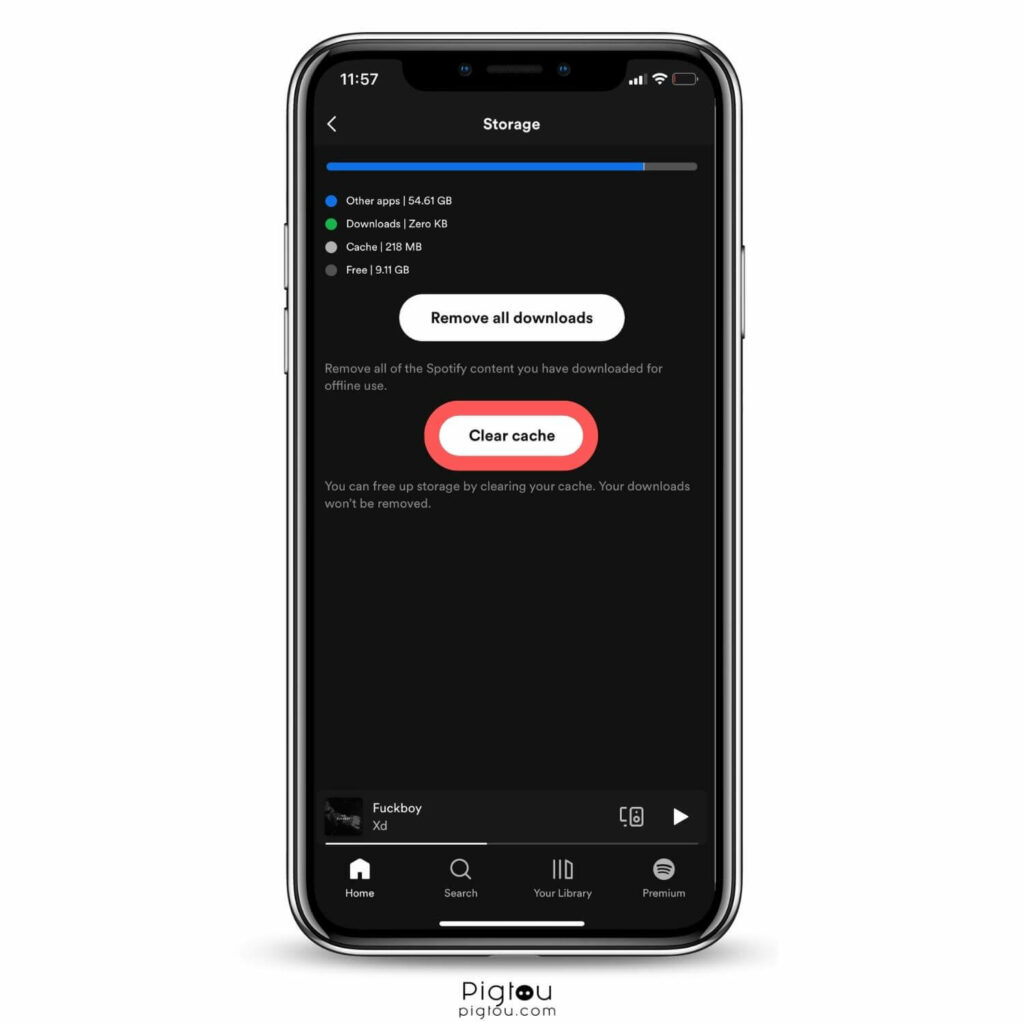
On IOS and Android:
- Open the Spotify app and tap the Setting icon
- On the Settings page, tap ‘Storage’
- Tap ‘Clear cache’
On Windows and Mac:
- Open Spotify app
- Click on your account name at the top right corner
- Click on Settings in the dropdown menu
- On the Settings page, click on ‘Storage’
- Select ‘Clear cache’
9. Contact The Spotify Customer Support
If after trying all the troubleshooting options in this article, you’re still struggling to get rid of the error, we recommend contacting Spotify customer support. The problem may be on their end, so they may be able to provide a solution that’s not included in our list.

![Something Went Wrong, Have Another Go on Spotify [FIXED!]](https://pigtou.com/wp-content/uploads/2023/08/Something-Went-Wrong-Have-Another-Go-on-Spotify-FIXED.jpg)