![Is Your Xfinity Online Light Off [PROVEN FIX!]](https://pigtou.com/wp-content/uploads/2023/08/Is-Your-Xfinity-Online-Light-Off-PROVEN-FIX.jpg)
When the online light on your Xfinity equipment goes off, it can cause frustration and disrupt your digital activities. This light indicates your internet connectivity status, and its absence signifies a potential issue needing attention. Common issues include network outages, outdated firmware, software glitches, and faulty connection cables. This article will discuss these causes and provide practical troubleshooting steps.
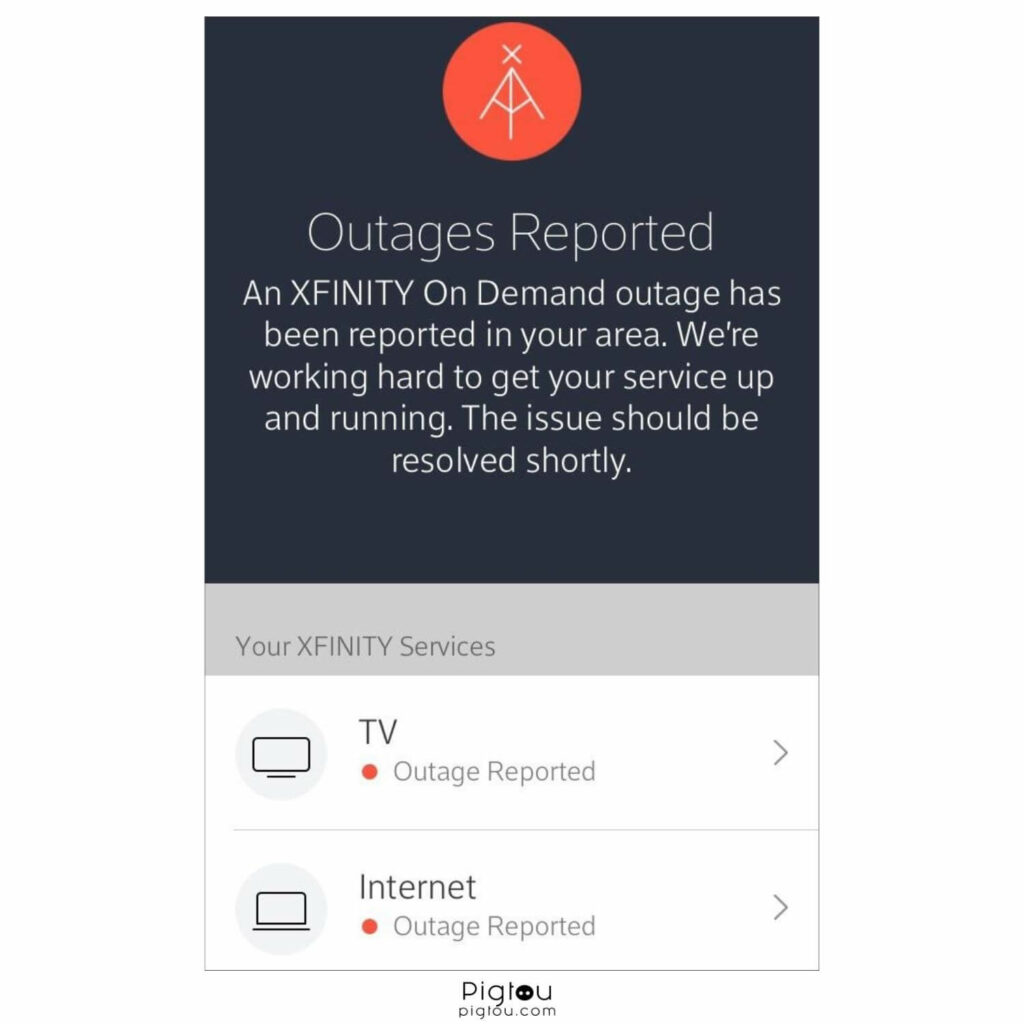
1. Check ISP Outage
One of the main reasons your Xfinity online light might be off is a network outage by your internet service provider (ISP).
- Sign in to Xfinity.com and click the “Account” icon
- Click “Support,” then scroll down to “Common Solutions”
- Tap “View Status Centre” to check outages within your area
- Check the color; red indicates there’s an outage that only impacts one service, and Xfinity is aware of the issue and is working on it, and green means there are no reported outages in your area
2. Update Xfinity Firmware
Sometimes, you might have outdated firmware; a quick update will fix the issue. There are two ways to update Xfinity firmware:
2.1 Update Software Automatically
Grab your phone or go to a computer and take the following steps:
- Log in to your router’s administration interface through the Xfinity app or website
- Go to “Maintenance” and click “Router Upgrade”
- Click on the “Check for Updates” button
- If there’s a new firmware update available, follow the instructions to install it
2.2 Update Software Manually
Use your computer and proceed as follows:
- Find the model number of your router (this is usually on the back of the router or in the user manual)
- Go to the Xfinity firmware update website
- Sign in with your Xfinity ID and password
- Enter the model number of your router in the search bar
- Click on the link for the firmware update
- Download the firmware update file to your computer
- Access the router’s dashboard (use the IP address, username, and password located at the back of the router) and select “Router Upgrade” in the “Maintenance section”
- Select “Browse,” then go to the folder you downloaded the upgrade
- Click “Upload” to start the update
3. Check Splitter Connections
The online light might not come on due to lose splitter connections, meaning the router might not be faulty. You’ll need a screwdriver set and a cable tester.
- Locate the splitter, which is usually near the main cable outlet in your home
- Look for any loose or damaged connections; the connectors should be tightly screwed into the splitter
- Use a cable tester to test the connections between the splitter and all the connected devices:
- Connect the cable tester to the splitter outlet
- Connect the cable tester to the modem or router
- Turn on the cable tester
- Wait for the display to show the signal strength and connection quality
- If the signal strength and quality are low, tighten the splitter and any loose connections with a screwdriver
- Retest the connections again with the cable tester

4. Reboot the Router/ Modem
The quickest fix to most router/ modem connectivity issues is a reboot. You can reboot an Xfinity modem by unplugging and re-plugging the power source, through the app, or web interface.
4.1 Reboot Via Xfinity App
Grab your iPhone or Android phone and take these steps:
- Open the app and sign in to your Xfinity account
- Tap on the “Gateway” tab and select “Manage Internet”
- Select the “Restart Modem” button
- Wait as the router troubleshoots and restarts automatically
- Check if the online light is back on
4.2 Reboot Via Web Interface
Connect to the internet and proceed as follows:
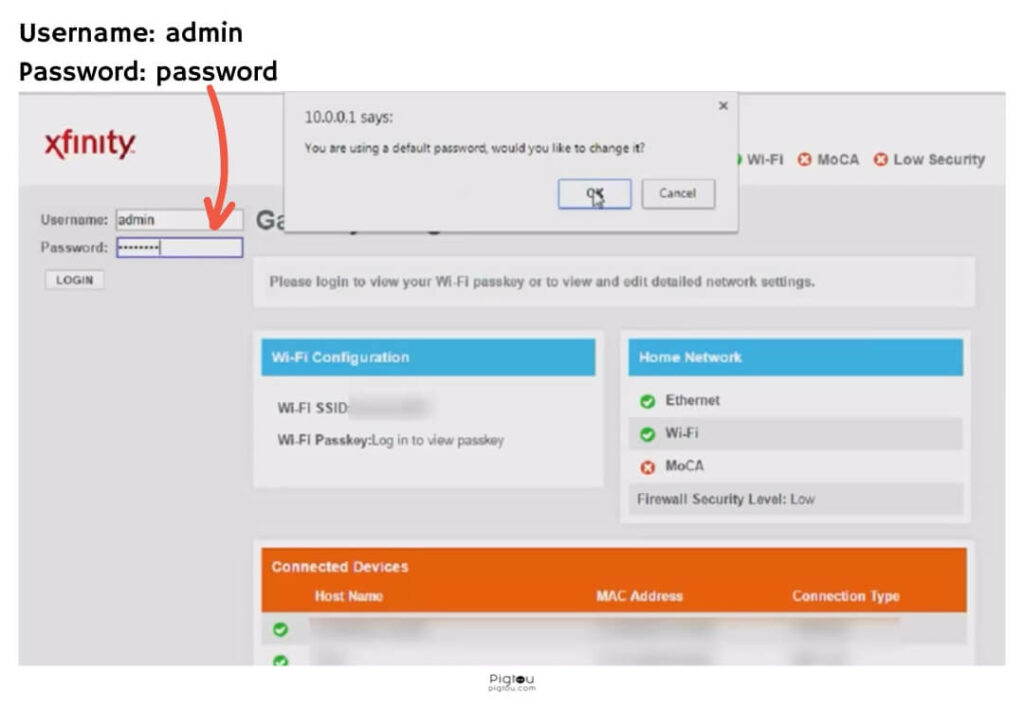
- Open a web browser and navigate to the router’s IP address
- Enter the username and password for the router
- Click on the “Troubleshooting” tab
- Select the “Reset/Restore Gateway” option
- Click on the “Reset WiFi Router” button
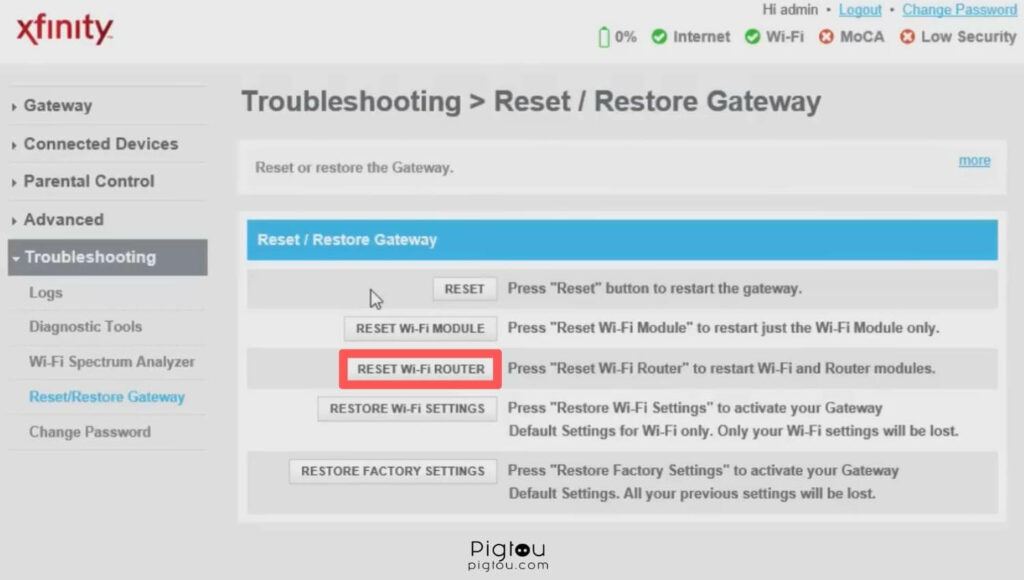
- Wait as the router restarts automatically
5. Hard Reset the Router
Hard resetting the router means clearing any custom settings or rolling back any new updates to the router’s factory settings.
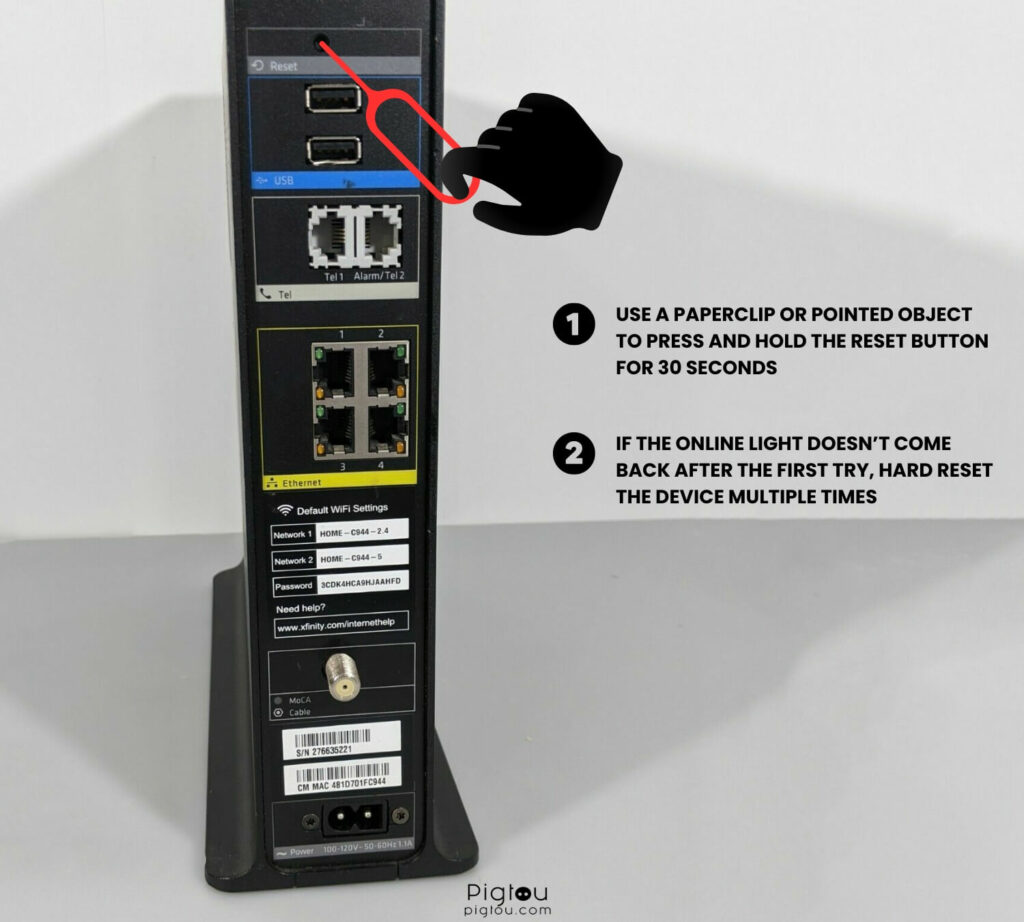
- Locate the reset button on the back of the router (it’s usually a tiny, recessed button)
- Use a paperclip or pointed object to press and hold the reset button for 30 seconds
- Release the button and wait for the router to restart
- If the online light doesn’t come back after the first try, hard reset the device multiple times
6. Check Coax Cable Connections
Coaxial cables connect Xfinity Internet, TV, and voice services to your home. Any damage or loose connections could limit signals. You might need a replacement coax cable, a cable tester, and a screwdriver set.
- Locate the coax cable connection (it may be in a closet, basement, or utility room)
- Inspect the coax cable connection; look for any loose or damaged connectors
- Use a cable tester to test the connections between the cable outlet and the modem or router:
- Connect the cable tester to the coax cable outlet
- Connect the cable tester to the modem or router
- Turn on the cable tester
- Check the signal strength and quality of the connection on display; if the signal strength and quality are low, you may need to tighten the coax cable connections or replace the coax cable
- Use the screwdriver to tighten any of the connections
- If the connections are tight and the cable tester still shows problems, replace the coax cable
7. Disable ZeroAlarm Firewall
For the older Xfinity models, firewalls could limit data, especially ZeroAlarm, that’s known to drop many DHCP requests. This can corrupt data in its access database, limiting the data flow.
7.1 Use Windows Service Manager
Connect your computer to the internet and take these steps:
- Click on the “Start” button and type “Services” in the search bar
- Click on “Services” and find the “ZoneAlarm Firewall Service” in the list
- Right-click on the “ZoneAlarm Firewall Service” and select “Properties”
- In the startup type drop-down list, select “Disabled”
- Click on the “OK” button
7.2 Use the ZeroAlarm Interface
You can also login into the firewall’s interface to turn off the feature.
- Open the “ZoneAlarm software client”
- Click on the “Settings” icon in the top-right corner of the window
- Select the “Firewall” tab
- Move the firewall’s ON/OFF slider to the “OFF” position
8. Contact Xfinity Support
Since each situation is unique, and specific factors could contribute to your problem, contact Xfinity support if the above solutions don’t help you.
- Send a direct message to support via https://comca.st/3eXtBdr (first sign in and click on “Direct Messaging”)
- Alternatively, you can call their tech support at 1 (888) 936-4968