Are you having trouble connecting your Xfinity remote controller to your cable box? A reliable connection between the remote and the cable box is essential for seamless control of your entertainment experience. If you’re facing connectivity issues, there are several troubleshooting steps you can take to resolve the problem, which often occurs when your remote is new, has dead batteries, or you’re using an old power adapter.
This guide will discuss various solutions to help you establish a successful connection between your Xfinity remote and the cable box.
1. Factory Reset the Remote
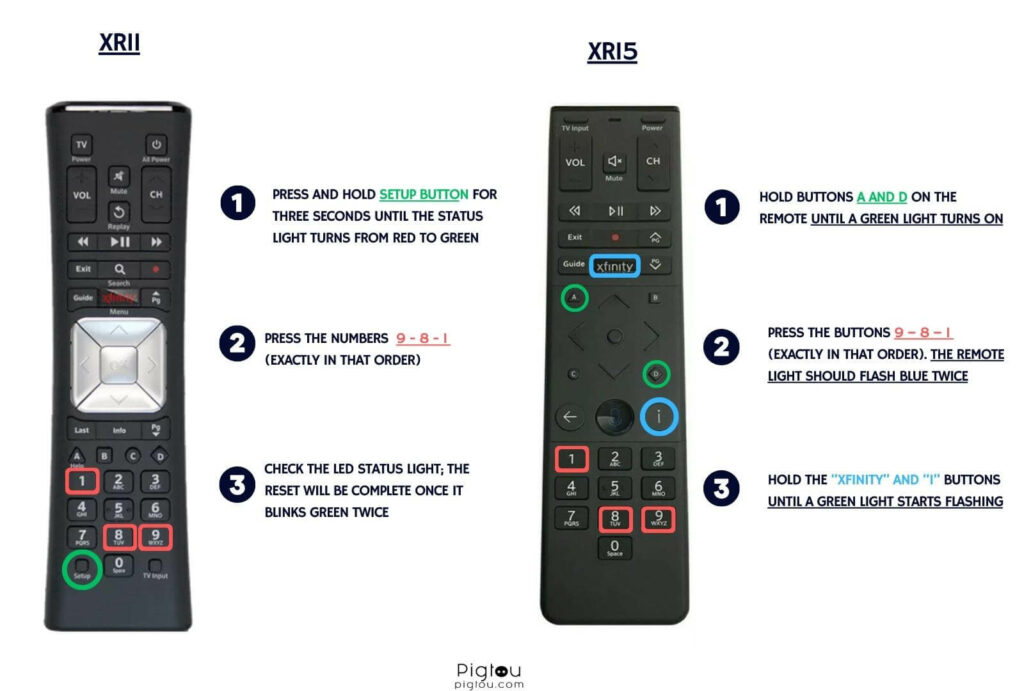
Resetting your remote will erase all previous settings, including your TV’s and other devices’ programmed codes. The factory reset process varies depending on the model of your remote.
1.1 Use the Remote’s Setup Button
If your remote has a setup button, take the following steps to reset it:
- Turn on your TV and cable box
- Press the “Setup” button and keep holding it until the LED at the top of the remote changes from red to green
- Enter the 9-8-1 code
- Wait for the remote to reset (the LED light will blink green twice)
1.2 Reset Without the Setup Button
For a remote that doesn’t have the setup button, take these steps:
- Turn on your TV and cable box
- Press the “A” button and the “D” button on the remote at the same time and hold them for about 15 seconds
- Enter the 9-8-1 code after the LED changes from red to green
- Wait for the reset to complete (check if the LED light blinked green two times)

2. Manually Pair the Remote
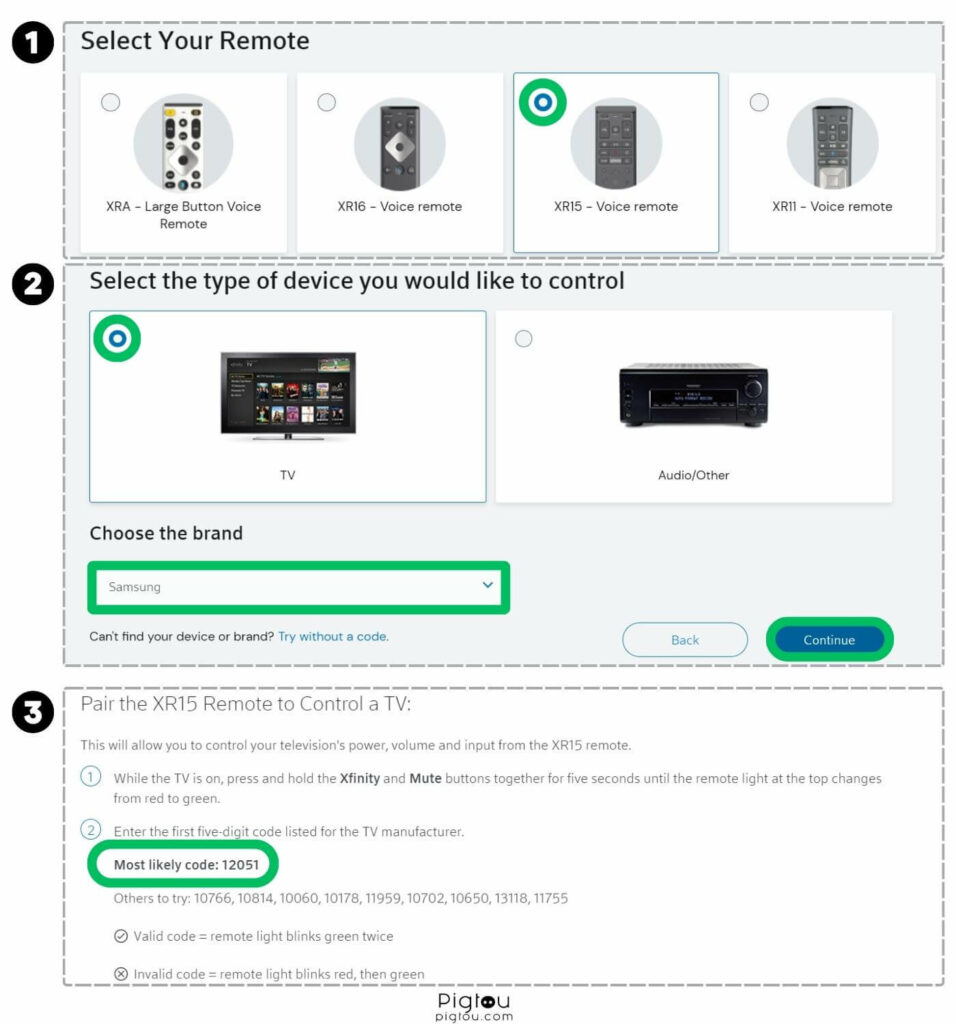
For a new Xfinity remote, try manually pairing it with the cable box to establish a reliable connection.
- Find your TV and AV remote codes by searching online or in your Xfinity user manual (they’re usually five digits long)

- Press “Setup” and hold it until the LED at the top of the remote changes from red to green, and then press 9-8-1 (the LED blinks green twice after the reset)
- If your remote doesn’t have a setup button, press and hold the “Xfinity” and “Mute” buttons until the red light changes to green; follow the prompts to complete the pairing process
- If your remote doesn’t have any numbered keys, activate it by flipping it on its back and removing the tab
- Aim the remote at your Xfinity box and press the “Microphone” button
- Say, “Program remote,” and follow the on-screen instructions, but don’t pair your remote to your TV yet; repeat the preceding steps several times if the on-screen instructions don’t appear
- Pair your remote to your TV directly by pressing and holding the “Setup” button on the remote until the LED changes from red to green
- Enter your TV code, and the LED should blink green twice to confirm the remote was set
- Check if your remote can control your TV and AV device (try turning them on and off, adjusting the volume, and switching inputs)
3. Change Remote Batteries
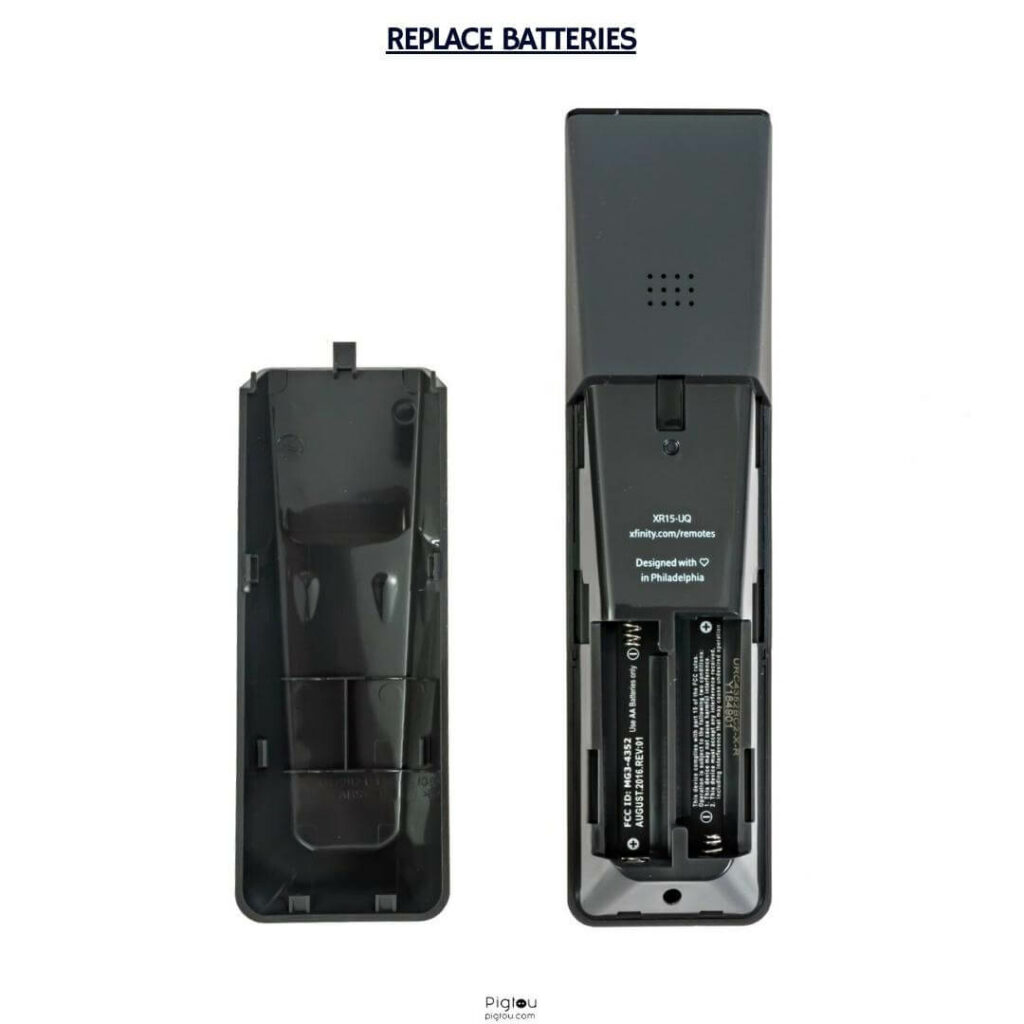
Check the battery status because low battery power can cause connectivity issues. You’ll need replacement AA batteries for this fix.
- Check whether the LED doesn’t flash at all or flashes red five times when you press a button (this is an indication that the batteries are extremely low and should be replaced)
- Open the battery compartment by removing the back cover of the remote
- If the batteries are loose or improperly placed, remove them and reinsert them securely
- Get the new batteries and insert them into the battery compartment; ensure you’ve placed the terminals correctly
- Power on your Xfinity remote and attempt to pair it with the cable box

4. Switch the Old Power Adapter
In some cases, it’s worth considering that the Xfinity adapter, which allows the remote to communicate with the cable box, may be faulty or incompatible. Get a replacement power adapter for this step.
- Power off your cable box and unplug the existing Xfinity adapter from the port
- Examine the adapter for any signs of damage, such as frayed cables or bent pins
- Plug the new Xfinity adapter into the corresponding port on the cable box, ensuring a secure connection
- Power on your cable box and wait for it to initialize and establish a connection with the new Xfinity adapter
- Attempt to pair your Xfinity remote with the cable box and check if the connectivity issue has been resolved
5. Power Cycle All Your Devices
This step clears all temporary glitches or conflicts that may be causing the connectivity issue between your Xfinity remote and the cable box.
- Power off your cable box; locate the power button on the cable box or unplug it from the power source
- Wait for at least 30 seconds to ensure all residual power is discharged
- While the cable box is powered off, unplug the router and wait for another 30 seconds
- Reconnect the router to the power source; allow it to power on and establish a stable connection (this process may take a couple of minutes)
- Plug in or turn on your cable box; give it a few moments to initialize and establish a connection
- Try pairing your Xfinity remote with the cable box again (follow the recommended pairing instructions provided by Xfinity or the steps above)
6. Troubleshoot Xfinity Firmware Through App
The Xfinity app offers a variety of features to help you manage and troubleshoot your Xfinity experience.
- Open the Xfinity app on your smartphone or tablet and sign in to your Xfinity account
- Tap the “Menu” icon in the top left corner of the screen
- Select the “Connect” tab and choose the specific device that’s having issues
- Scroll to “Troubleshoot Device”
- Follow the prompts to determine the problem and how to fix it
7. Contact Support
If you still can’t connect your remote to the cable box, contact Xfinity tech support for more troubleshooting steps.
- Open a web browser
- Go to Xfinity’s support page
- Start a chat with tech support and explain your issue
- Follow the steps they’ll provide

![Xfinity Remote Won't Connect to Cable Box [FIXED!]](https://pigtou.com/wp-content/uploads/2023/08/Xfinity-Remote-Wont-Connect-to-Cable-Box-FIXED.jpg)