![MacBook Air Not Charging, No Light [PROVEN FIX!]](https://pigtou.com/wp-content/uploads/2023/08/MacBook-Air-Not-Charging-No-Light-PROVEN-FIX.jpg)
Dealing with a MacBook Air that won’t charge or light up is aggravating, disrupting work, mobility, and data security. Uncertainty about the cause and repair costs compounds the frustration as our reliance on technology grows. Common culprits include faulty chargers, damaged ports, battery issues, software or hardware glitches, and System Management Controller (SMC) problems.
The silver lining is that these problems often have do-it-yourself (DIY) solutions. Let’s look at some user-recommended troubleshooting steps.
1. Reboot, Reset SMC, and Check Power Adapter
If your MacBook Air refuses to charge, doesn’t identify the charger, or doesn’t have a charging sign light, you can solve the problem in various ways. The initial fixes include restarting your MacBook, resetting the SMC, and assessing your power adapter.
1.1 Restart or Power Cycle Your MacBook
Restarting your MacBook can resolve software-related problems impacting its charging behavior. This action refreshes the operating system and processes, eliminating minor glitches causing charging issues.
- Save any ongoing work and close applications
- Click on the “Apple” logo
- Select “Restart” from the dropdown menu
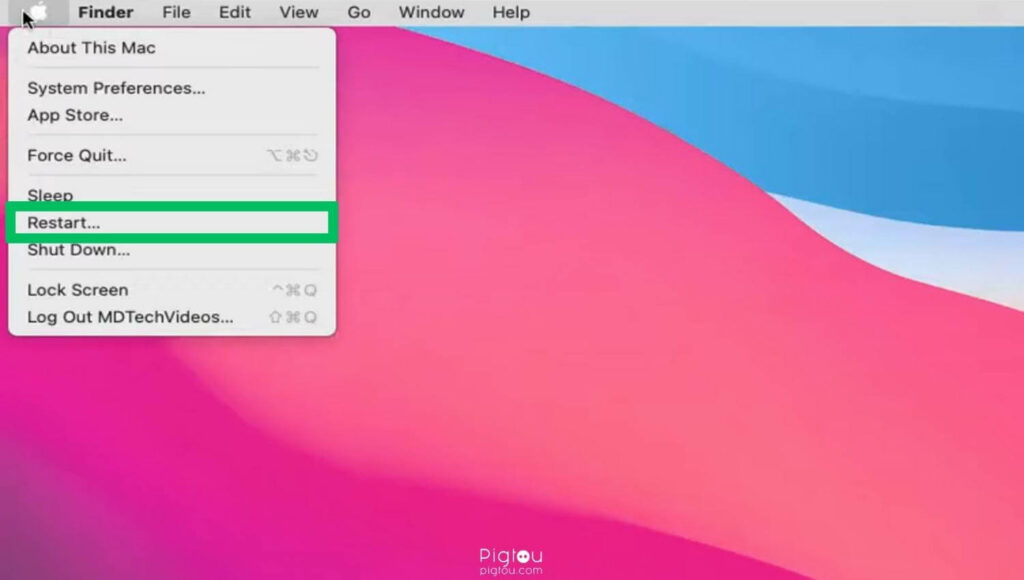
- Wait for your MacBook Air’s operating system and previous applications to reload
- Alternatively, you can power cycle the MacBook:
- Unplug the power cable
- Press and hold the “Power” button for up to 10 seconds
- Connect the power cable and check if the laptop is charging
1.2 Reset the System Management Controller
The SMC manages various hardware functions, including power-related issues. Resetting the SMC can help address charging anomalies and other hardware-related problems.
- Shut down your MacBook Air and connect it to the MagSafe adapter
- Long-press the “Shift,” the “Control,” the “Option,” and the “Power” buttons for about 7–10 seconds
- Release all the keys (including the “Power” button) simultaneously
- Turn on your MacBook
- After the SMC resets, check if your MacBook Air charges properly
- If the reset doesn’t work, contact a professional technician (you can find them on Craigslist) to check the SMC and power/motherboard for faults

ALSO READ: AirPods Max won’t charge past 1%
1.3 Check/replace the Power Adapter, USB-C Ports
To troubleshoot charging issues effectively, you might need a replacement power adapter and follow these actionable steps:
- Ensure your power adapter functions properly
- Inspect for physical damage, frayed cables, or bent connectors
- Confirm the charging cable is securely connected to the adapter and MacBook Air
- Test the adapter in a different power outlet to eliminate outlet-related problems
- If available, try an alternate compatible power adapter to identify whether the issue is with the adapter or the laptop itself
- Also, attempt charging through an alternative port if one port fails (a specific port might have a hardware issue or a faulty connection)
NOTE: If the power adapter gets too hot while charging, allow it to cool before charging again. Also, keep your MacBook from areas that are too cold inside the apartment, especially during winter.
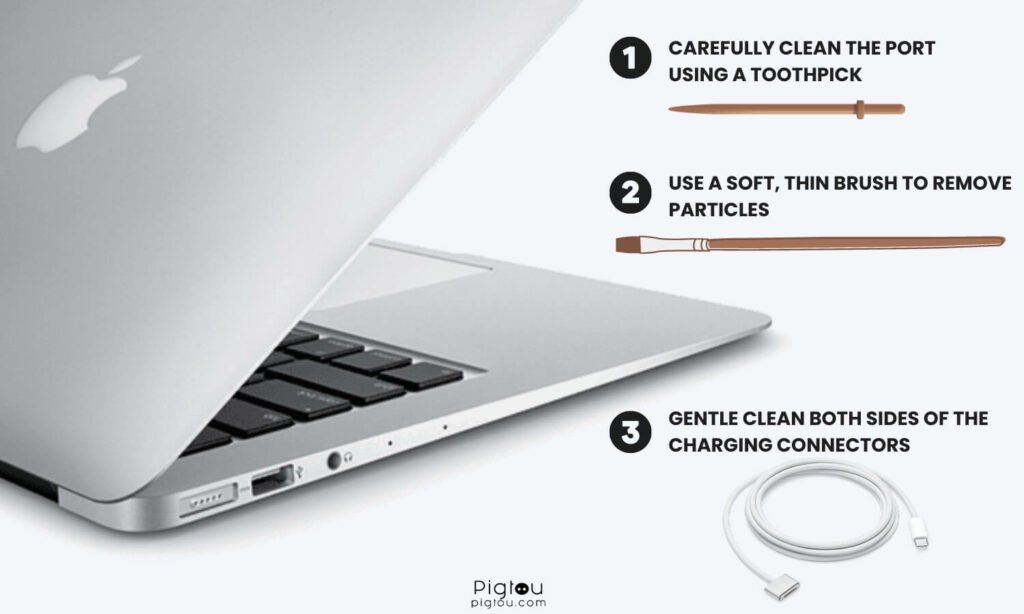
2. Clean the Charging Port & Connectors
Inspect and clean your MacBook Air’s charging port if you’ve ruled out issues with the power adapter or other ports. Dust, lint, or debris can accumulate in the port and on the connectors over time, hindering proper charging.
- Power off your MacBook Air
- Check the charging port for debris
- Use a soft, thin brush (or compressed air) to remove particles (avoid using liquids or excessive force as this can damage the electrical components)
- Gentle clean both sides of the charging connectors (use a microfiber cloth to clean recessed connectors and a pencil eraser for protruding connectors)
- Ensure the port is clean before attempting to charge your MacBook Air again
3. Reset the Parameter Random Access Memory (PRAM)
The PRAM holds certain memory of various settings even when the MacBook is powered off.
- Hold down the “Command” button, the “Option” button, the “p” button, and the “r” button simultaneously
- Turn on the Mac and keep holding the keys until the Mac reboots
- Wait for a second reboot and then release the keys
- Wait for the laptop to power up and then connect the charger
- Verify that it’s charging correctly

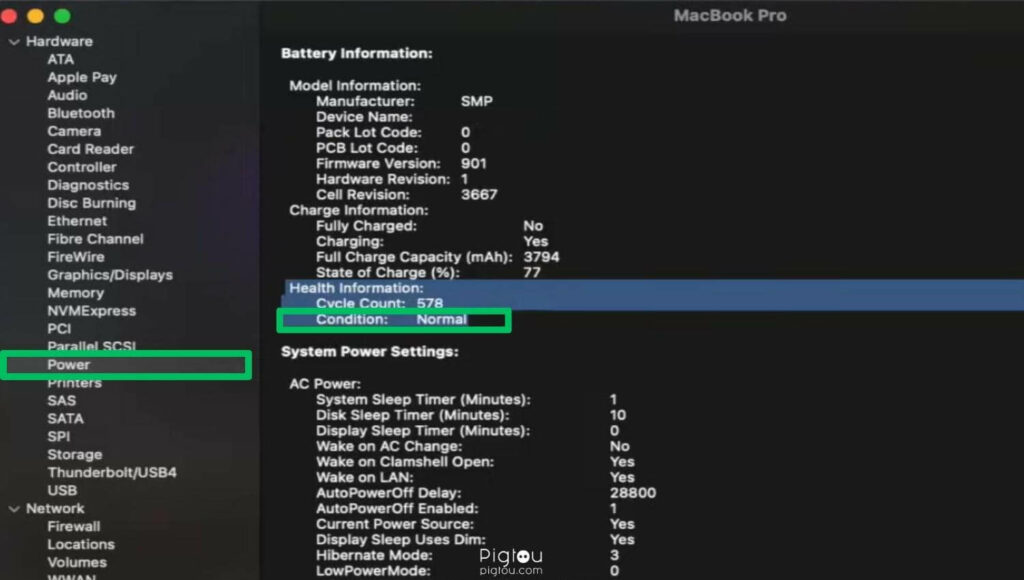
4. Check Battery Health
Sometimes, battery health can contribute to charging issues. To check your MacBook Air’s battery health, do the following:
- Go to the “Apple Menu” and select “About This Mac”
- Click on the “System Report” button at the bottom left of the window (hold the Option key when clicking “About This Mac” to access the System Report directly)
- In the new window, navigate to the “Power” section
- Look for “Health Information” in the right-hand window
- Check your current cycle count and battery condition
- Alternatively, click the battery icon and examine the status messages:
- Normal: Ideal battery health.
- Replace Soon: The battery functions but requires replacement.
- Replace Now: The battery works but offers limited charge; consider a replacement.
- Service Battery: Continue use, but servicing is recommended.
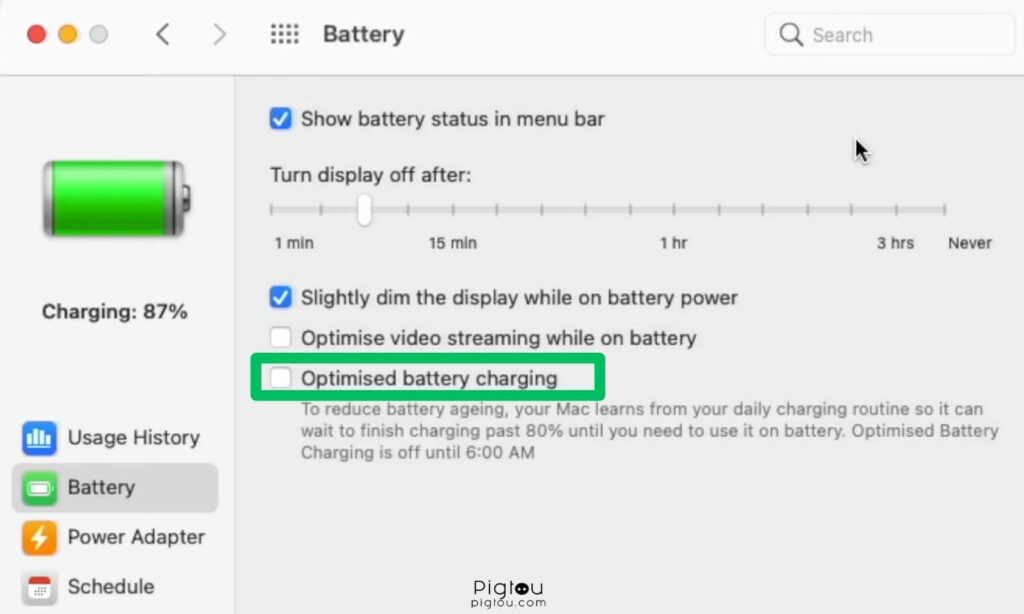
5. Turn Off Optimized Battery Charging
The Mac’s battery usually has a longer lifespan when this feature is on. We recommend turning it off so that the battery can charge fully.
- Navigate to the “Apple Menu”
- Click on “System Settings” and select “Battery”
- Click on “Show Detail” (located next to Battery Health)
- Disable the “Optimized battery charging” option
- Click “Done”
6. Check macOS Updates
Ensure your macOS is up-to-date because pending software updates might include fixes for charging-related problems.
6.1 Use the App Store for Updates
You can use the App Store to view and install available updates by following these steps:
- Click the “Apple Menu”
- Choose “App Store”
- Click the “Updates” tab to view available updates
- Click “Update” next to each available update to install them
- To update all available apps at once, click “Update All”
- Check again for more updates after installing the available ones
- Restart your computer and try charging it to see if the issue is resolved
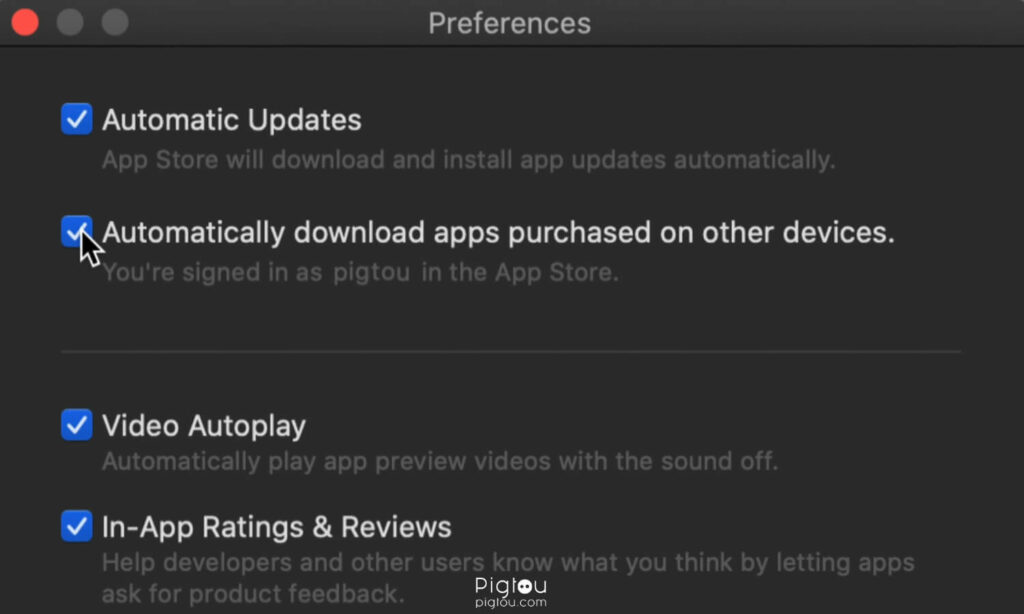
6.2 Enable Automatic Updates
Streamline maintenance by turning on the feature that enables your device to check for updates automatically, thus ensuring continuous updates.
- Open the “Apple Menu”
- Select “System Preferences”
- Click “App Store” and check the box labeled “Automatically check for updates” (automatic updates include app, system, and security updates)
- Click “Check Now” to instantly look for new updates
6.3 Upgrade to a Newer OS X Version
Elevate your user experience by accessing enhanced features by downloading the latest OS X release from the App Store.
- Search for the latest OS X version
- Click on the “Download” to initiate the upgrade
- Run the “Install OS X Name” program in “Applications“
- Follow the prompts to install the upgrade
6.4 Install Updates in Legacy OS X Versions
Navigate through “Software Update preferences” in older OS X versions to adeptly manage updates, ensuring the secure installation of your chosen updates.
- Open the “Apple Menu“
- Choose “Software Update“
- Set “Update preferences for frequency and automation”
- Click “Check Now” to scan for updates
- Check the boxes for updates you want to install
- Click “Install # Items” and enter your admin password
- Open “App Store” separately to update app versions
NOTE: If “Software Update” confirms your Mac is up-to-date, no further compatible software is available for your model. If all these steps don’t help, you could be dealing with a motherboard issue. Call the Apple support team at 1-800-275-2273 for details about your warranty, or contact a computer technician near you (you can find them on Craigslist).