![How To Create Apple ID Without a Phone Number [EXPLAINED]](https://pigtou.com/wp-content/uploads/2023/06/How-To-Create-Apple-ID-Without-a-Phone-Number-EXPLAINED.jpg)
An Apple ID is your gateway to accessing Apple services on various devices, including your iPhone, Mac, iPad, and iPod touch. Although you can still set up an Apple ID without using these devices from Apple, you’ll generally be required to enter your phone number for verification.
If you would like to create an Apple ID without using your phone number, maybe for security purposes, or you’re setting up a secondary account for your child, this article will guide you through various steps you can use to achieve this goal.
1) Do Not Verify Your Number
You’ll still need to input a phone number for this step, but you’ll not use it to verify the account you’re creating.
- Open “Settings”
- Tap on “Sign in to Your iPhone”
- Click on “Don’t have an Apple ID or forgot it”
- On the pop-up, select “Create Apple ID”
- Enter your details on the prompt “Name and Date of Birth” and tap on “Next”
- On the Email Address page, click “Do not have an email address”
- Tap on “Get an iCloud email address”
- Create a unique email address that will have the handle @icloud.com and tap on “Next”
- Tap on “Create email address” on the prompt
- Choose and enter a password (verify it by entering it again) and tap on “Next”
- Find and select your home country when you reach the Phone Number page
- Enter a random number (you’ll not use this number to verify your account)
- Request a verification and then select the “Did not get a verification code?” option
- On the pop-up, select “Verify later”
- Click “Continue” on the prompt “Continue without a verified phone number?”
- Scroll down to the page and select “Agree”
- Enter your iPhone passcode
- Wait as you’re automatically signed into iCloud
NOTE: After you’ve created your Apple ID without verifying the phone number you entered, you’ll need to verify your ID to use it without any problems in the future.
1.1) Verify Your Apple ID Using Free Apps
After creating the Apple ID, proceed to verify it through the following steps:
- Go to “App Store”
- Click “Get free Apps”
- Choose any free app on the list
- Click “Install”
- Sign in with your Apple ID and password
- Click “Review” when you receive the prompt “This Apple ID has not yet been used in the iTunes store”
- Under “Complete your Apple ID” toggle on “Agree to Terms and Conditions” and check that you have the correct country selected
- Click “Next”
- Enter your address information under “BILLING ADDRESS”
- Once you get the “Apple ID Completed” notification, click “Continue”
- Go back to “Get free Apps” again and select a different app
- Click “Install”
- Enter your credentials again to sign in and authorize the transaction
- Click “Sign in”
- Success, you’re good to go
2) Use an Existing Email Address to Create Your Apple ID on a PC
If the above methods are unsuccessful, try using your existing email (like Gmail, Hotmail, or Yahoo) to create the Apple ID using a computer instead of your phone.
2.1) Use Mac to Create Apple ID
Take the following steps if you’re using Mac:
- Go to “Apple Menu”
- Select “System Settings” (for earlier macOS versions, select “System Preferences”)
- Go to the sidebar and click “Sign In with your Apple ID” (for earlier macOS versions, click “Sign In”)
- Click “Create Apple ID”
- Follow the onscreen steps and enter your existing email address, create a secure password, and set the region for your device
- Enter your billing and credit card information, then click “Continue” (you can also choose “None,” but no charges will be made until you purchase something)
- Check your email inbox for a verification message and click it
- Your Apple ID is now active and ready to use
RELATED:
– Best apps for spying on iPhone
– iPad has a lightning bolt but not charging
2.2) Use Windows to Create Apple ID
If you have a Windows PC, follow the steps below to create an Apple ID without a phone number:
- Open “iTunes” for Windows
- Go to the top of the iTunes window or the computer’s menu bar
- Select “Account” and then click on “Sign In”

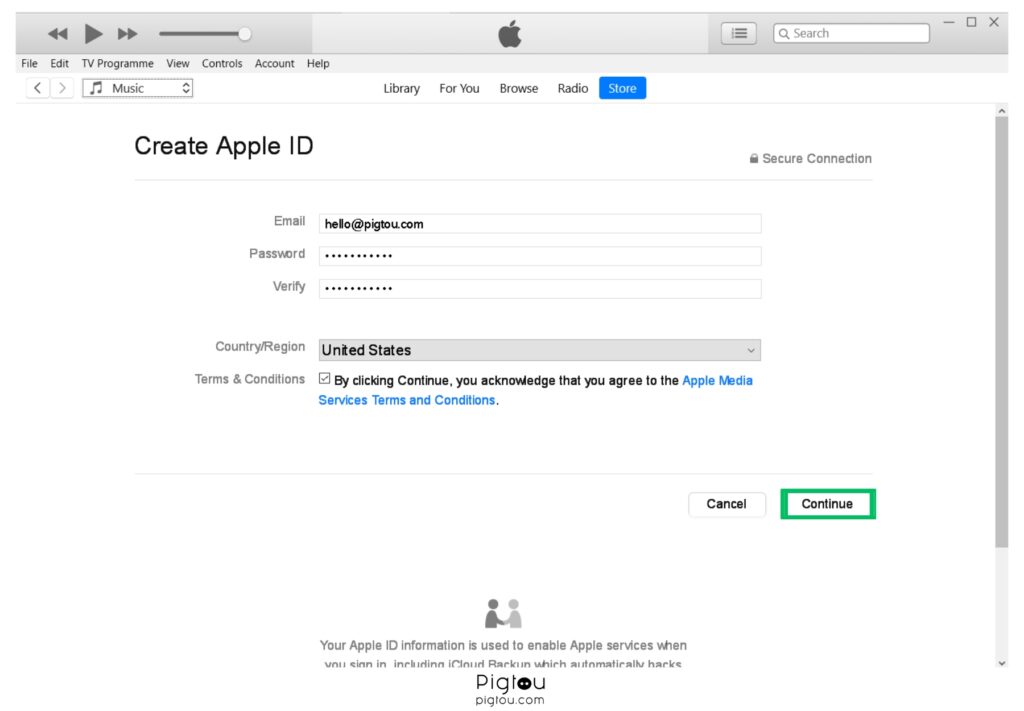
- Click “Create New Apple ID”
- Follow the onscreen steps and enter your existing email address, create a secure password, and set the region for your device
- Enter your billing and credit card information, then click “Continue” (you can also choose “None,” but no charges will be made until you purchase something)
- Check your email inbox and verify your Apple ID by clicking on the link provided
3) Use the Sideloadly App
This app helps gamers side load their favorite games and apps, but it can also be quite helpful when you want to create an Apple ID without a phone number.
3.1) Set Up the Sideloadly App on Windows
For Windows setup, follow the steps below:
- Go to the Sideloadly website
- Scroll down and click the “X 64” button to download the correct version of iTunes, which is compatible with Sideloadly
- Right-click to download “iCloud,” which is also compatible with Sideloadly
- Set up the “iTunes” (Sideloadly version) and the “iCloud”
- After setting these up, click on the “Windows” button and click on “Power” to restart the computer
- After you’ve done this, head back to the Sideloadly website and click on “Windows 64-bit download”
- Wait for the Sideloadly setup to download
- Follow the onscreen instructions to install Sideloadly onto your computer
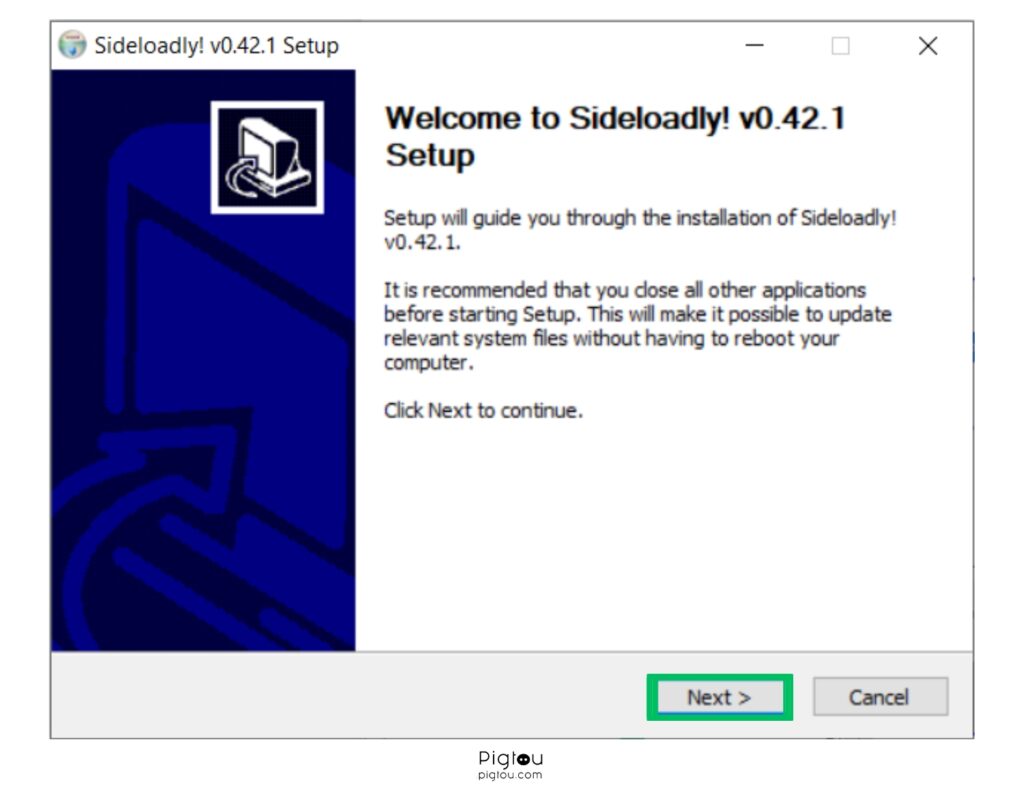
- Click on “Finish” and wait for the Sideloadly app to open up
- Click on “Okay” when you see the prompt: Administration permission is required
- Click on “Yes” and turn on private and public networks
- Click on “Allow Access”
- Windows dislikes sideloading, so every time you must click on the search for “Windows security”
- Click on “Virus & threat protection”
- Select “Manage Settings” and turn off the “Real-time protection”
- Once the sideloading is finished, you can turn back on the “Virus & threat protection”
- You now need to sideload an IP file, which you can find from an opensource project like freya.ipa
- Once you find that, click on “Download”
- Connect your iPhone to the computer using a USB cable
- Go to the “Home screen” of your iPhone and tap on “Trust and enter” if it asks you whether you trust the connection
- Enter your passcode
- Click on the “At USB” option, and the device will be connected successfully
- Go to “Downloads” and drag the IPA file into the Sideloadly application
- You’ll now be required to enter your Apple ID to side load apps
- Create a new Apple ID using the details you want
3.2) Set Up the Sideloadly App on Mac
Here’s how to set up Sideloadly on a Mac:
- Go to the Sideloadly website
- Scroll down and click the “macOS Download” button
- Wait for the files to download and proceed to set it up on your computer
- After it finishes the setup, open Sideloadly and search for your device (if you cannot see your device, disconnect and then reconnect the USB cable)
- Drag and drop your IPA file (you can use INDS, which is an open-source emulator)
- Now create a new Apple ID
NOTE: After creating the Apple ID using Sideloadly, you must sign in at least once to a real device. We recommend using a secondary device with no important iCloud data because signing out of the device might lead to losing some of your data. After signing in, remain connected to the internet and wait for a 2FA verification code, which should come as a pop-up, not a message. Now you can log out of the device and keep your Apple ID.
FAQs
Here are some frequently asked questions (FAQs) from other users trying to create an Apple ID without a phone number.
No. You must provide a +86 phone number in mainland China to verify the Apple ID. However, you can change the number later or to a region that doesn’t require a phone number.