
So, you have a Hisense Roku TV, and you have an issue with your sound (audio and volume)? It can be frustrating if the sound doesn’t even work right now, it’s off and on, echoes, is out of sync, muffles, or delays. Fortunately, some solutions can get you up and running in minutes.
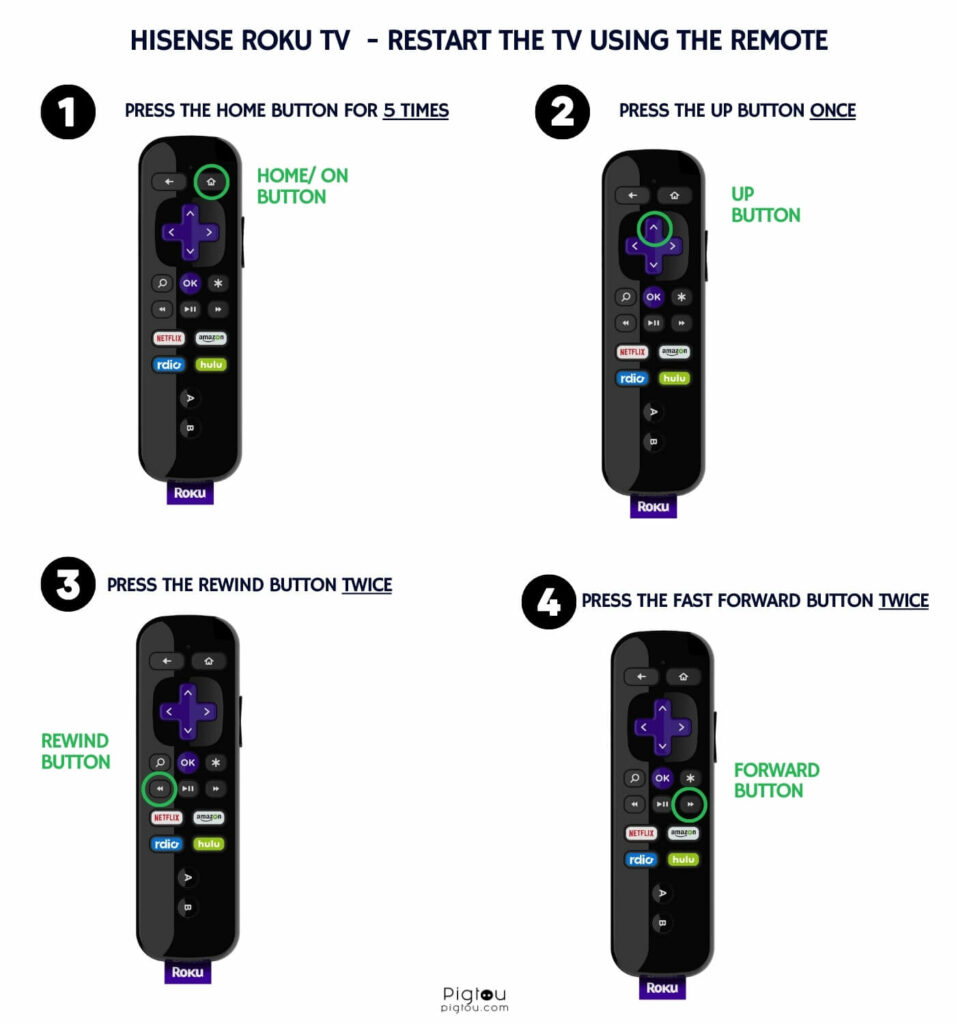
1) Restart the TV Using a Key Combination
You can clear the cache on your Hisense Roku TV by following the steps below:
- Turn your TV on
- Grab the remote
- Press the “Home” button five times
- Press the “Up” button once
- Press the “Rewind” button twice
- Press the “Forward” button twice
- The screen will start behaving awkwardly; let it sit there for about 20 seconds
- Wait as the TV reboots (it might take about 25 seconds to reboot, then a few more minutes as the TV screen reboot the second time for the Roku Home Screen to load fully)
- Check if your sound is working
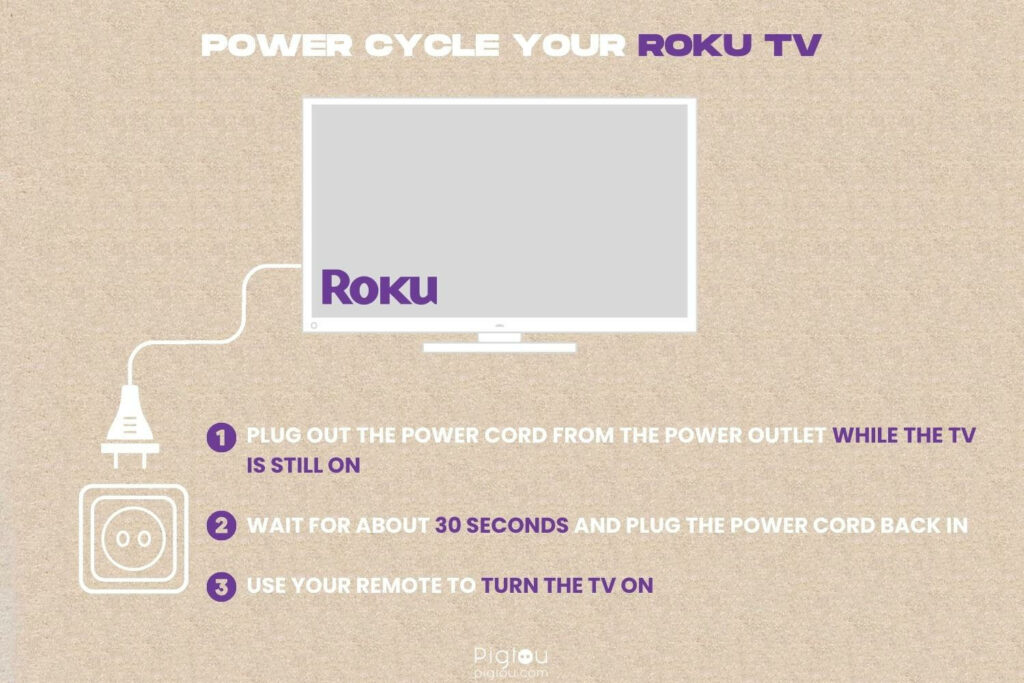
2) Power Cycle the TV
This is whereby you unplug the TV from the power source and then plug it back in to remove any static electricity that might interfere with the sound.
- Turn the TV on
- Go to the wall socket (or wherever the TV is plugged in)
- Pull the plug (while the TV is still on) and wait for about 30 to 60 seconds
- Plug the TV back in and turn it on using your remote
- See if the sound is working
3) Spam Your Remote
An unresponsive remote controller can be slow or delayed, sometimes leading to sound issues.
- Power cycle your Hisense Roku TV
- Grab your remote and pop the back plate off
- Take out the batteries
- Press and hold the remote’s power button for about 30 seconds
- After the 30 seconds is up, start pressing (spamming) all the other buttons on the remote, including the power button
- Keep pressing all the buttons hard multiple times
- Whack the remote a couple of times and put the batteries back
- Now turn your TV on and see if the sound is working
- If this doesn’t solve your issue, repeat the steps above three to six times
Watch the solution in action:
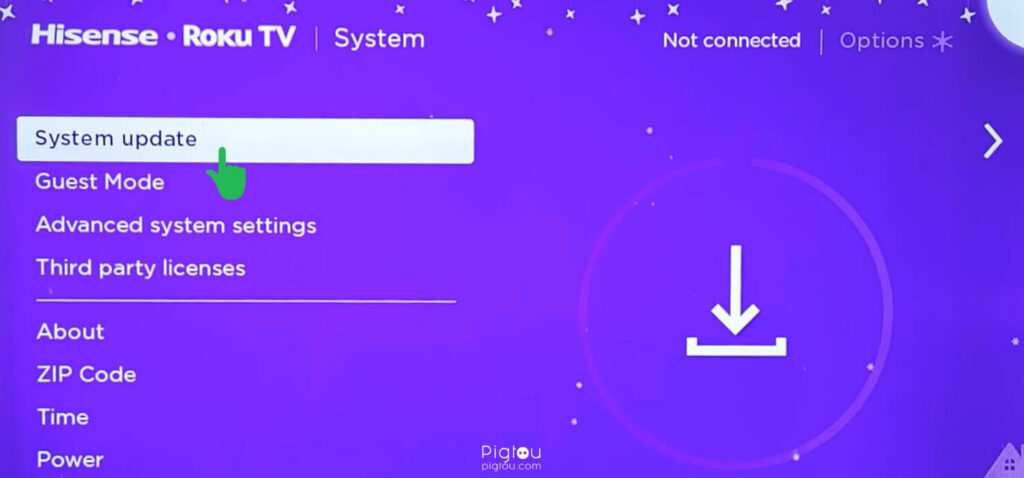
4) Perform a System Update
A system update improves the functionality of your Hisense Roku TV and fixes performance issues.
- Go to “Home” using your remote
- Go down to “Settings“
- Move to the right, then go down to “System“
- Move to the right again and scroll to “System update“
- Click the “OK” button to see if there’s an update
- If there’s an update, proceed to download it and install it
- Check whether the TV’s sound is now working
Recommended to read: Hisense Roku TV refuses to connect to WiFi
5) Reset the “Audio/Picture Settings”
You can remove software glitches affecting your sound by resetting the audio/picture settings.
- Grab your remote and go to Home > Settings > System
- Scroll down to “Advanced system settings“
- Move to the right twice and select “Reset TV audio/picture settings“
- Tap the “Play/Pause” button three times (as shown on the screen)
- Check whether the audio is working correctly
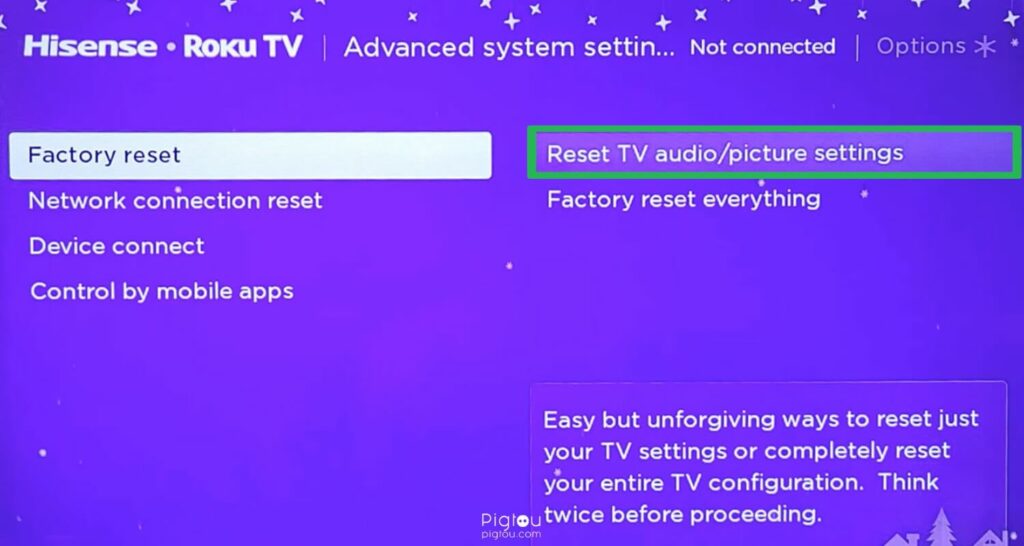
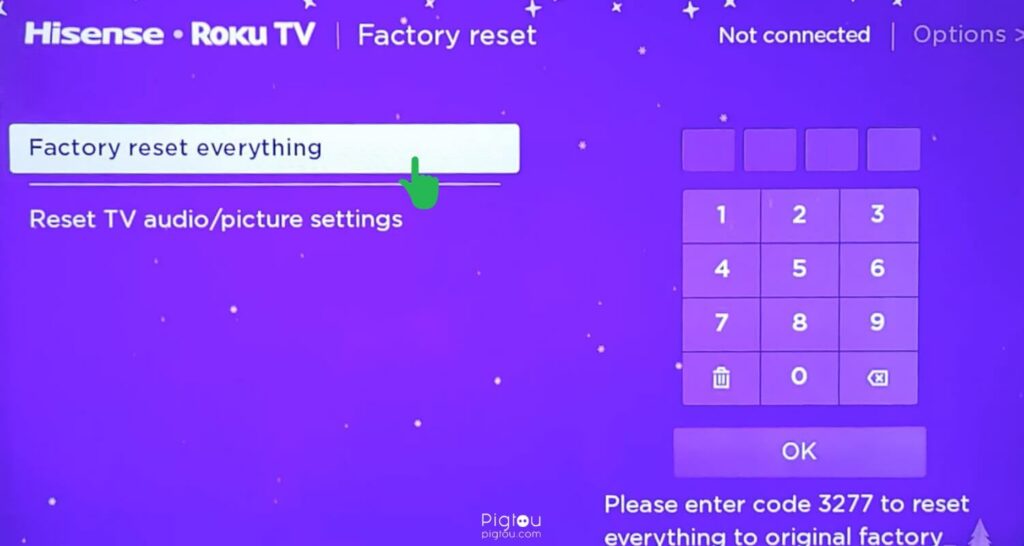
6) Do a Factory Reset
After a factory reset, your Hisense Roku TV will be like brand new, so you’ll need to set it up again, including setting up your Wi-Fi network, downloading apps, and signing into apps.
- Go to Home > Settings > System > Advanced system settings
- Move over to the right and go down to “Factory reset everything“
- Enter the four-digit code the TV will provide to begin the factory reset
- Reboot your TV and check whether there is sound
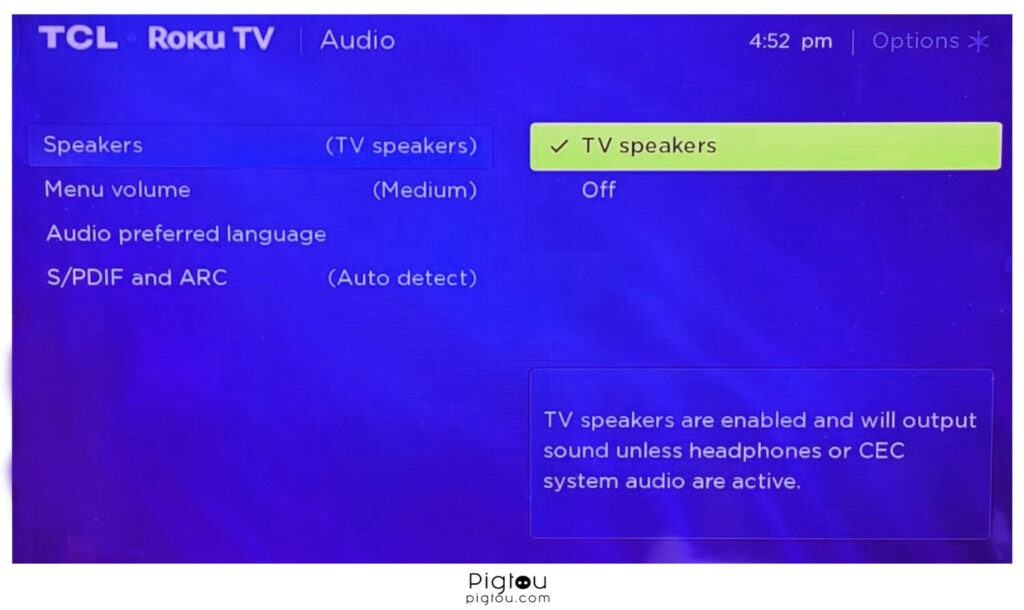
7) Check if Your TV Speakers Are on
You should check which device is set to produce sound if you have a soundbar, headphones, or an external speaker and amplifier connected to the TV.
- Click the “Home” button
- Scroll down and select “Settings“
- Move over to the right and scroll down to “Audio“
- Go to the right; you’ll see where it says Speakers (TV speakers)
- If you’re using the TV speakers alone, make sure you toggle the switch to “On“
- Do the opposite (turn the TV speakers “Off“) if you have an external device connected
- See if you have sound
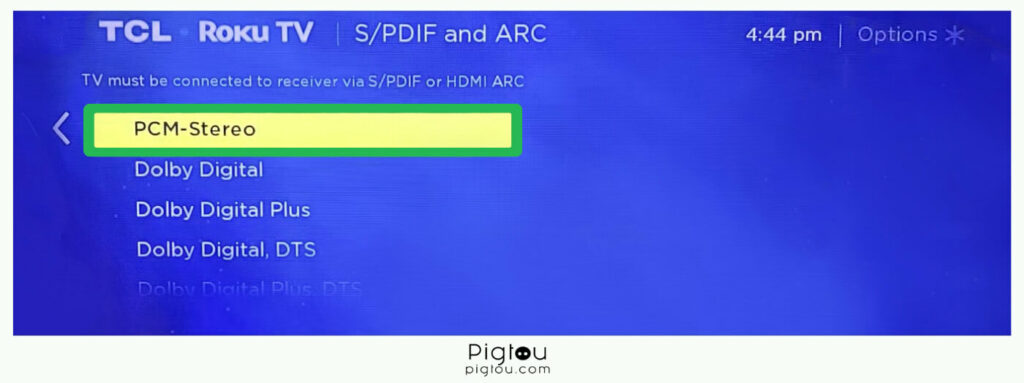
8) Set Your Sound to ARC or PCM
If your TV does produce sound but has issues with the quality, setting it to ARC or PCM could resolve the issue.
- Go to Home > Settings > Audio
- Scroll and select “S/PDIF and ARC“
- Move to the right and select “Auto detect” (if you have something else, choose this option)
- If it still doesn’t work, go down and try “PCM-Stereo“
9) Change the Audio Profile
If your sound keeps cutting out after a few seconds, try changing the audio profile on the TV.
- Go to “Settings“
- Select “TV inputs“
- Go to “HDMI (1,2,3,etc.)”
- Select “HDMI Mode“
- Change the sound from “Auto” to “Standard“
9.1) Change the Audio Output Type
When changing the audio profile to ARC, the internal TV speakers should turn off (or at least it should try doing that) when you’re using a soundbar. If this doesn’t happen, try changing the TV’s audio output type.
- Grab the TV’s remote and click “Menu“
- Go to “Settings“
- Click “System“
- Select “HDMI & CEC Functions“
- Toggle on “CEC Control“
- Scroll down to “CEC device lists” and click “Detect“
- Wait as the soundbar automatically lights up
- If this doesn’t work, switch off the entire system and repeat the steps above again
9.2) Change Audio Output for Your Console
If you’ve connected a soundbar and a gaming console to your TV’s ARC channel, then any audio source will be returned through the HDMI 1 port. For this fix, you’ll need two HDMI cables.
- Connect your gaming console to the TV’s HDMI 2 port
- Connect the soundbar to the TV’s HDMI 1 port
- Check whether the soundbar works when the TV turns on
- Set your TV to HDMI 2 when using the gaming console to get sound (click the “Input” or “Source” button on your remote to select the desired HDMI port)
9.3) Change Audio Settings When Casting
If you’re casting your PC or laptop to the TV and you get a picture but no sound, take the following steps:
- Restart the Roku TV (use the remote to switch it on and off)
- Restart the PC or laptop (go to Settings > System > Power > System Restart)
- Before casting again, go to your PC’s sound settings (they may be on the Taskbar or under Settings > Sound)
- If you have disabled the PC’s speakers, turn up the volume slider or select “Audio source” (check under “More Volume Options” if you can’t find any of these options)
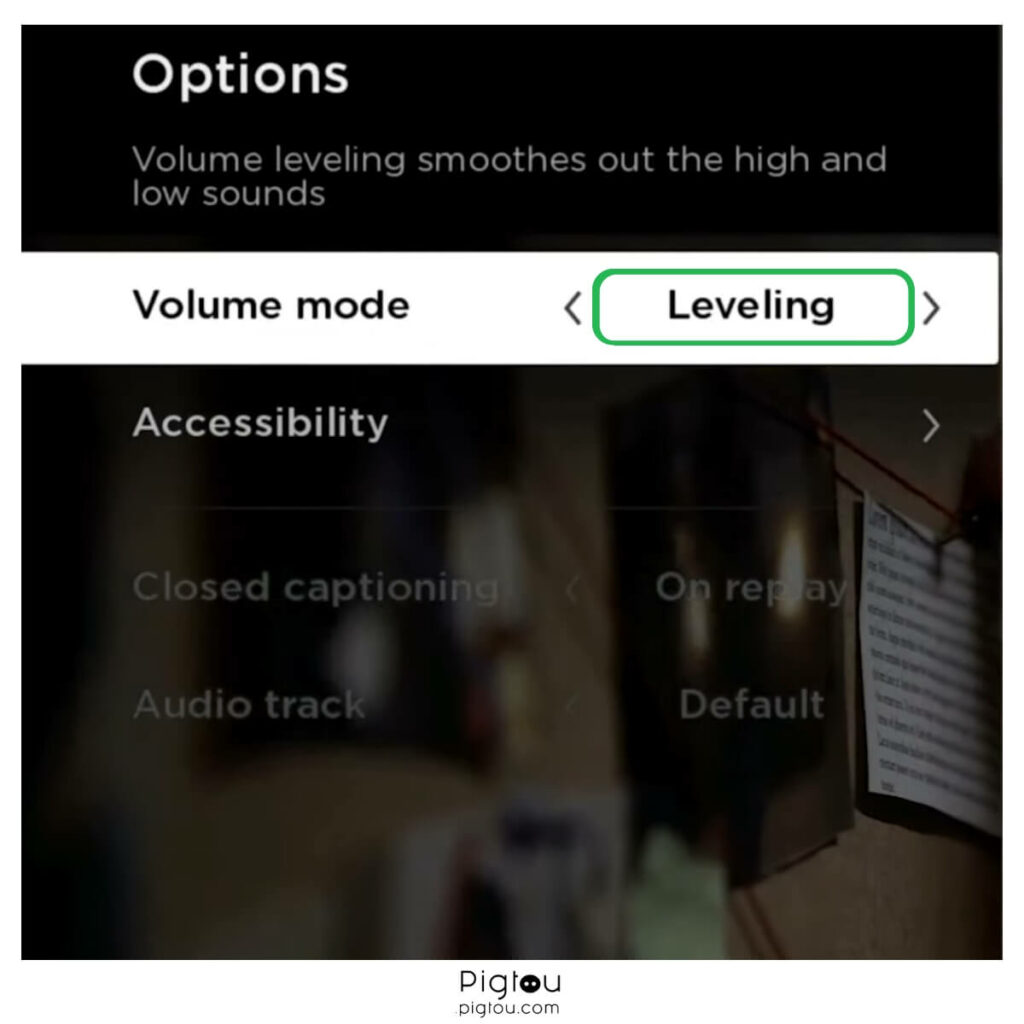
9.4) Enable Volume Leveling
If you’re streaming a movie or a series and have to turn up the volume to hear anything, try enabling this feature.
- Open a streaming app like Netflix
- Start playing anything
- Press the “Asterix/star (*)” on the remote to bring up the menu on the left pane
- Select “Sound mode“
- Go to “Volume mode“
- Scroll down and select “Leveling“
10) Check Headphone Jack Switch
If you connected an AUX cable speaker to the Hisense Roku TV and it had sound, but the TV sound disappeared when you disconnected it, the headphone jack switch might be faulty.
- Check whether a headphone symbol appears even when nothing is connected to the AUX port
- Check whether there is something stuck in the jack or the switch is still open (which might require professional assistance to fix)
- Try connecting a Bluetooth device (go to Home > Settings > Remotes & Devices > Pair Bluetooth device) and then disconnecting it (follow the same steps as when you’re connecting but when you reach “Bluetooth devices,” select the name of your Bluetooth device and toggle it to “Disconnect”); check whether the sound goes back to normal after that
- If this doesn’t fix your sound issue, seek professional assistance on Craigslist or contact Roku if your warranty is still valid
11) Update Firmware
If you’re experiencing audio cuts after several minutes and the sound returns to normal after restarting the TV, you might need to update your firmware.
- Open a support ticket with Hisense and explain your sound issue
- Wait as they send you a firmware update on a USB and the instructions to follow
- After you receive the USB, plug it into your TV and follow the prompts to install the updates manually
- Check whether you now have sound
Conclusion
If the solutions provided in our guide have successfully resolved your previous issue with your Hisense Roku TV, we’ve included some other common problems related for your reference: